
Painting Our Semihandmade Cabinets

Hello! How’d we get here?
Well, I launched a blog this week but still have about 15 weeks of content to catch up on writing in these pages between buying our 1929 Tudor house, the full kitchen renovation and the 6,725 other projects we’re currently tackling.
BUT… I have been posting on Instagram about our cabinet painting journey, and a lot of people had questions. And to my absolute surprise, many asked for advice. So I’ve prioritised and set out our key tips for spray-painting your kitchen cabinets, the tools I used, what worked/what didn’t, etc. This post is based on us using Semihandmade pre-made fronts for IKEA Sektion kitchen cabinets, but most of it can be applied to any cabinet painting you might want to do! It’s long and a bit dry in terms of content, but hopefully it helps a few of you.
My foreword: I do A LOT of research before I dive into any project. I find out what the pros use. I message big accounts on Insta. I always try to find at least 3-4 people who have done the same DIY before me and compare/contrast their tactics before I begin. Nevertheless, I’m not an expert, so please take all “advice” with a modicum of common sense and apply it to your situation. Additionally, I like to spell everything out and give as much detail as I can. It makes for some very long and dry, but hopefully helpful, posts! And at the end I have vowed to always do a “These are my confessions….” section (my teenage soul is still a big Usher fan), as I’ll take you through the mistakes I made along the way and how I would correct them next time. Any blogger who tells you how they did something without giving words of caution of where they went wrong, is not presenting the most helpful advice in my opinion. All that said, I tried to find blogs/accounts that broke down the process step-by-step but I didn’t really find many who gave the details all in one place. Additionally, even figuring out how much I needed to water down my Farrow and Ball paint, turned into a four hour Reddit and YouTube journey that was particularly dull! Thus… I write this in the hopes that even a few of the steps may be helpful for someone else. I’ll try to hyperlink all of my tools & set-up as I go through, and give a complete source list at the end. Full transparency, these are affiliate links so we will earn a tiny commission at no extra expense to you if you use them. If you still have questions, please send us an email hello@brooksandstone.com or message us on Instagram @brooksandstone.
Don’t want to read the whole thing? Cool beans.
Skip to your expected fave part here with these jumpy links.
2 // DON’T YOU DARE PICK UP THAT PAINT YET. Prep. Prep. Prep.
5 // SPRAYING TECHNIQUE & PROCESS
1 // BEFORE YOU BEGIN
Don’t expect this to be a quick two-day process. If you’re looking for an instant gratification project…. THIS AIN’T IT, MR MILLENNIAL. (N.B. I am also a millennial) I worked on our cabinets about two hours a day off and on for approximately 4 weeks. With no kids, pets, fully dedicated hours every day, and a cordoned off work space that you don’t have to dismantle every other day, you could probably complete in about 10-14 days from start to finish to allow for proper drying times.
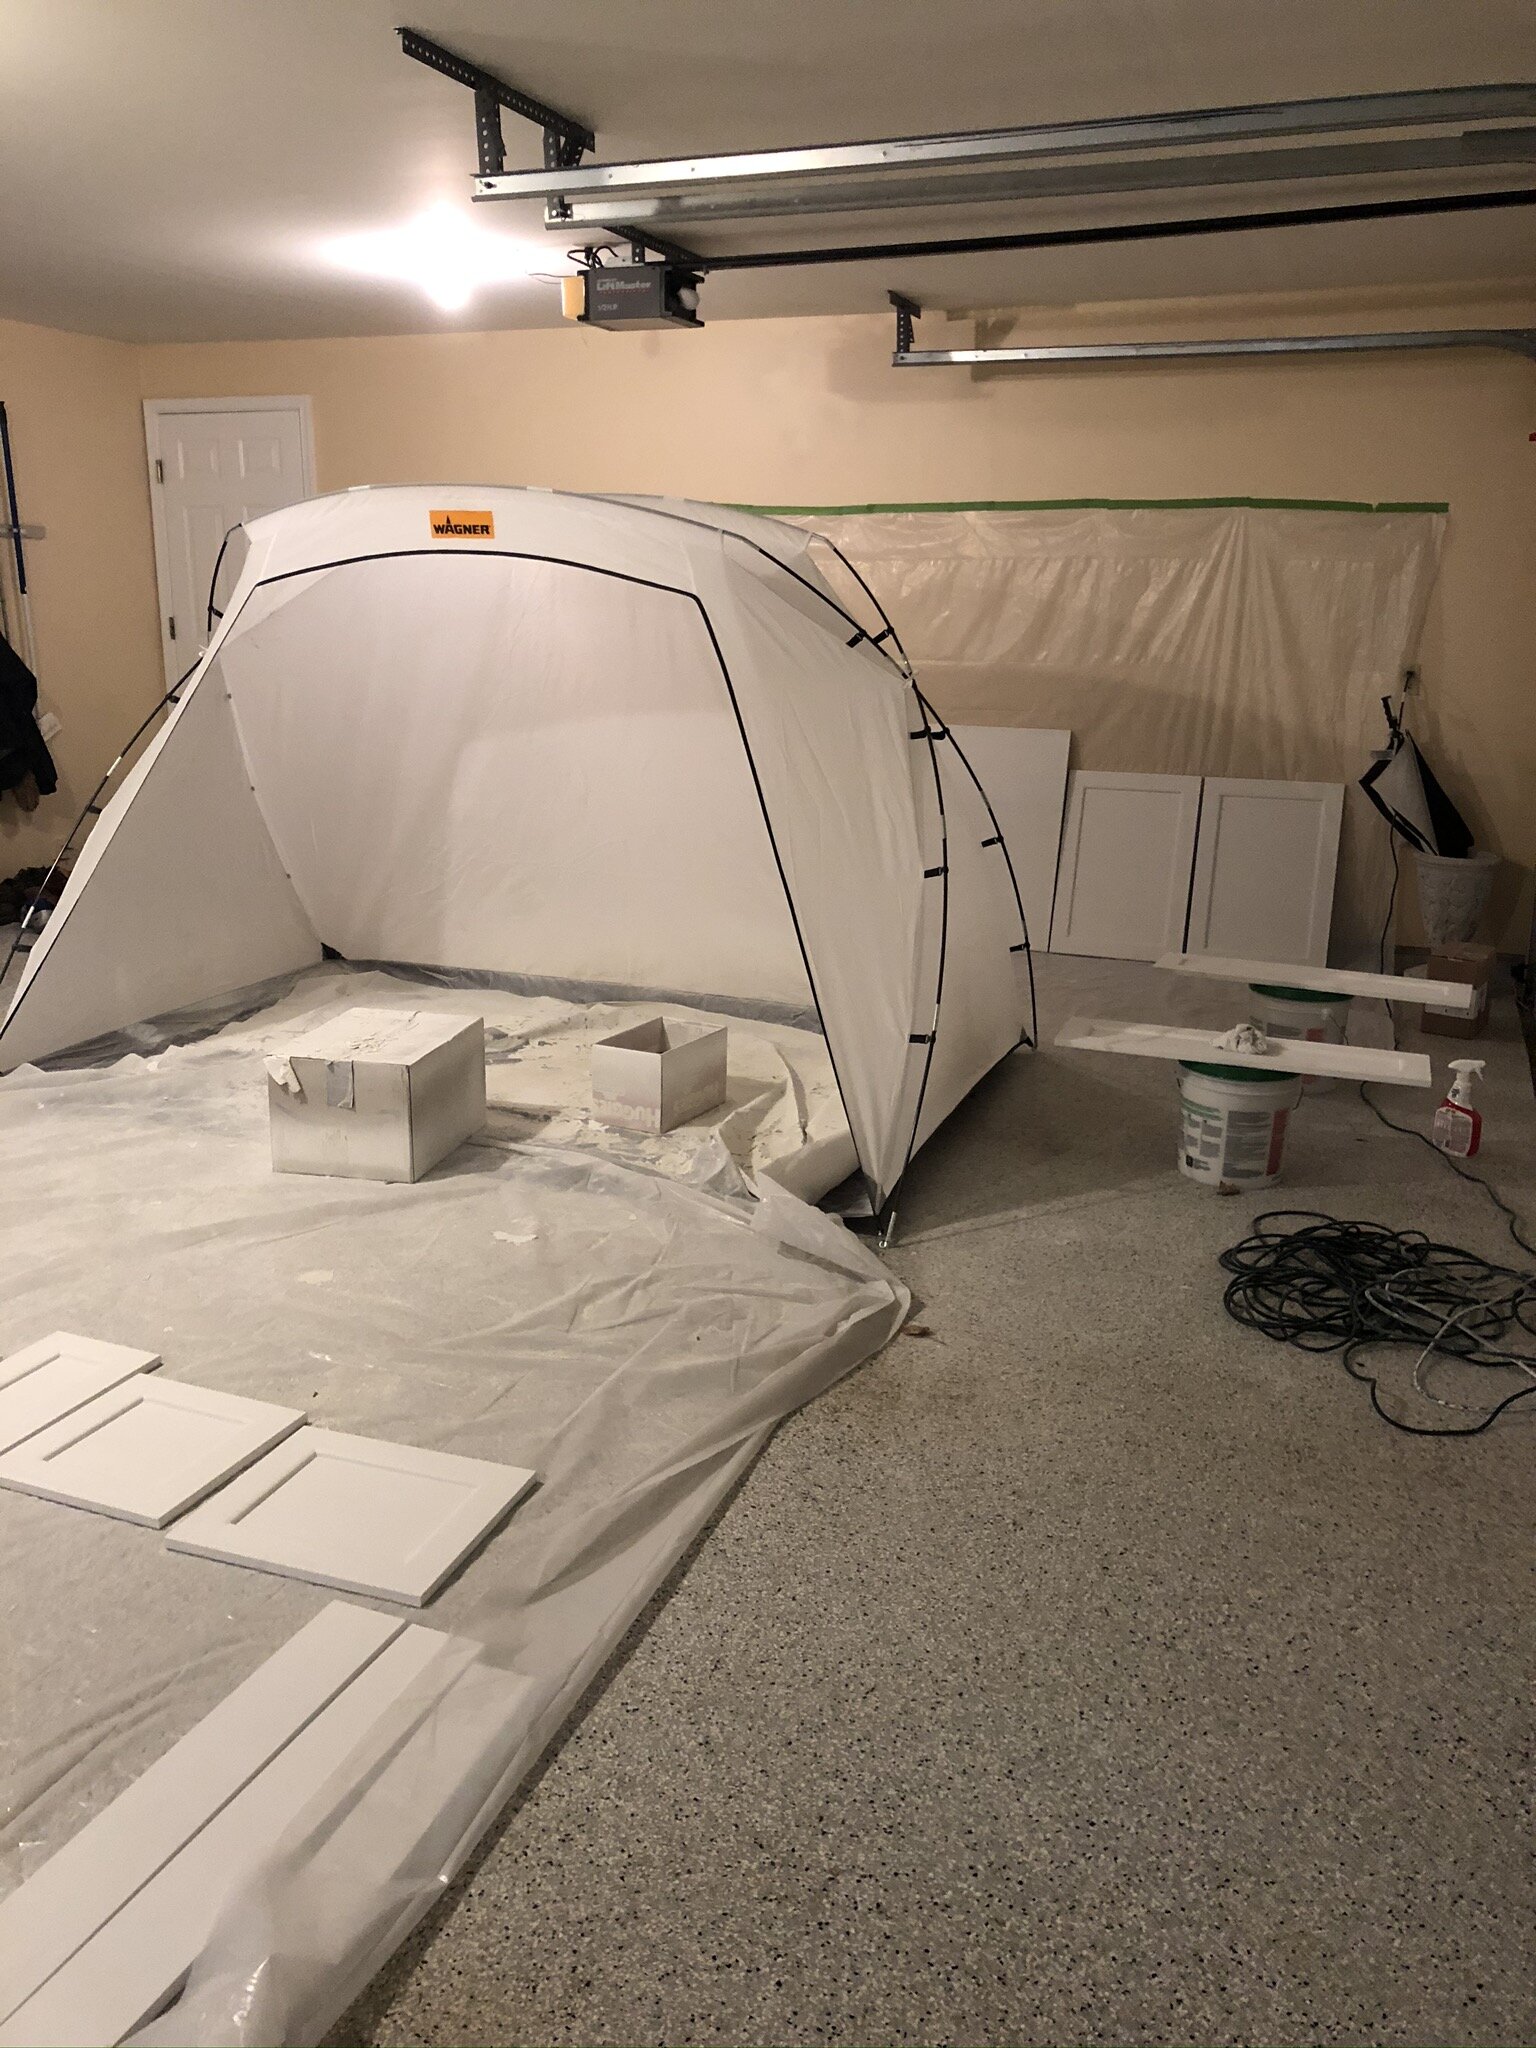
Ensure that you pick a well-ventilated and large area to both sand and paint. You’ll produce a LOT of very fine dust and paint particles, and both the primer/paint need to be able to air out properly. Consider somewhere you can close off if needed, but still ventilate, like a garage, basement, spare bedroom with big windows, etc.
Cover ALL surfaces that you care about with plastic sheeting or drop-cloths, and use a spray tent to help with over-spray (if you’re not painting in garden). If you are prepping on any kind of uneven surface, then lay out cardboard to protect your cabinets from unwanted dents and dings. See *my confessions* to see my mistake here. If you’ve just unpacked your Semihandmade cabinet fronts, then all of that cardboard is perfect material (I had already used all mine as a base to build the IKEA cabinets instead…).
Get yourself the best respirator you can and wear it at all times for both sanding and spraying – your lungs will thank you. Especially if you have asthma like I do. I use either my Breath Buddy w/ N95 filters or my 3M with P100 filters depending on the job.
I’m writing this during the midst of the coronavirus pandemic and quarantine, so I had to get creative in some places during the process. Also relative to the point above, I wore a respirator the entire time, and still believed I had the virus at one point because I had inhaled so much dust/paint (when I took mask off for water breaks etc, my asthma is easily triggered). If you’re also about to start this project during the pandemic, buying a respirator will be very difficult currently and many sites are rightly reserving them for our nation’s first responders. We already had ours months before all this began due to other lead dust and hazardous particle concerns in our old house.


2 // DON'T YOU DARE PICK UP THAT PAINT YET. Prep. Prep. Prep.
We chose to add some minor trim detail to our Semihandmade cabinets in the form of 1/4” round within the Shaker panel. I sourced the round from our local lumber yard, but it would likely be available at Home Depot or Lowe’s too. I used our mitre saw to cut 45 degree angles on the trim, then used Gorilla Wood Glue to attach it, then clamped the pieces to ensure a tight fit. After a couple hours, I removed the clamps and then caulked in a few places to help even out the trim and fill tiny gaps that would have shown. Because I did this extra step, I had to ensure the cabinets were sanded smooth for painting again.
I sanded down each cabinet front (and back to keep the finish consistent across all surfaces) with 80 grit, followed by 120 grit, 220 grit and then finally 400 grit paper with my 3M hand-sanding tool. 80 and 120 grit help ensure the surface is uniform and devoid of any uneven bumps, glue dots etc then the 220 grit gives it a finer finish needed for painting, and 400 grit gives it a silky smooth finish ready for professional quality painting. The 400 grit ensures the cabinets felt like they did when they first arrived!
If you are NOT adding any further detail to your cabinets like we did, you can probably just begin your process in the step below as the Semihandmade fronts arrive in beautiful condition ready for painting. If you are transforming any other kitchen cabinets, then I would recommend going through the sanding process above to give you a better surface to adhere to. This ensures that your paints will adhere properly, and not chip in the months or years to come, and will stand up to all of the mess that will be thrown at them in the kitchen!


3 // FINAL PREP & SET-UP
This is a little unnecessary after sanding but I like to clean down the surface with something wet to get rid of all the excess dust. So I used Krud Kutter liquid deglosser to wipe down all cabinet fronts. This dries in about 10 minutes. I like to use a fine weave micro-fiber cloth to apply and ensure I’m not adding any extraneous lint. A basic cleaning solution or simply a damp cloth would also work - I just like to be extra sometimes.
While this was drying, I set up my spray tent, painting station, drying spaces and sprayer.
I opted to paint my cabinet fronts one at a time using an empty box as my platform – honestly, this wasn’t ideal. I had to contort myself in places to spray within the tent, bend over a lot, and my over-spray on the box then stuck to the next piece which required more sanding in between coats. Not a deal breaker, just one of those moments where I didn’t adjust because I’m at my in-laws house rather than at home with all my tools, due to COVID-19 quarantine. In future, I would opt for using a workhorse platform set up with a turntable / lazy Susan on top. Or dixie cups / small wood blocks to prop up each cabinet, though I prefer not to use extra plastic if possible. Under quarantine, paper products and a trip to Home Depot just wasn’t happening!! *See my confessions for the one “tool” I used for 10 seconds that was disastrous*
Paint your cabinet fronts flat – not leaning up against a wall. This helps ensure that if you do over-spray a little, then you don’t get any paint runs and drips. It helps your spraying be a little more forgiving in my opinion. My cabinets were only moved to the ‘drying’ area up against the wall once they were dry to the touch. See drying times in section 6 below.
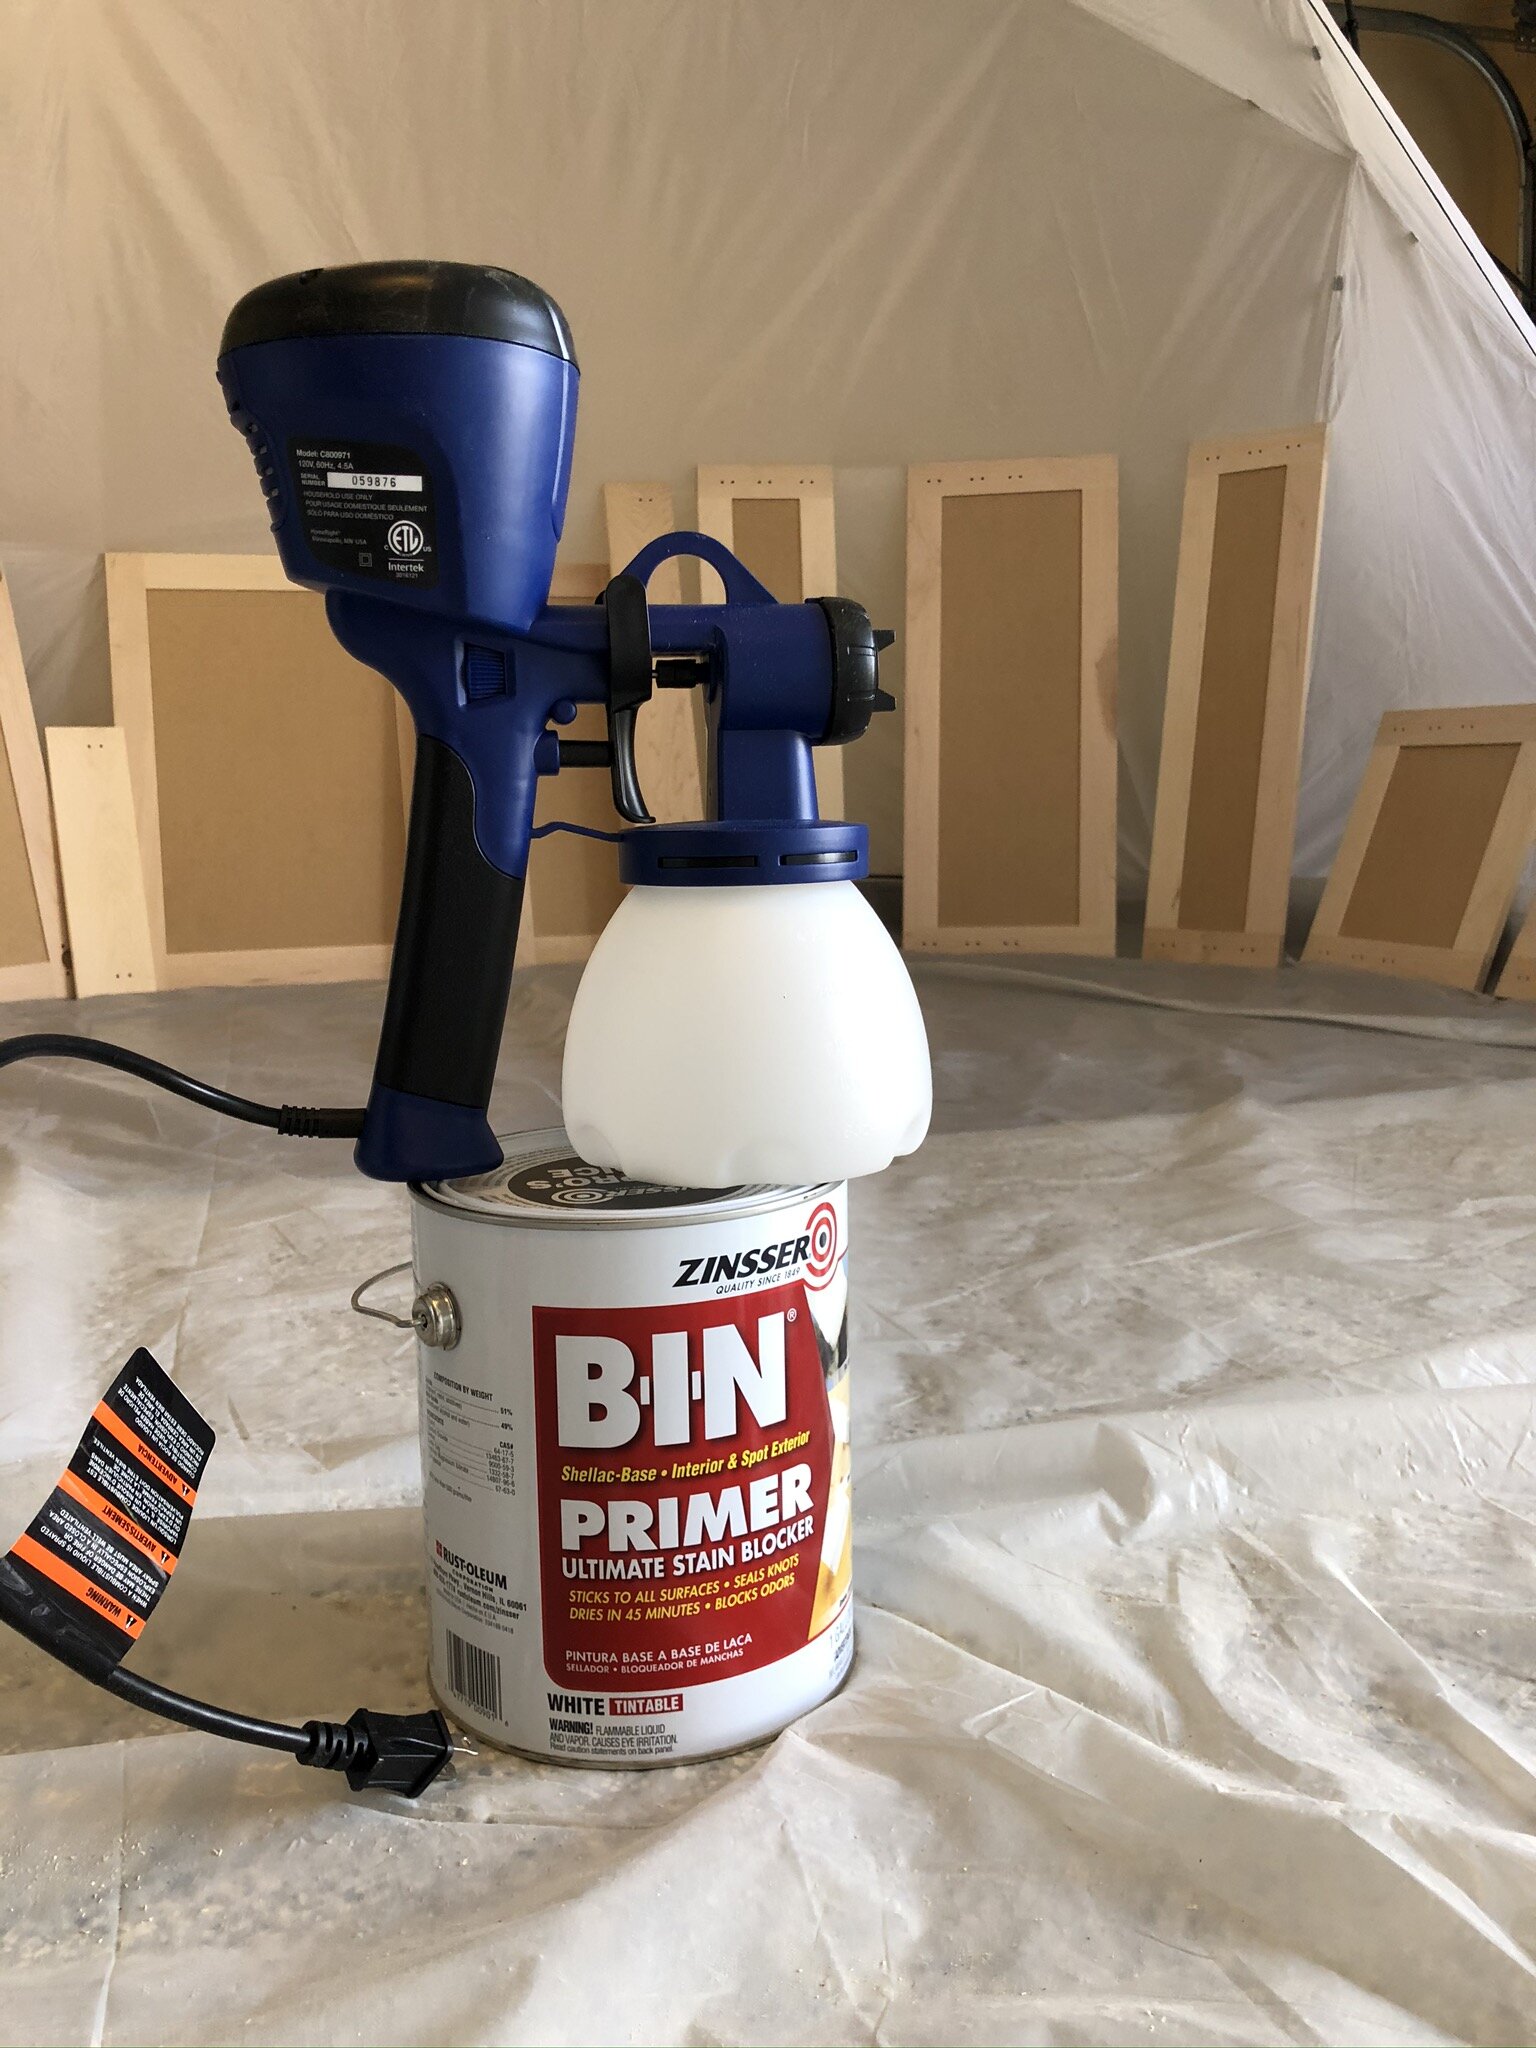
Setting up my Home Right Finish Max Super paint sprayer was pretty straight forward per the instructions– I used the black air cap and the green nozzle for the finest mist spray for both primer and paint. The sprayer comes with a guide as to what nozzle works best if you are looking at it for other projects. Getting a fine mist is important for the most professional finish on kitchen cabinets.
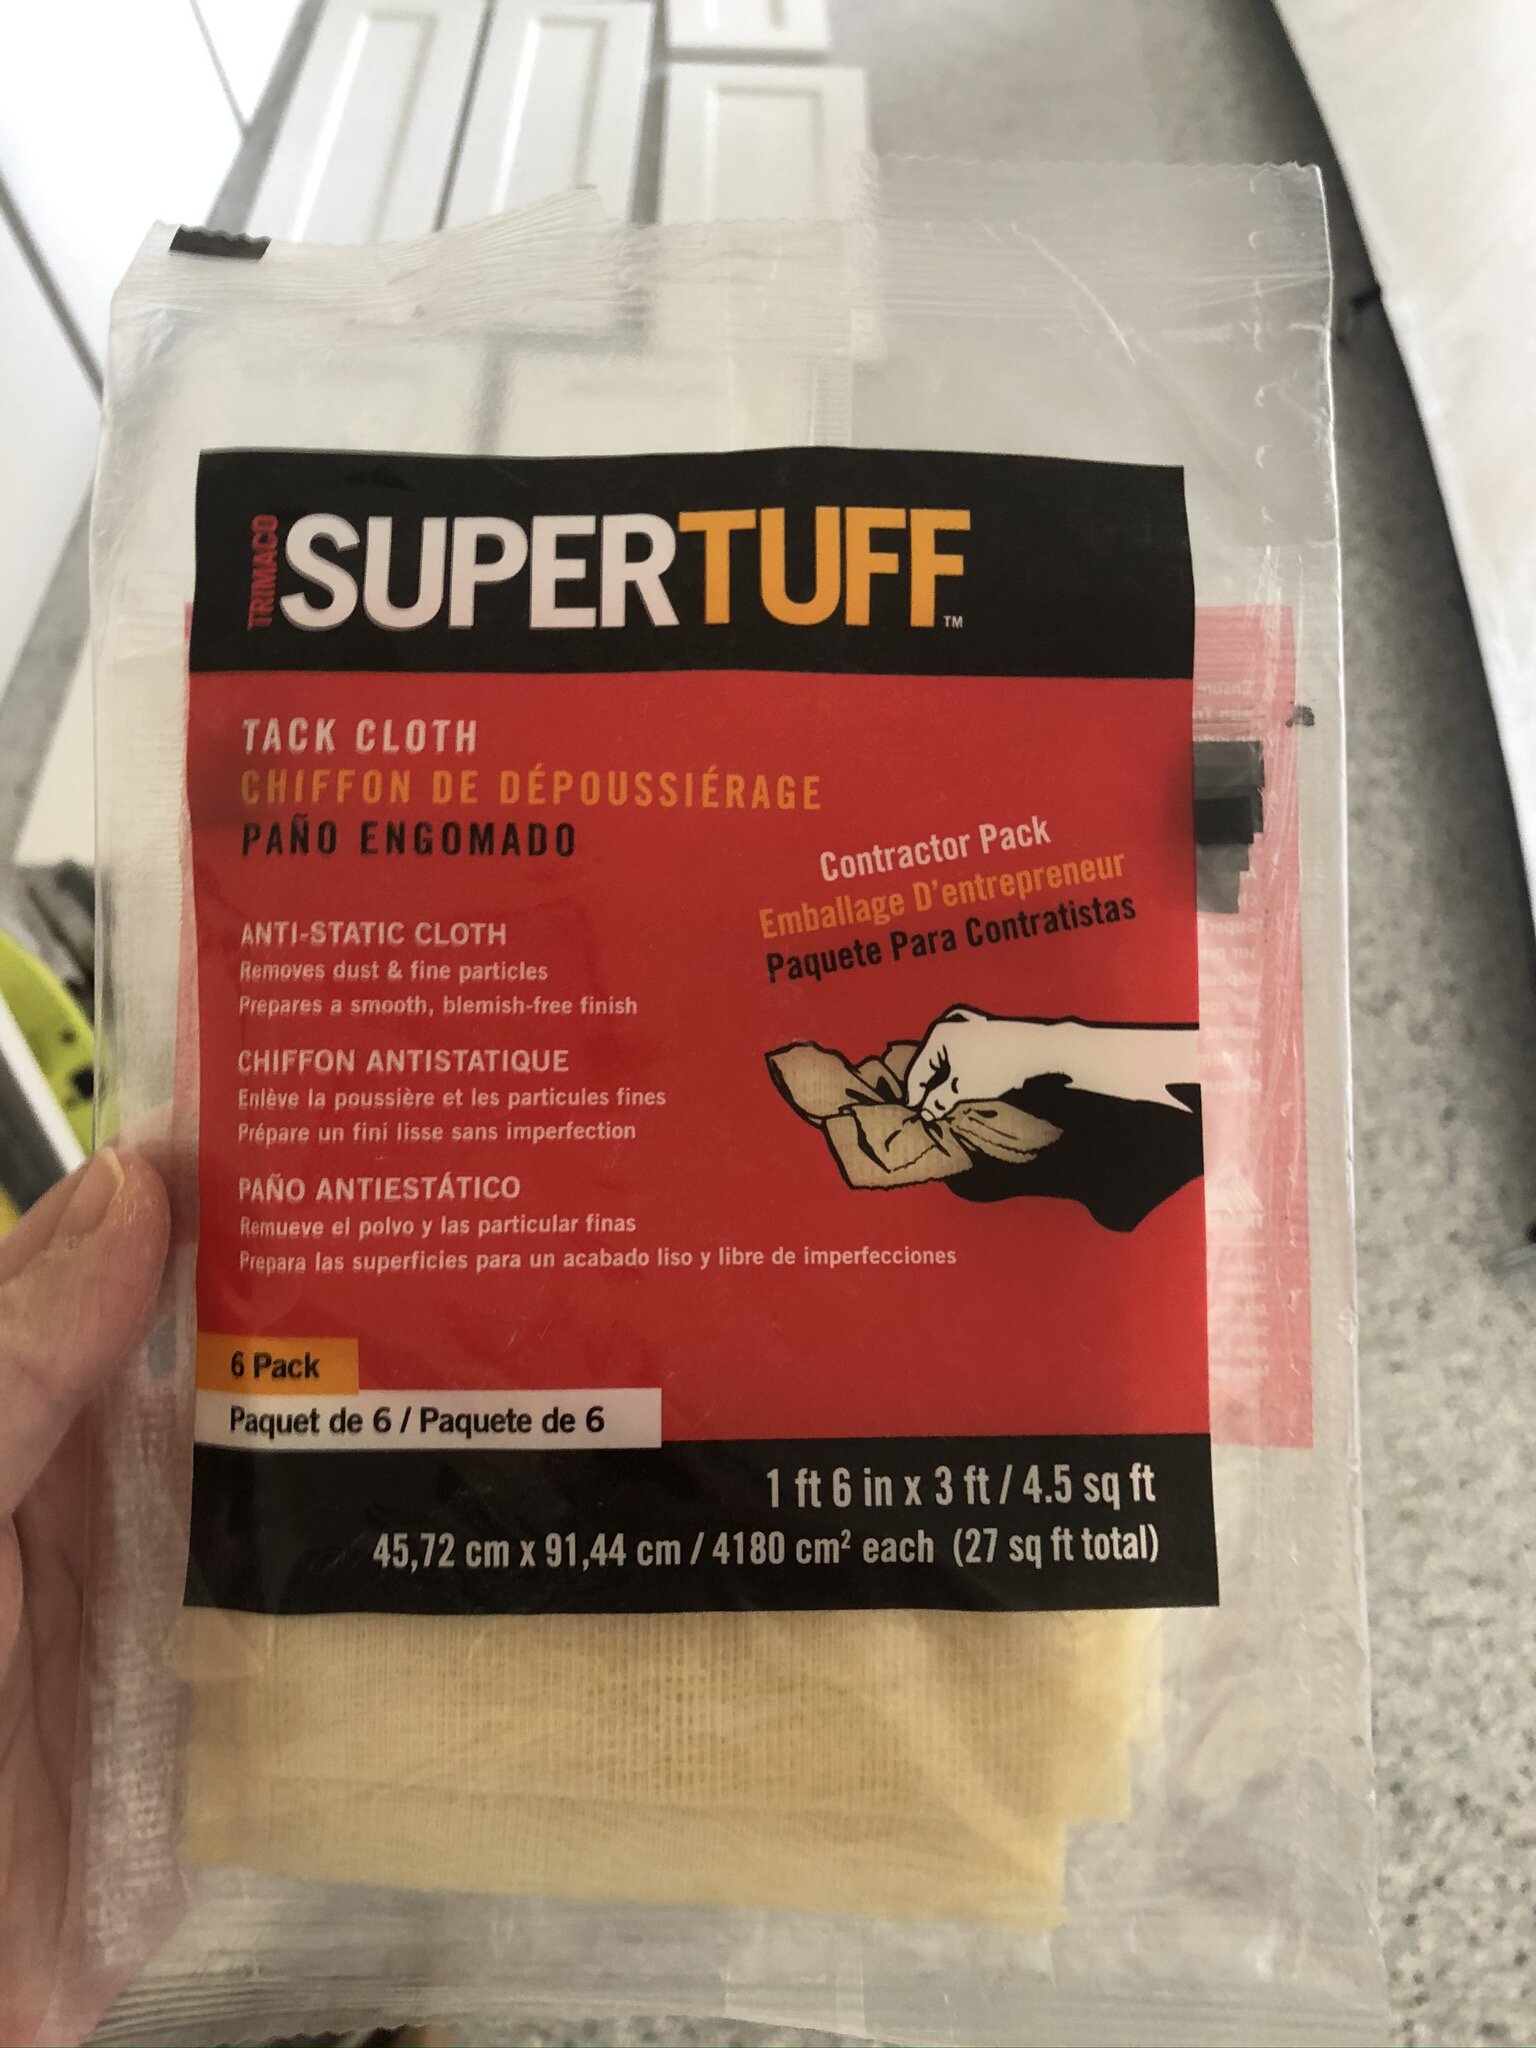
My final step was wiping down each cabinet front with a tack cloth, as I placed it on my platform, seconds before spraying it. Tack cloths are loosely woven cheesecloth impregnated with beeswax and help to trap every last spec of dust that could still be hiding out on your surface. This helps with reducing bumps, flakes, and more sanding later.


4 // PRIMER & PREPPING PAINT
Primer is essential in this process, as is the kind of primer you use. In my research for this project, I’ve come across many people who started on painting their cabinets only to find the paint flaking immediately, not adhering, etc. I’ll skip the dramatics, but the professionals all use and recommend an oil or shellac-based primer to ensure proper adhesion of the paint and durability in terms of resisting stains and future wear & tear. If you are re-painting current cabinets that have a wood stain, then an oil or shellac-based primer is apparently a must.
Note that oil and shellac based primers are very high in toxic VOCs, and a good quality respirator is a absolutely necessary if you are spraying. I ensured that kids, dogs, and even the other members of our family kept out of the garage for multiple days during this part of the process.
I opted for Zinsser BIN Shellac Primer, which is approx. $21 per quart from Amazon. It certainly ain’t cheap, but it is the most recommended and a little goes a long way! It has a super thin milk-like viscosity that means it is perfect for spraying. If you are rolling or using a brush, you may want to opt for a thicker option.
Using this primer meant that I did not have to thin it down at all to put in the sprayer. Usually you will need to thin any material by 10-25% to ensure it is not too dense to be sprayed. Most manufacturers will detail this on the tin of the paint/primer you are using, and also explain what you need to thin with – paint thinner, denatured alcohol, water, etc.
One note of warning: cleaning your sprayer out of oil-based primer is a royal pain-in-the-arse. I knew this going in, but even so, it’s super hard to get out because it dries so hard and so quickly (#cuethedirtyjokes). Great for cabinets, not so great for the sprayer. Pro tip: Be prepared with ALL cleaning materials before you put any paint in. Again, the paint can will indicate what you need for cleaning. I required ammonia. I did not have ammonia. Stores do not currently have ammonia as the world is currently disinfecting everything due to “the Rona”. Cue some fun research that resulted in me using every bottle of Windex we had in the house to clean it out. I’ll write a separate post all about cleaning the sprayer!
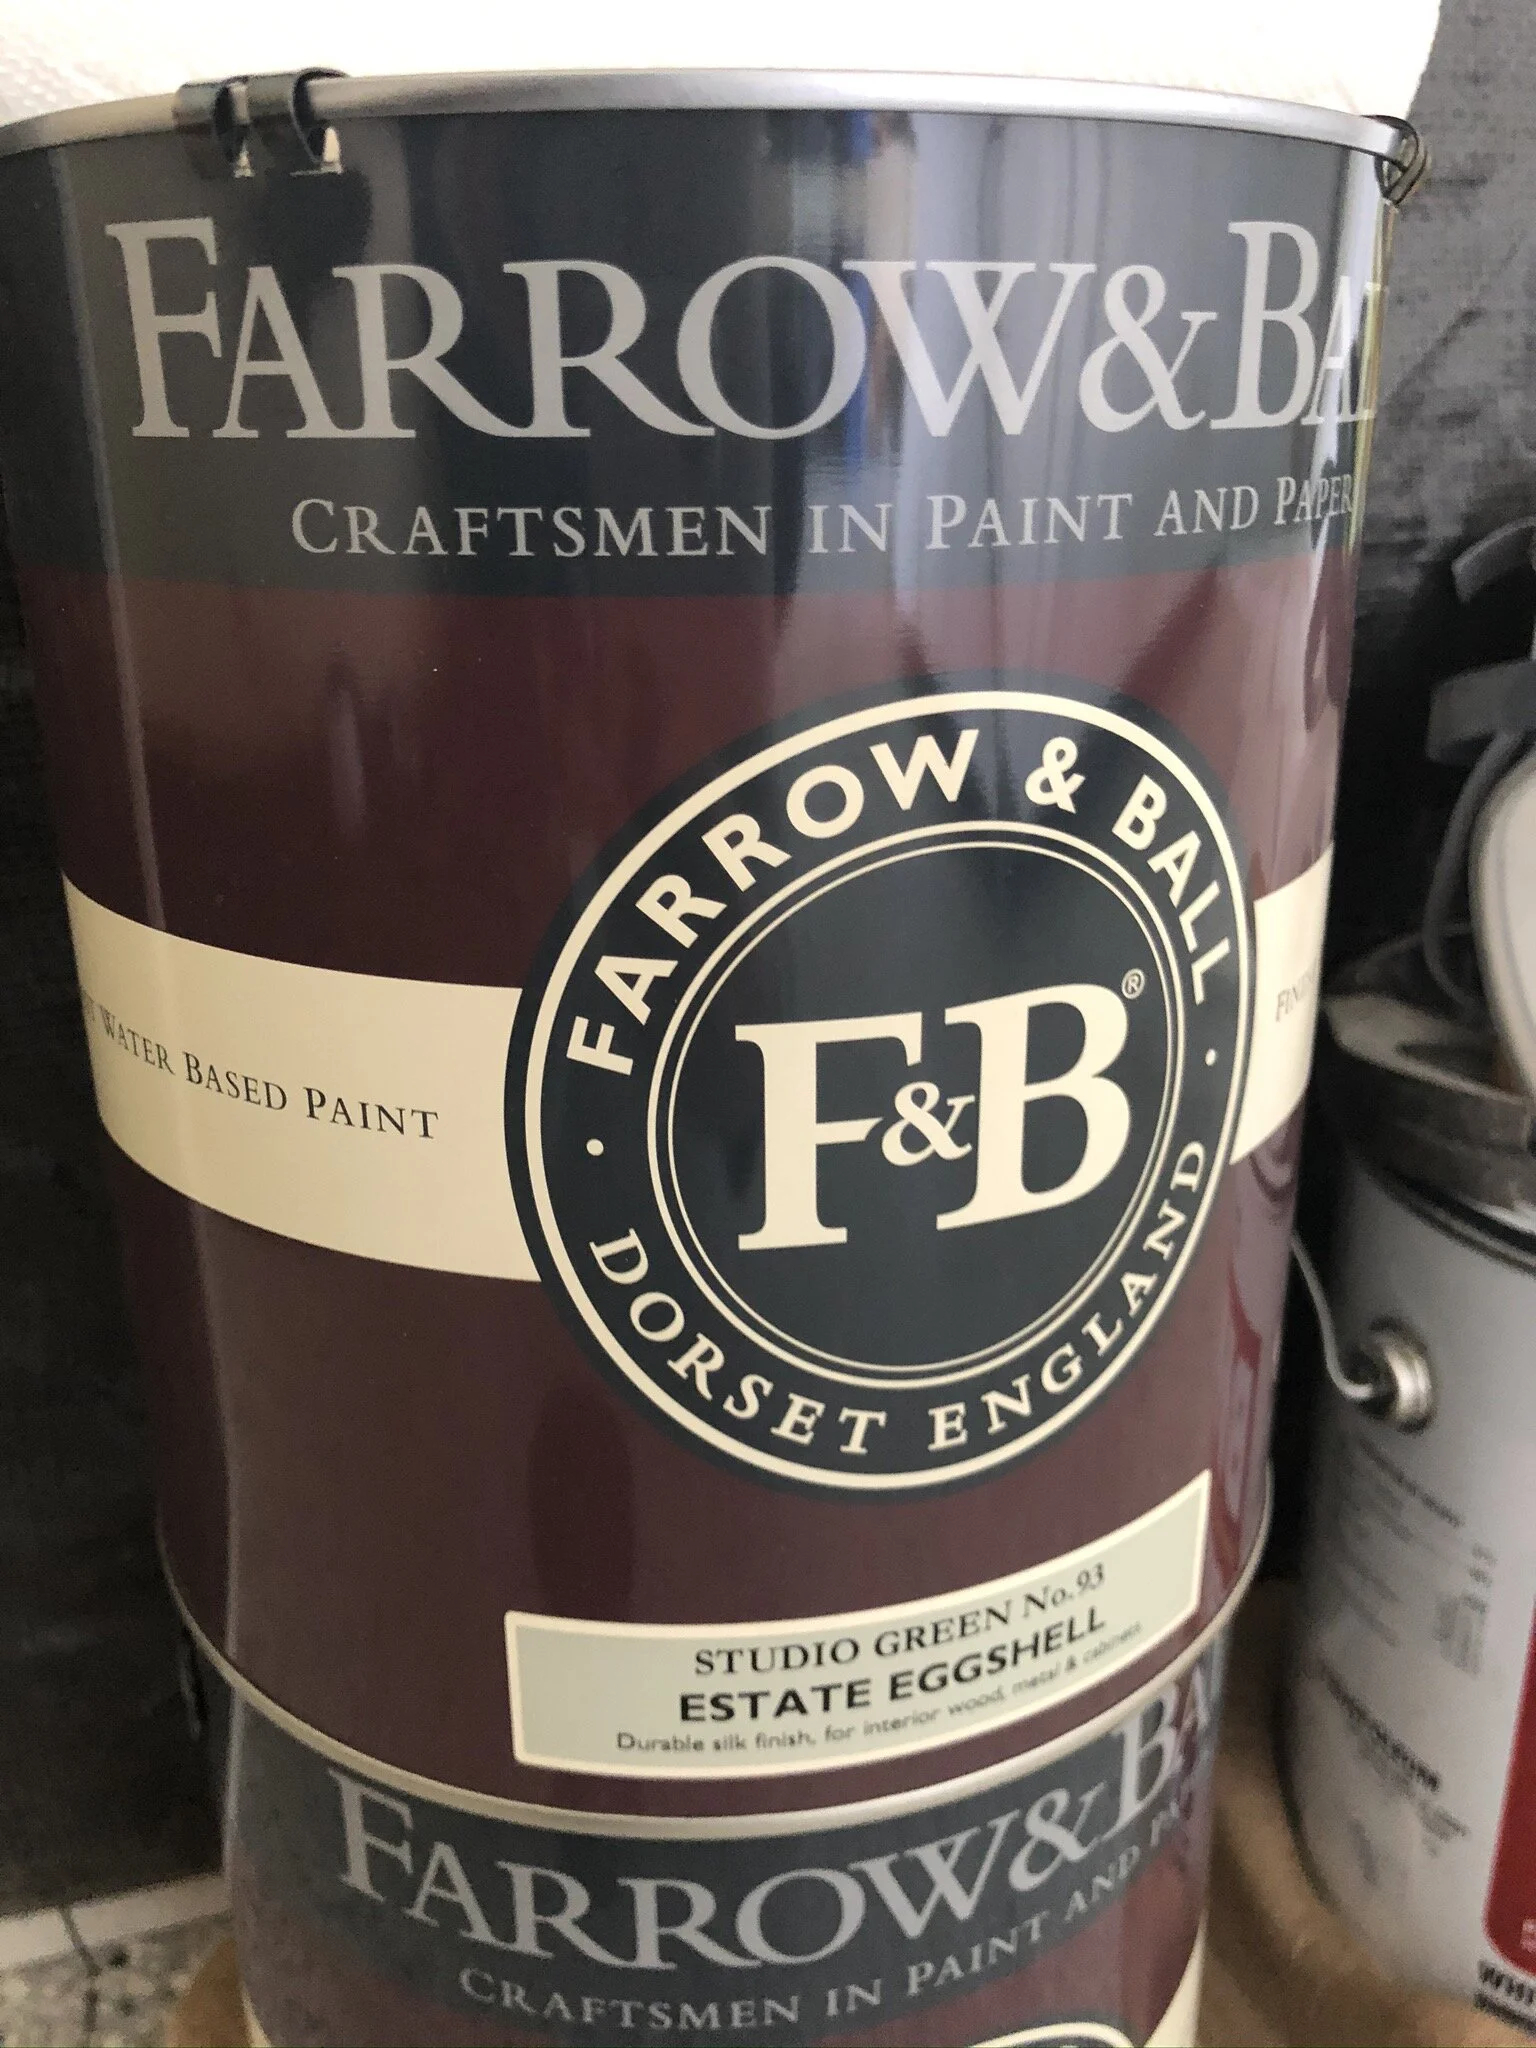
When I switched to my Farrow & Ball “Estate Eggshell” paint (in Studio Green) in the sprayer, I thinned down the paint by about 20-25%. So for every 3 ounces of paint, I would add approximately 1 ounce of water. Generally you want to aim for a viscosity level that matches whole milk consistency to help with flow. Due to the dark colour of the, using the markings on the side to determine this ratio was very difficult, so I’ll be honest - I eyeballed it and went for a general viscosity. I’m weirdly good at that kind of eyeballing, but Stu would have measured it out in a separate container and poured it in. Once the water was added, I put the lid on just the base part and shook vigorously for about 5 minutes before reattaching & spraying. Apparently being a bartender in a prior life did in fact prove practical for something else!
We opted for “Estate Eggshell” which has a sheen of 20% sheen over “Modern Eggshell” which has a 40% sheen and is generally recommended for kitchens. We went with the lower sheen because we don’t particularly like the shiny kitchen look. And, because we picked such a dark colour, the more matt finish will help it look more green, yet still be wipeable and durable to spills and stains. In terms of VOCs, Farrow and Ball is all water based, which is extremely eco-friendly and they have some of the best standards in lack of toxicity.

5 // SPRAYING TECHNIQUE & PROCESS
My spraying technique was the same for both primer and paint.
If this is your first time using a sprayer, get a massive bit of cardboard and practice spraying for a while, playing with the spray mist adjuster (spinning wheel near the trigger), the spray patterns (turning the air cap in different directions), distance you hold the sprayer from the object, etc. I practiced with my primer, but if you want to be cost efficient, water probably works just fine too *See my confessions*
I had to adjust the spray width to about 1/3 down of the way towards the “-“ mark before I found a spray pattern I was comfortable with. My spray was probably about 5-6” wide and I opted for my air cap to be turned horizontally which results in a vertical spray. I kept the paint collecting straw facing towards the front as well, to get the best flow from the container through the paint sprayer.
Spray each door laying flat and have surfaces ready to place the door flat to dry for the minimum ‘dry-to-the-touch’ time. This will be different for primer and paint. See my estimated drying times below. A couple of workhorses spread out with two planks of 2x4 stretched between them works well as a drying station. I also used my huge 5-gallon tubs of joint compound, really great for a solid surface for the huge and heavy side panel pieces.
After each door was dry to the touch, I then shifted them to my ‘dry’ area behind the spray tent, out of over-spray and dust areas. This allowed them to fully dry in a safe area devoid of extra particles that could stick in the paint.
I started by spraying the backs of the doors / drawers first. That way, if I screwed anything up, all of my mistakes are hidden inside the cabinet! By the time I got to “round two” painting the front visible side, I had a really good feel for how to use the sprayer.
I opted to spray the edges and one side of the doors on each “round” of painting, so in theory my edges actually received 2x the amount of primer and paint compared to the front and back of the door. I’m okay with this, as they’ll probably get the most wear.
Each edge had two passes of the gun, at a rate of approximately one foot per 3 seconds (or 3 “mississippis” if you count that way…) I.e. a 3 foot drawer front took me 9 seconds to get from one edge to the other. I found this to be the best speed to get a consistent and good coverage without being too heavy in any one spot.
Each side (i.e. the front and the back) got one pass back and forth, but I overlapped the spray. Much like you overlap the lawnmower half-on cut grass, half-off to un-mown grass, I took the same approach with the painting, ensuring my spray always covered the spray before by half and my lines were as parallel as possible. There’s a lot of forgiveness here, as long as your distance is good and speed of passing is consistent.
I would pull the trigger of the sprayer off the door, do my pass, and then release the trigger off the other side. If I was doing a front or back, I would keep passing back and forth with the trigger held until I reach the bottom of the piece. I have carpel tunnel syndrome (due to earlier pregnancies), so with a full paint sprayer this became a bit difficult and heavy for me, but I used my other hand to support where possible. I ensured I passed completely over the edges and past the object for the best direct spray ensuring the most equal distribution of paint across the whole cabinet.
I kept my wrist as solid and straight as possible, and moved my body with the sprayer across the object. i.e. Don’t bend your wrist and stand in one spot which creates an arc. This ensures that you have a consistent spray and portion of paint across all sections of the cabinet door. If you bend your wrist, then on the outer edges the spray will be lighter and your cabinet will take on an undesired ombre effect. See video below for how I moved!
I tried to keep my distance from the door the same at all times. I found that a 8-10” distance was best with the spray pattern I had chosen. Keeping this distance the same was really hard for me, so I tried to mentally maintain the same body position in terms of how bent my elbow was against my body to help guide me. I’m a bit spatially challenged, so that might be a personal problem only!!
Because I added more detail to the cabinet front, I found it necessary to do a few extra sweeps angling the sprayer up or down to cover the corners and seams where the trim met the front. I had to do this for all the interior trim on our doors, but I increased my distance from the door by a couple of inches to make sure that I didn’t cause paint pooling.
Make sure your sprayer is neither too full or too empty, this can cause splatters and pooling. I found that a 20-70% full container was perfect for consistency and prevented extra flakes being produced.
I found that getting the base container off of the sprayer was particularly difficult as the paint dried around the rim. Maybe its just weak wrists, but instead of yelling for the more muscular person in my life every time (Stu) to help me loosen it, I carefully used a dirty tack cloth to grip the base container pulling one direction, while pushing the sprayer down with my other hand in the other direction.
Have a wet paper towel on hand at all times to wipe your nozzle between every few doors. This helps keep the nozzle clean of build-up which can cause paint splatters.
Have another wet paper towel on hand to wipe out your respirator! I found that because I was coughing and my respirator had some liquid build up, the condensation dripped out of the top vents sometimes causing a few dots in the paint! EEK!
Like you would with a vacuum, keep your extension cord out of the way with your other hand! Nothing worse than accidentally landing that cord on top of the freshly painted surface while you were moving around. I did it once and didn’t make the mistake again. (Another reason for a turntable).


6 // GENERAL PROCESS & DRYING TIMES
Each round consisted of about 1.5 hours of spraying – 16 pieces in total, spraying the edges and one side.
I laid all the pieces flat until they had dried to the touch per the timelines below (as stated on can and from just feeling the pieces) – then once they were dry enough I moved them to lean against the wall in the garage to continue fully drying.
After each piece was fully dry and between each round of spraying, I would sand down any surface that had been painted with 400 grit sandpaper which drastically helps in changing the ‘orange peel’ effect you can get from the sprayer into a professional smooth surface with no irregularities. *This is integral* and I would argue is more important than your painting. This was by far the longest part of the process besides waiting for the paint to dry, but also requires the most patience to do consistently. Not my forte, but word of warning, take your time!!
Sanding 16 pieces took me about 2-2.5 hours each time
Right before spraying, I would make sure all surfaces were free of dust using two tack cloths, and I changed tack cloths each round to make sure there was no dust or paint transfer.
For the final round of sanding, you must absolutely make sure the cabinets are dry between the two paint coats. This may take more time than you think!! While I was completing this, it rained for about 4 days solid and the humidity level was approx. 90% for those 4 days. Even though it was sunny when I painted, the drying time took nearly 5 days before they were fully cured. On day 4, I thought they were dry enough and I was WRONG! In future, I may even just not sand between the final two coats but just wipe down with a damp cloth.
After the final coat of paint, I used a very mildly damp cloth (like you can’t wring water out of it), to mildly buff any last imperfections out and gave the cabinets a final wipe down.

Zinsser BIN Primer
Touch Dry: 10-15 mins
Fully Dry: 4-6 Hours

Farrow & Ball Eggshell
Touch Dry: 1-3 Hours
Fully Dry: 2-5 Days
7 // THESE ARE MY CONFESSIONS
Beware the beautiful epoxy floor! As I was adding the trim and sanding the cabinets before any painting, I was tapping the edge of the cabinet down on the floor to remove dust. I had not considered well enough that the garage floor was an epoxy coat with loads of little chips in it. This means we now have all sorts of ‘character’ added to the edge of our cabinets due to divots and bumps from the floor. Learn from me – ALWAYS put cardboard down before building anything. Semihandmade cabinets are a softer wood, so they will pick up every small divot.
Do not use these! On this same note….. I decided to try “Painter’s Pyramids” for the first time ever. Short story, they SUCK for this. They are supposed to help you prop up your cabinets / object for easy painting and drying so that you don’t have to do the platform method, and so that you can paint and flip immediately. That would be great and all, if they didn’t leave pock-mark divots in every piece due to the sharp point. Cue me having to add wood filler / caulk to multiple cabinet fronts which only added to my sanding process. Le sigh. My recommendation?... Use small blocks of wood as your supports, or take a leaf out of my IG friend Erin’s book and use Dixie Cups as your prop.
Separate your prep spaces! I didn’t have separate sanding and painting areas as I was attempting to contain myself to one space for 3-4 weeks. I wish I had separate spaces, as the spread of many many fine dust particles meant some extra sanding to remove from the paint. In future, I will sand outside and paint in the garage or vice versa if possible.
Practice spraying! – I did not practice enough and botched the back of a couple doors with running paint because I was too close with the sprayer, and then also tipped the cabinet front up to lean against the wall immediately instead of letting it dry flat. That was dumb, but I learned quickly and was able to fix those errors with some more coarse grit sandpaper before the next layer of primer.
Be careful of overspray! When spraying, because of the distance you need to be away from the object and some of the small pieces (like 5” drawer fronts), there will be a healthy amount of paint that lands on the floor. Not a big deal, but after 10 or so fronts, your shoes will become sticky and you’ll start pulling up the plastic with every step. I’m not sure how to prevent this one bar painting on the grass / driveway with no plastic – but neither of those are an option for me. So I’m just careful to lift up my feet slowly before carrying any pieces to their final laying spot.
Clean clean clean! Cleaning out the sprayer was a bear after the shellac primer, especially with no ammonia on hand. I did the best I could removing all the pieces and scrubbing every little part down, but the middle section where the air pumps through does not come apart and primer got stuck in there. Not too big of a deal, but the pressure after about 15 minutes with the new paint added meant that chips and flakes of the primer started coming out. In future, I would use an ammonia-water mix in the sprayer container and spray 2-3 pieces of cardboard to help flush the sprayer. Then rinse again and let dry before adding any new paint.
Let it shine! If it’s raining, just don’t spray yet. Wait for a nice sunny day with a distinct lack of wind to avoid the excess humidity which will undoubtedly make your primer and/or paint slide, and/or not dry. The lack of wind will also ensure no pollen / grass / dust / etc lands on your lovely new paint. See next point.
Let it be! Leaving enough time for drying and the final colour to cure completely. I waited 3 days and my cabinets were still tacky. I waited another day and thought they were ok. They weren’t!! I sanded 3 fronts and almost ruined the hard work I had done, by not waiting longer. You will see eraser like rolls of paint on your doors and clumps all over your sandpaper if you haven’t waited long enough. If the sandpaper is not producing dust, then wait longer. You should be able to run your hand over the painted surface smoothly without it sticking anywhere.


8 // SOURCE LIST
All can be found listed in our Amazon Storefront under “Painting Supplies”
Dewalt Mitre Saw - if adding any trim to the doors
HomeRight Finish Max Super Sprayer, does NOT require an air compressor, simply plug in
Tack Cloths – lots!
Farrow & Ball Paint in Estate Eggshell (20% sheen) - colour used “Studio Green”
Finish Max Cleaning Kit: note I was not able to use this due to no compatible sink but the company assures me it would have helped a lot
At the end of this project, despite a few wrong turns and minor errors, I am SO PROUD of how professional these look given it was my first time using these door fronts, and my first time using a pressurized paint sprayer. At one point, even Stu stopped me talking as we were holding a cabinet front and talking through tile selections, that he couldn’t believe how amazing they were and that the trim looked like it was always there. That should show you how easy it is to accomplish just by taking your time and being thorough!! If you take this project on and use any of this “advice”, please do send us some pictures and a message. We’d love to hear from you.
If you still have questions, please send us an email hello@brooksandstone.com or message us on Instagram @brooksandstone.


