
DIY: the Witch Coven
Once Upon a Time…. our daughter was 5 years old (last year), and complaining to me that absolutely everyone had Halloween decorations except us. It didn’t seem to matter that a tiny human had been pulled from my stomach less than 5 weeks prior to give her a cute little brother, I was the worst. See below for the extent of our decor last year… I focused on natural cobwebs with an essence of pumpkin… haha! So, this year, mum-guilt set in, and while we were browsing IG stories together one day for inspiration, we decided to build ourselves a little garden witch coven!

We don’t really have many horizontal branches of trees in the front part of our garden to do the hanging variety, so we opted for self-standing versions. That said, we do have an awesome stone chimney backdrop, an old unused firepit covered in rust perfect as a makeshift cauldron, and a rarely trodden section of the garden that was going to be perfect for our little coven, especially after we added some special effects lighting which makes all the difference.
My goal was to create 5 witches, one to represent each member of the family, to make them substantial enough to stand on their own and to generally use up wood & stuff we already had lying around. I didn’t want to have to buy too much new, but if you want the quick Amazon list of what we did purchase - check it out here. Total cost for us was about $50 per witch, but without the materials lying around, it might be more like $80-90 per witch from scratch. An investment perhaps, but these are going to last longer than any $400 inflatable. Then, in terms of time, I spent about 6 hours total on all 5 witches - the first couple hours just figuring out my method then about 45 minutes per witch after that, plus a bit of time for tweaking, lighting, small additions, and so on. Really not that bad and I spread it out over several weeks. It’s easy to do one little section at a time!
Read on to get the full DIY tutorial on making these not-so-little witches, and make sure you see the final night-time reveal at the end. We love it! And my mum-guilt has been fully assuaged… though said daughter is now asking for more decor inside next year. Ha, I can’t win!!
THE INSPIRATION

We had come across these store-bought witches, but they were sold out in late September already!
Clever me should have searched around a bit more and discovered plenty of cheap ones on Amazon and Wayfair, but DIY me decided to choose the path less traveled and make them.
It was more fun and I’d get to put my own spin on it anyway! Our witches ended up far more substantial than the bought ones and may even be able to be repurposed for other holidays too.
MATERIALS (per witch)
Full Amazon List here: https://a.co/7UWxPJM
104” 2x4s, or 40” 4x4, plus 24” 2x4 (we already had these from a prior project, so didn’t purchase new)
1/2 roll of this chicken wire (comes with gloves & extra wire)
5x yards landscape fabric (also already had a huge roll of this, so didn’t purchase new)
5x yards black creepy fabric
1x pair high denier black tights (had a bunch of these that were kaput for me, so didn’t purchase new)
1x witch hat (had bought prior too)
Staple gun & hot glue gun for attaching everything (we also already had these), plus some pliers are always handy

MAKING THE BASE & SECURING THE SUPPORT
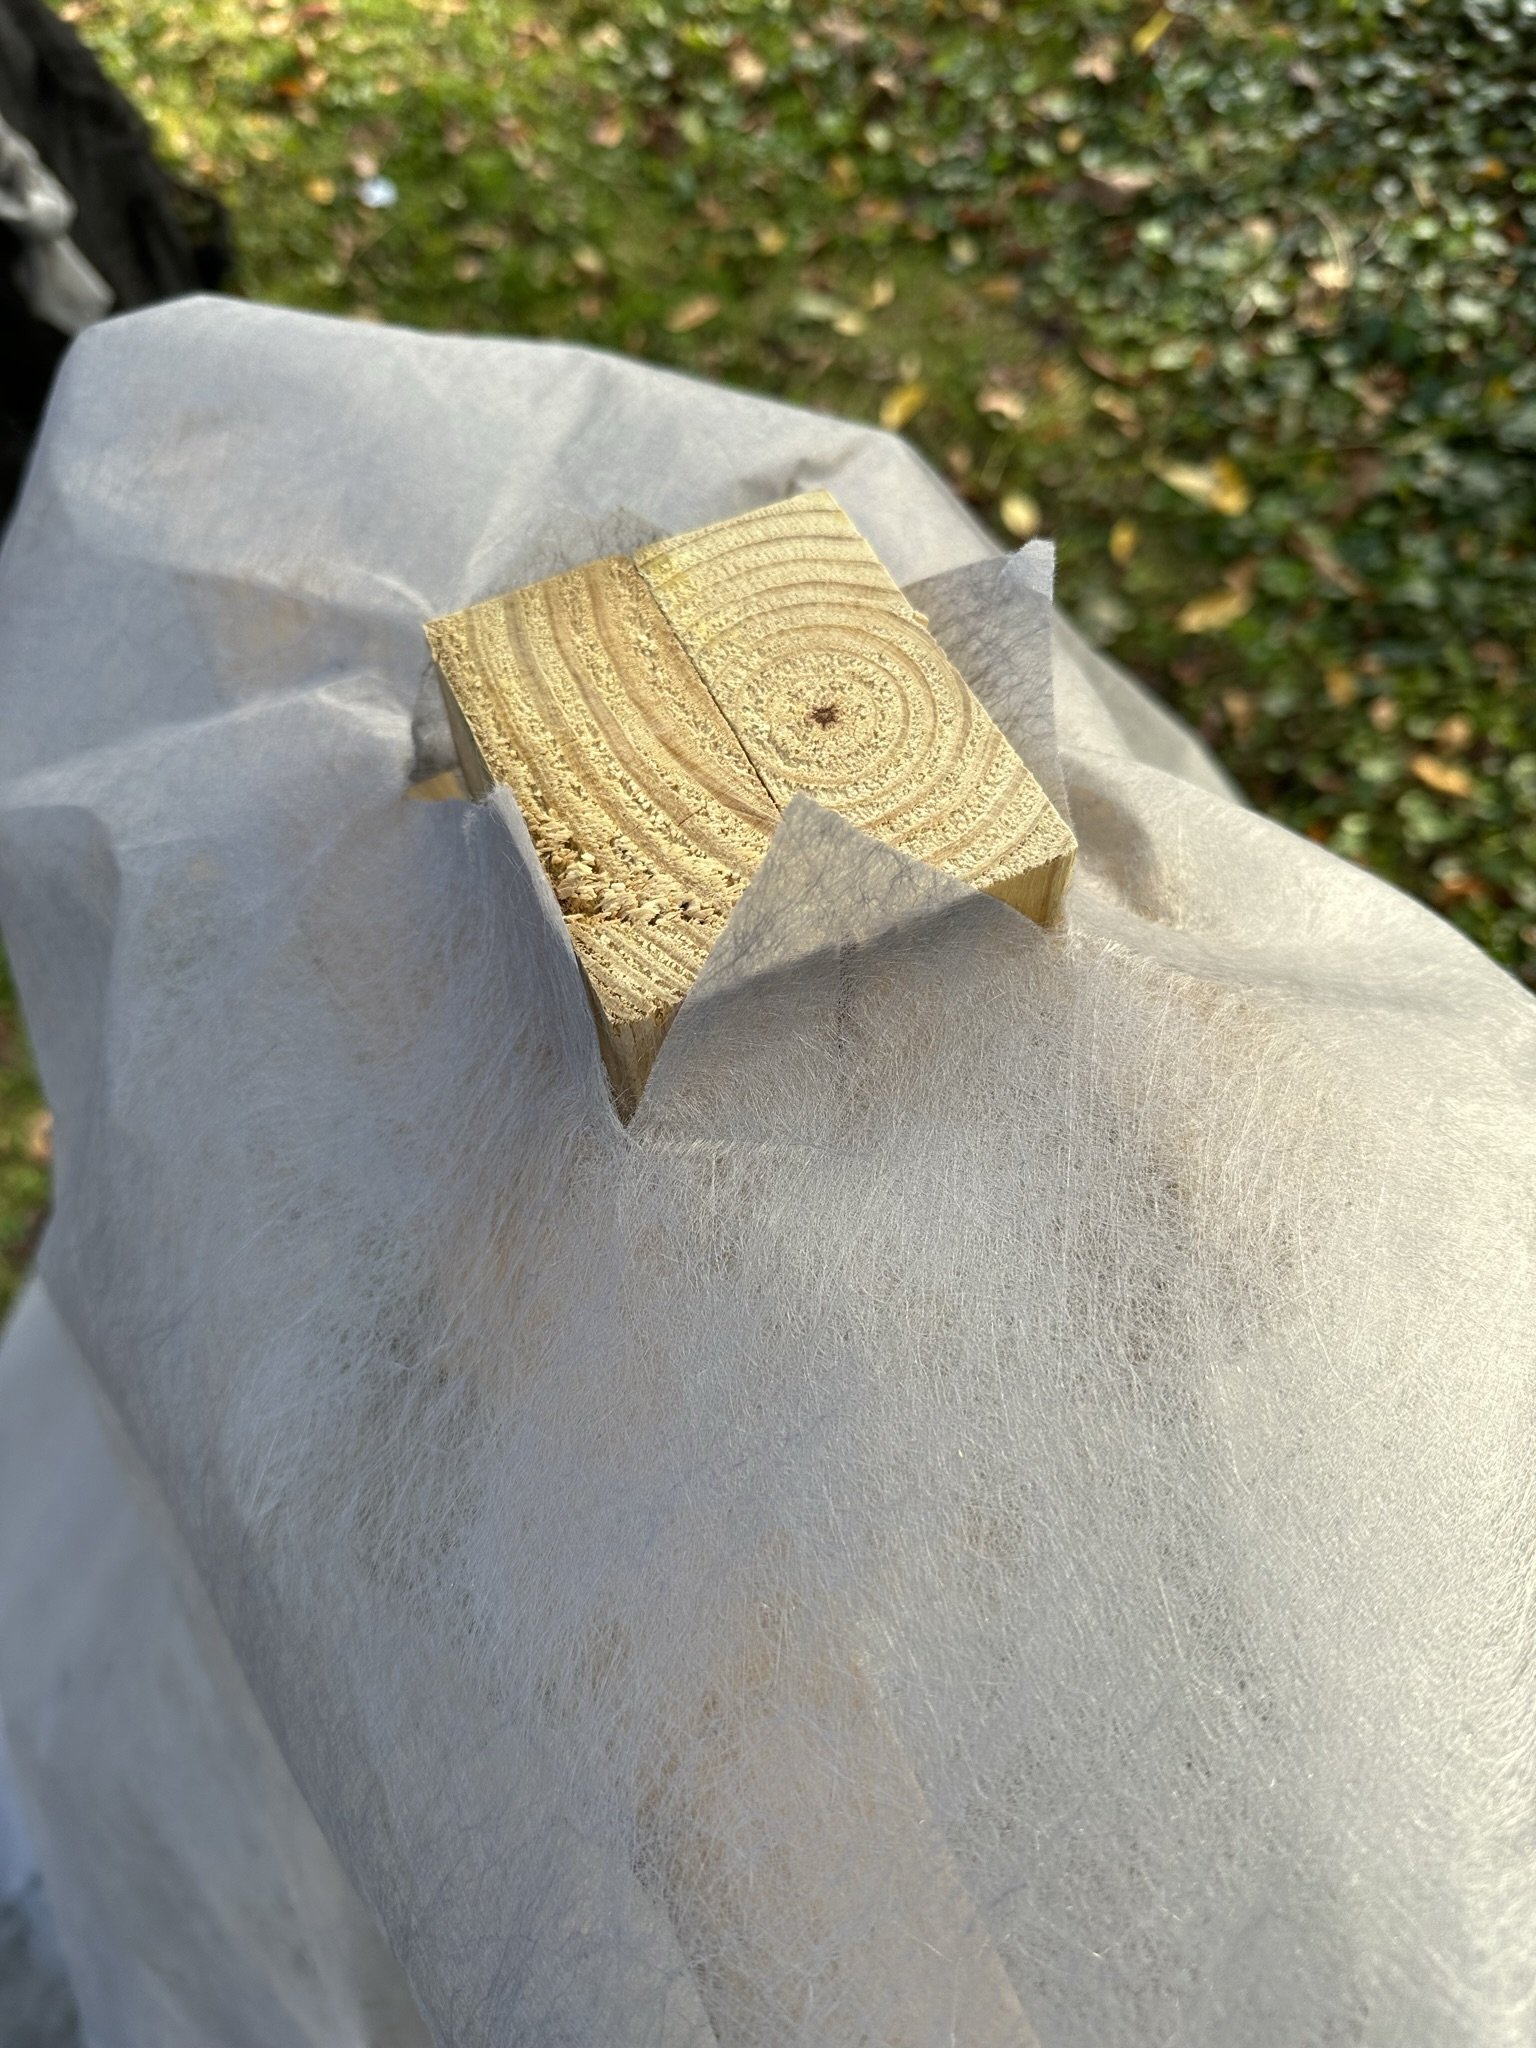
Cut down 2x 2”x4”s (what we had on hand already) - to 40” each, screw together top and bottom to make a 4x4” post
Cut down a second set of 2x4s - one at 16” length, the second at 8” length to form the shoulders of the witch. I marked 2” down from the top of the 4x4” post to secure both 16” and 8” section, to ensure that the acrylic globe for the head had a stable base to rest on. The 2” that then sticks up into the acrylic globe, helps keep the head on the witch (except for high wind, and then the heads will roll off). I did think I could add some velcro to the underside of the globe, but haven’t felt that necessary yet!
Secure the 16” section horizontally to one side of the 4x4” with the top of the 2x4 at the 2” mark, and with approximately 6” hanging off each side of the post. Then flip the 4x4” over and secure the 8” section the same way, to ensure it is level with the first piece. Your acrylic bowl will sit on top of these two pieces, so if they’re uneven then the head will fall off often.
My original idea for the support was to make the posts into stakes and then put them in the ground, but I didn’t want to have to create a whole jig for the miter saw just to do that. So, I pivoted, looked around at supplies I already had lying around, and opted to stick the post into large flowerpots (at least 12” in diameter), and then fill around the post with marble chips, pebbles, stones, dirt, whatever you have! We had a couple bags of marble chips that I’ll be using elsewhere in the garden later, so I just used those.
The pots don’t matter, they will be hidden! As you can see from the pics below, I used some of my nice summer blue ceramic pots as we were cleaning up the garden for autumn anyway.


CREATING THE WITCH SHAPE
Chicken wire was so much easier to work with than I expected. I was fully anticipating blood to be drawn in this process, but can happily report using the gloves and eye protection (just in case small metal pieces go flying when you snip), that there were zero injuries in this process.
Take the roll of chicken wire and start creating the “bodice”. If you purchase this one, it handily comes in a nice small size along with wire-handling gloves and some extra wire which I use for the fabric part.
Start by securing the chicken wire (still on the roll) centered over the 16” section of the horizontal 2x4', with a staple on each corner
Then bow the chicken wire out a little to create the chest area, and secure about 8-10” down from the horizontal 2x4 using a staple in the middle of the post.
Then roll the chicken wire down the full height of the post & base, add an extra 3-4” to allow for wire that will secure itself on the ground (assuming you’re putting them on grass), and snip the wire using the included wire snips.
From there, tuck in all of the exterior parts - secure the chicken wire to the edges of the 16” 2x4 and then again secure the sides of the chest section to the middle - aiming to create a waist area with all the staples securing the wire in the same place. I also ensured to tuck the chicken wire in at the top under the “shoulder” 2x4s, to ensure I would have a flat area to staple the “arms” afterwards.
For the “back” of the witch, take the end of the roll again and secure it to the same spot on the 16” section of the 2x4, but run it down the back instead. I tried to keep this as flat as possible. Secure it with a single staple again about 8-10” down from the horizontal 2x4, and then using the wire snips, cut out the chicken wire around the protruding post at the top. This allows the chicken wire to form full shoulder area by covering between the 2x4’s at the top.
Repeat the process of unrolling the wire down to the ground and tucking in / stapling all of the exterior parts, continuing to make a waist.
Then finally, for the last two sides of the “skirt” - bend the top of the chicken wire into a somewhat triangle with a flat top, squish the wire onto the side, and secure with several staples. Roll it out down to the ground again, adding 3-4” and snip the wire. At this point, you can “fluff” it out to give it the rounded shape.
Repeat for the other side of the skirt, so that you have 4 separate pieces of chicken wire for the bottom section.


ADDING FABRIC
Now you’re ready to create the “dress”!
Starting with a massive roll of landscape fabric (I already had grey on hand and quite liked the ethereal look it gave, but black might make it even better!), place the roll on the ground in front of the witch and pull it all the way over to the other side on the ground - then cut.
Then cut out an X shape where the post protrudes at the top of the witch - being careful not to cut the X too big. You want it just smaller than the 4x4” post so that when you push the fabric over the post, it helps secure it. I opted not to staple all my fabric to the posts and 2x4’s in the hope that I could easily remove it and replace it with something else if I wanted to use the bodice wire frames for another holiday. But if I end up using these for only Halloween, then I might end up securing the fabric a bit more!
Repeat the landscape fabric process again for a second time,
Once all the grey fabric is cut and “secured” using the X-cut method - cut a length of wire about 2-3’ long (wire is included if you get the chicken wire package). Tie it around the middle as tight as possible, cross the wires when they meet, twist and repeat until you meet the final ends and twist together multiple times to secure. Now you have a proper “waist”.
Use the wire in place to adjust the grey fabric into position to make sure it covers all of the chicken wire. I ended up pulling one piece round more towards one side, and the second toward the other - so that there was double coverage in the front but more wafting type pieces at the sides. I might also cut the bottom of this fabric into rag-ends for a creepier look, but we kept it more kid-cute at the moment.
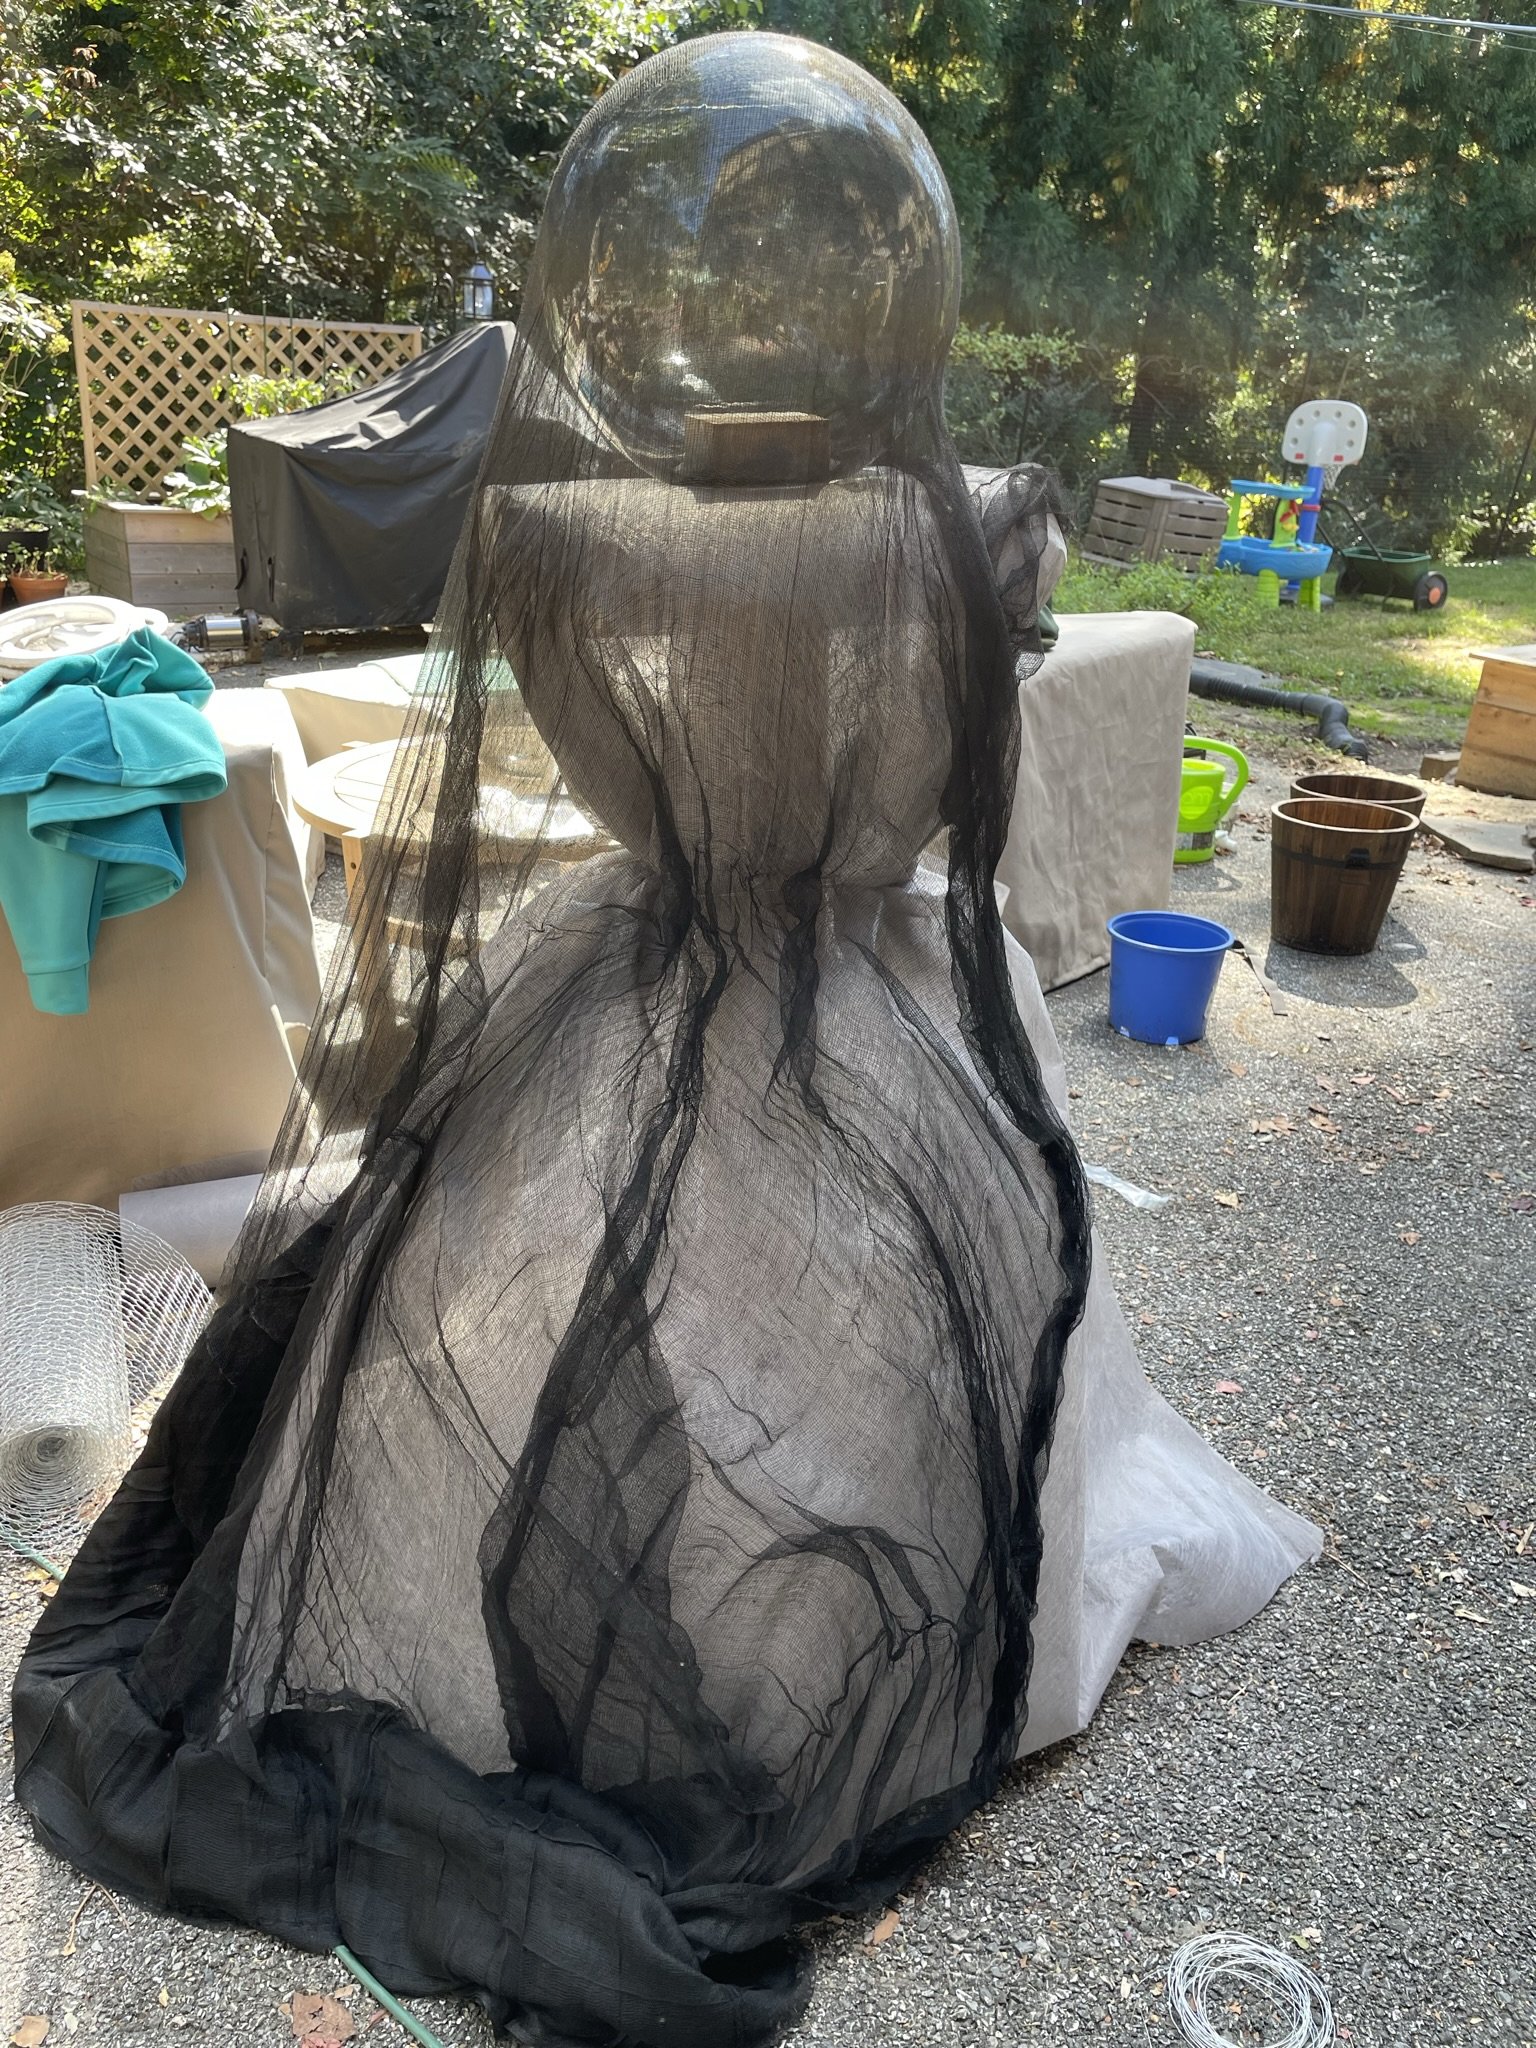
Repeat the pull and cover method twice more using the black creepy fabric. However, do not cut the X this time as the black fabric will cover the exposed post now. I found that each single package of black fabric was enough for one witch at the 40” height.
Then tuck in the black fabric to the waist wire, so that the wire isn’t visible, but you still get waist definition. This fabric is somewhat sticky and sort of sticks to itself and everything else, but this is helpful for putting it in place and it stays! I did find mine kept gathering leaves, but I thought it added to the day-time effect so have just left them!


CREATING ARMS
I didn’t really have a plan for the arms going in - but I knew they needed to be tied to each other to create the coven look. It took a couple of tries to get this right!
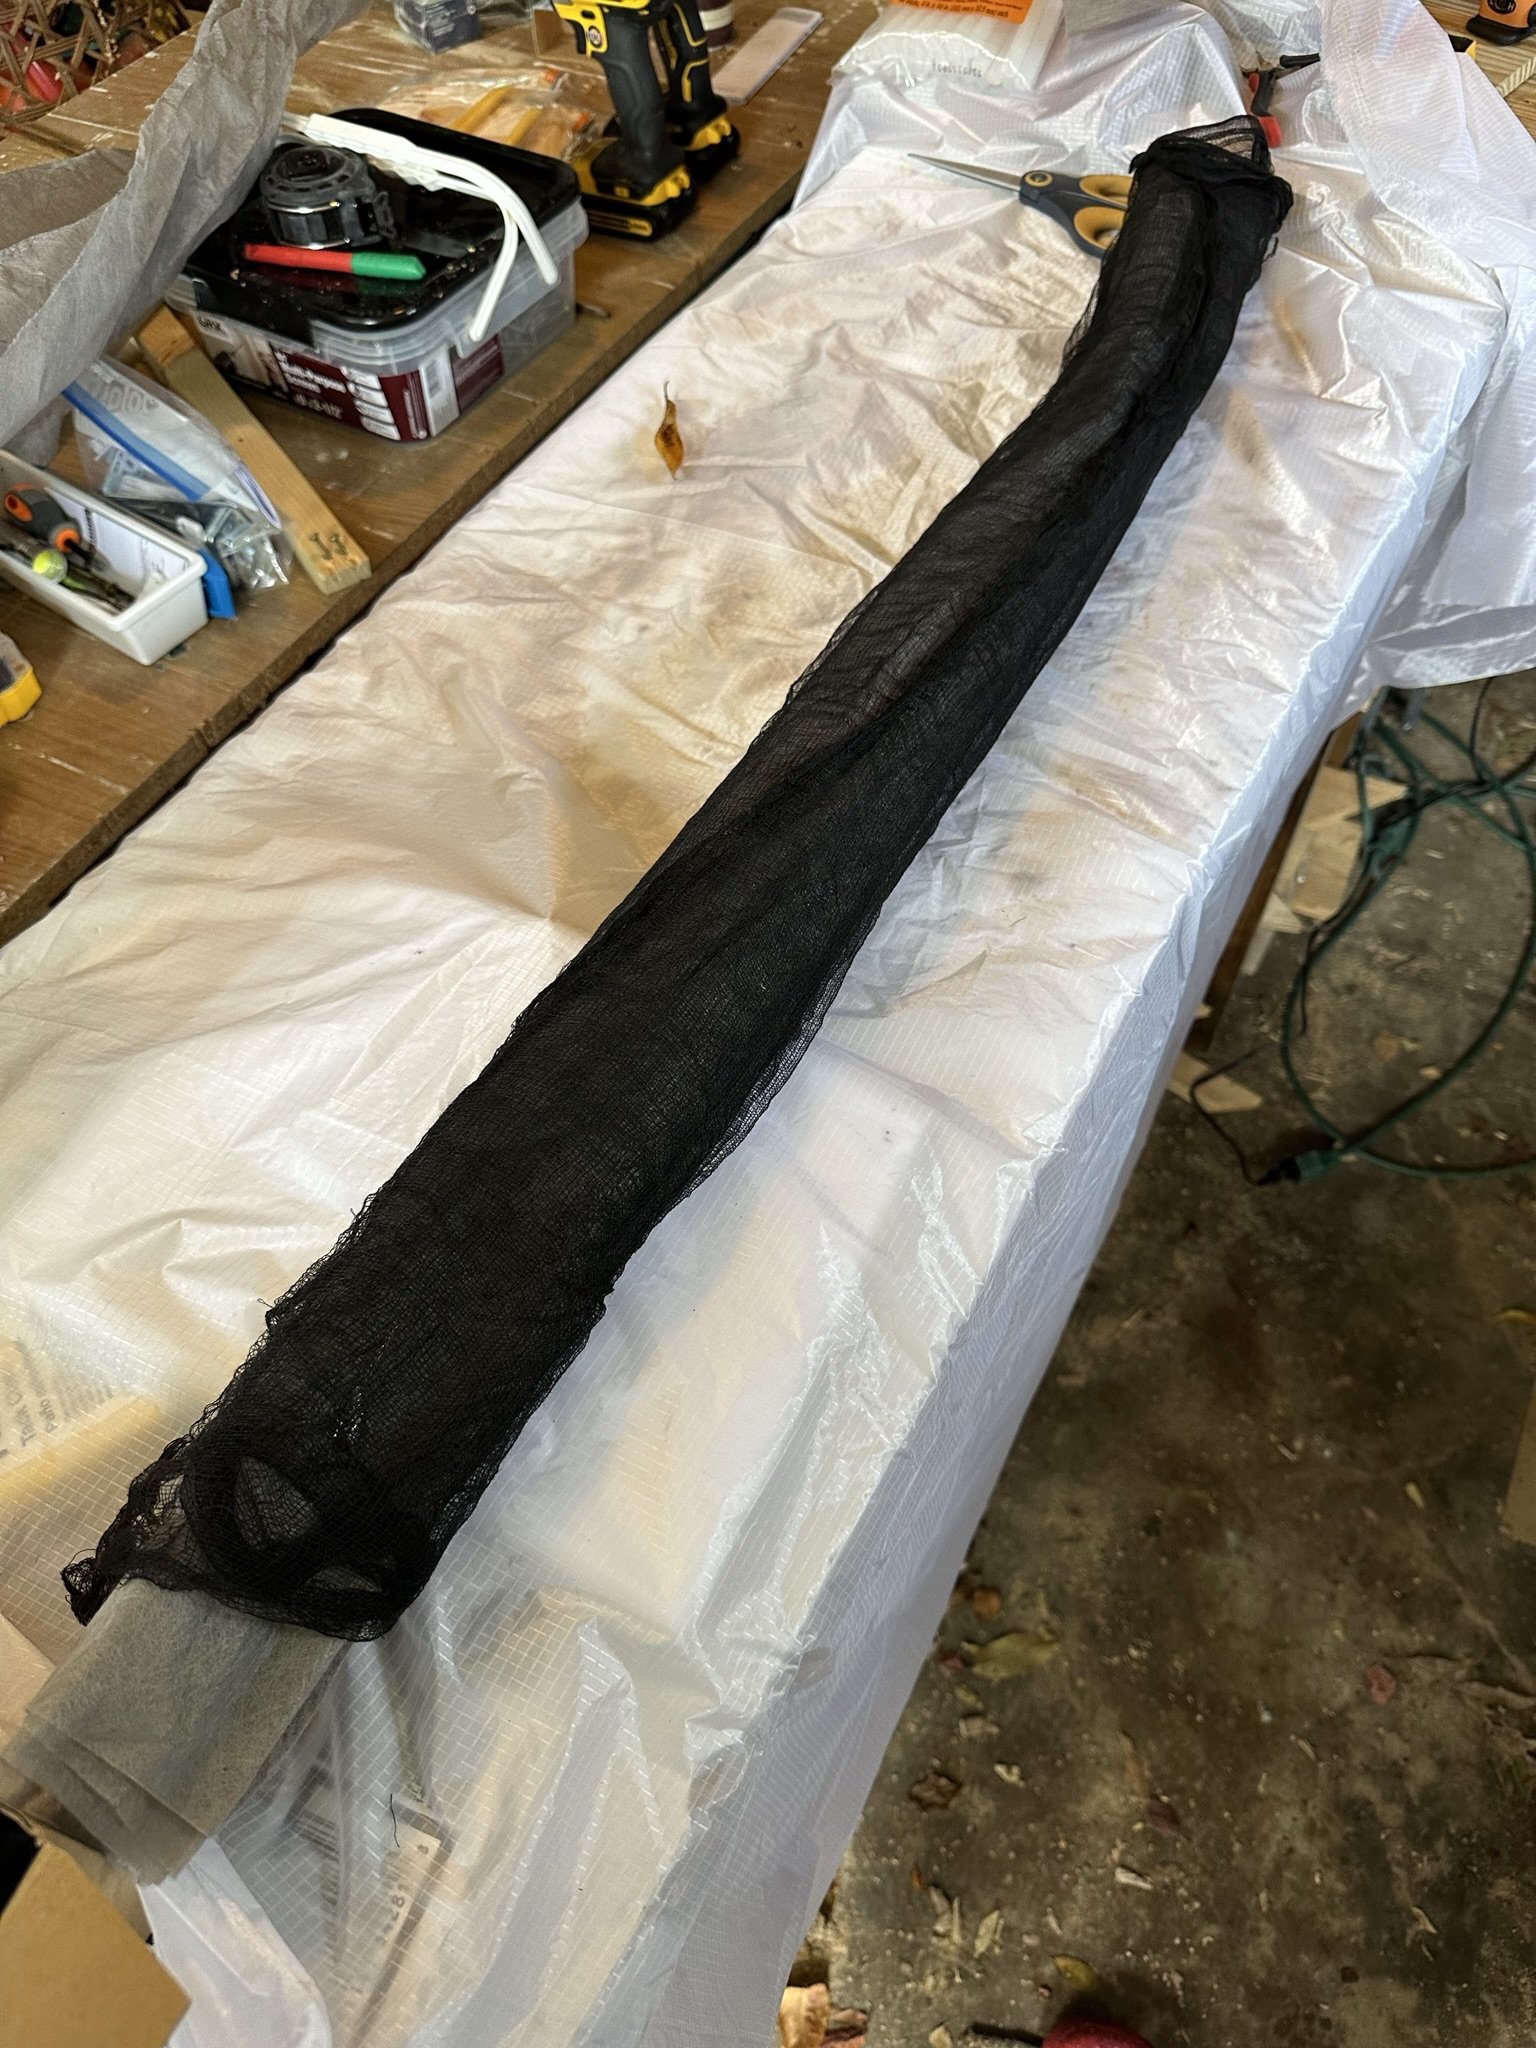
First cut off a section of landscape fabric around 12” wide
Then roll it up and secure with a length of hot glue down the long end to create the “width” of your arm.
Then cut a width of creep black fabric (also about 12” wide, you should have enough leftover over from other witches to do this, or buy an extra packet of fabric) and wrap it around the landscape, with about 5-6” protruding at the bottom end. I used a length of hot glue to secure the start of the black fabric, then rolled it and secured the end with another length of hot glue.
Using the top end (not the part with the dangly black fabric), secure the landscape fabric to the back of the 16” 2x4 cross brace with a couple of staples
Once all arms are secured to witches, pull the two opposing arms together and tie the ends of the gray fabric together, so that just the black fabric is hanging out of the knot. Then cut off any extra to your own style.


MAKING THE HEAD
The head was very straightforward - I bought these 12” acrylic post globes in smoke, but they are honestly a bit too big. If I were doing it again (or maybe I’ll fix for next year..) I’d use these 8” acrylic post globes in milk white (again for repurposing for other things, and because it would hide the internal light better) and cut a bit of the corners off the 4x4” post to help it sit on top.
Take your acrylic globe (purchased) and using high denier black tights (I think mine were 60 or 70), pull the waist over the 12” acrylic globe - possible to do with one person, but faster with help and my son loved helping!
Pull the waist until it meets the neck opening of the globe. The stretched texture means the tights don’t move once they’re on, and means I can pull over different colors of tights for different things in the future. It also allowed me a way to secure the hat!
Pull the legs of the tights up and tie in a double knot. Then cut off the legs of the tights.
Then using hot glue on the rim of the witch hat, secure it over the tied tight legs at whatever angle you prefer.
I made these so that you could put an LED candle / string lights / pumpkin light sitting on the post inside the head to make it glow. And then put the acrylic globe with the hat on top of the post. Simples!


SETTING THE SCENE
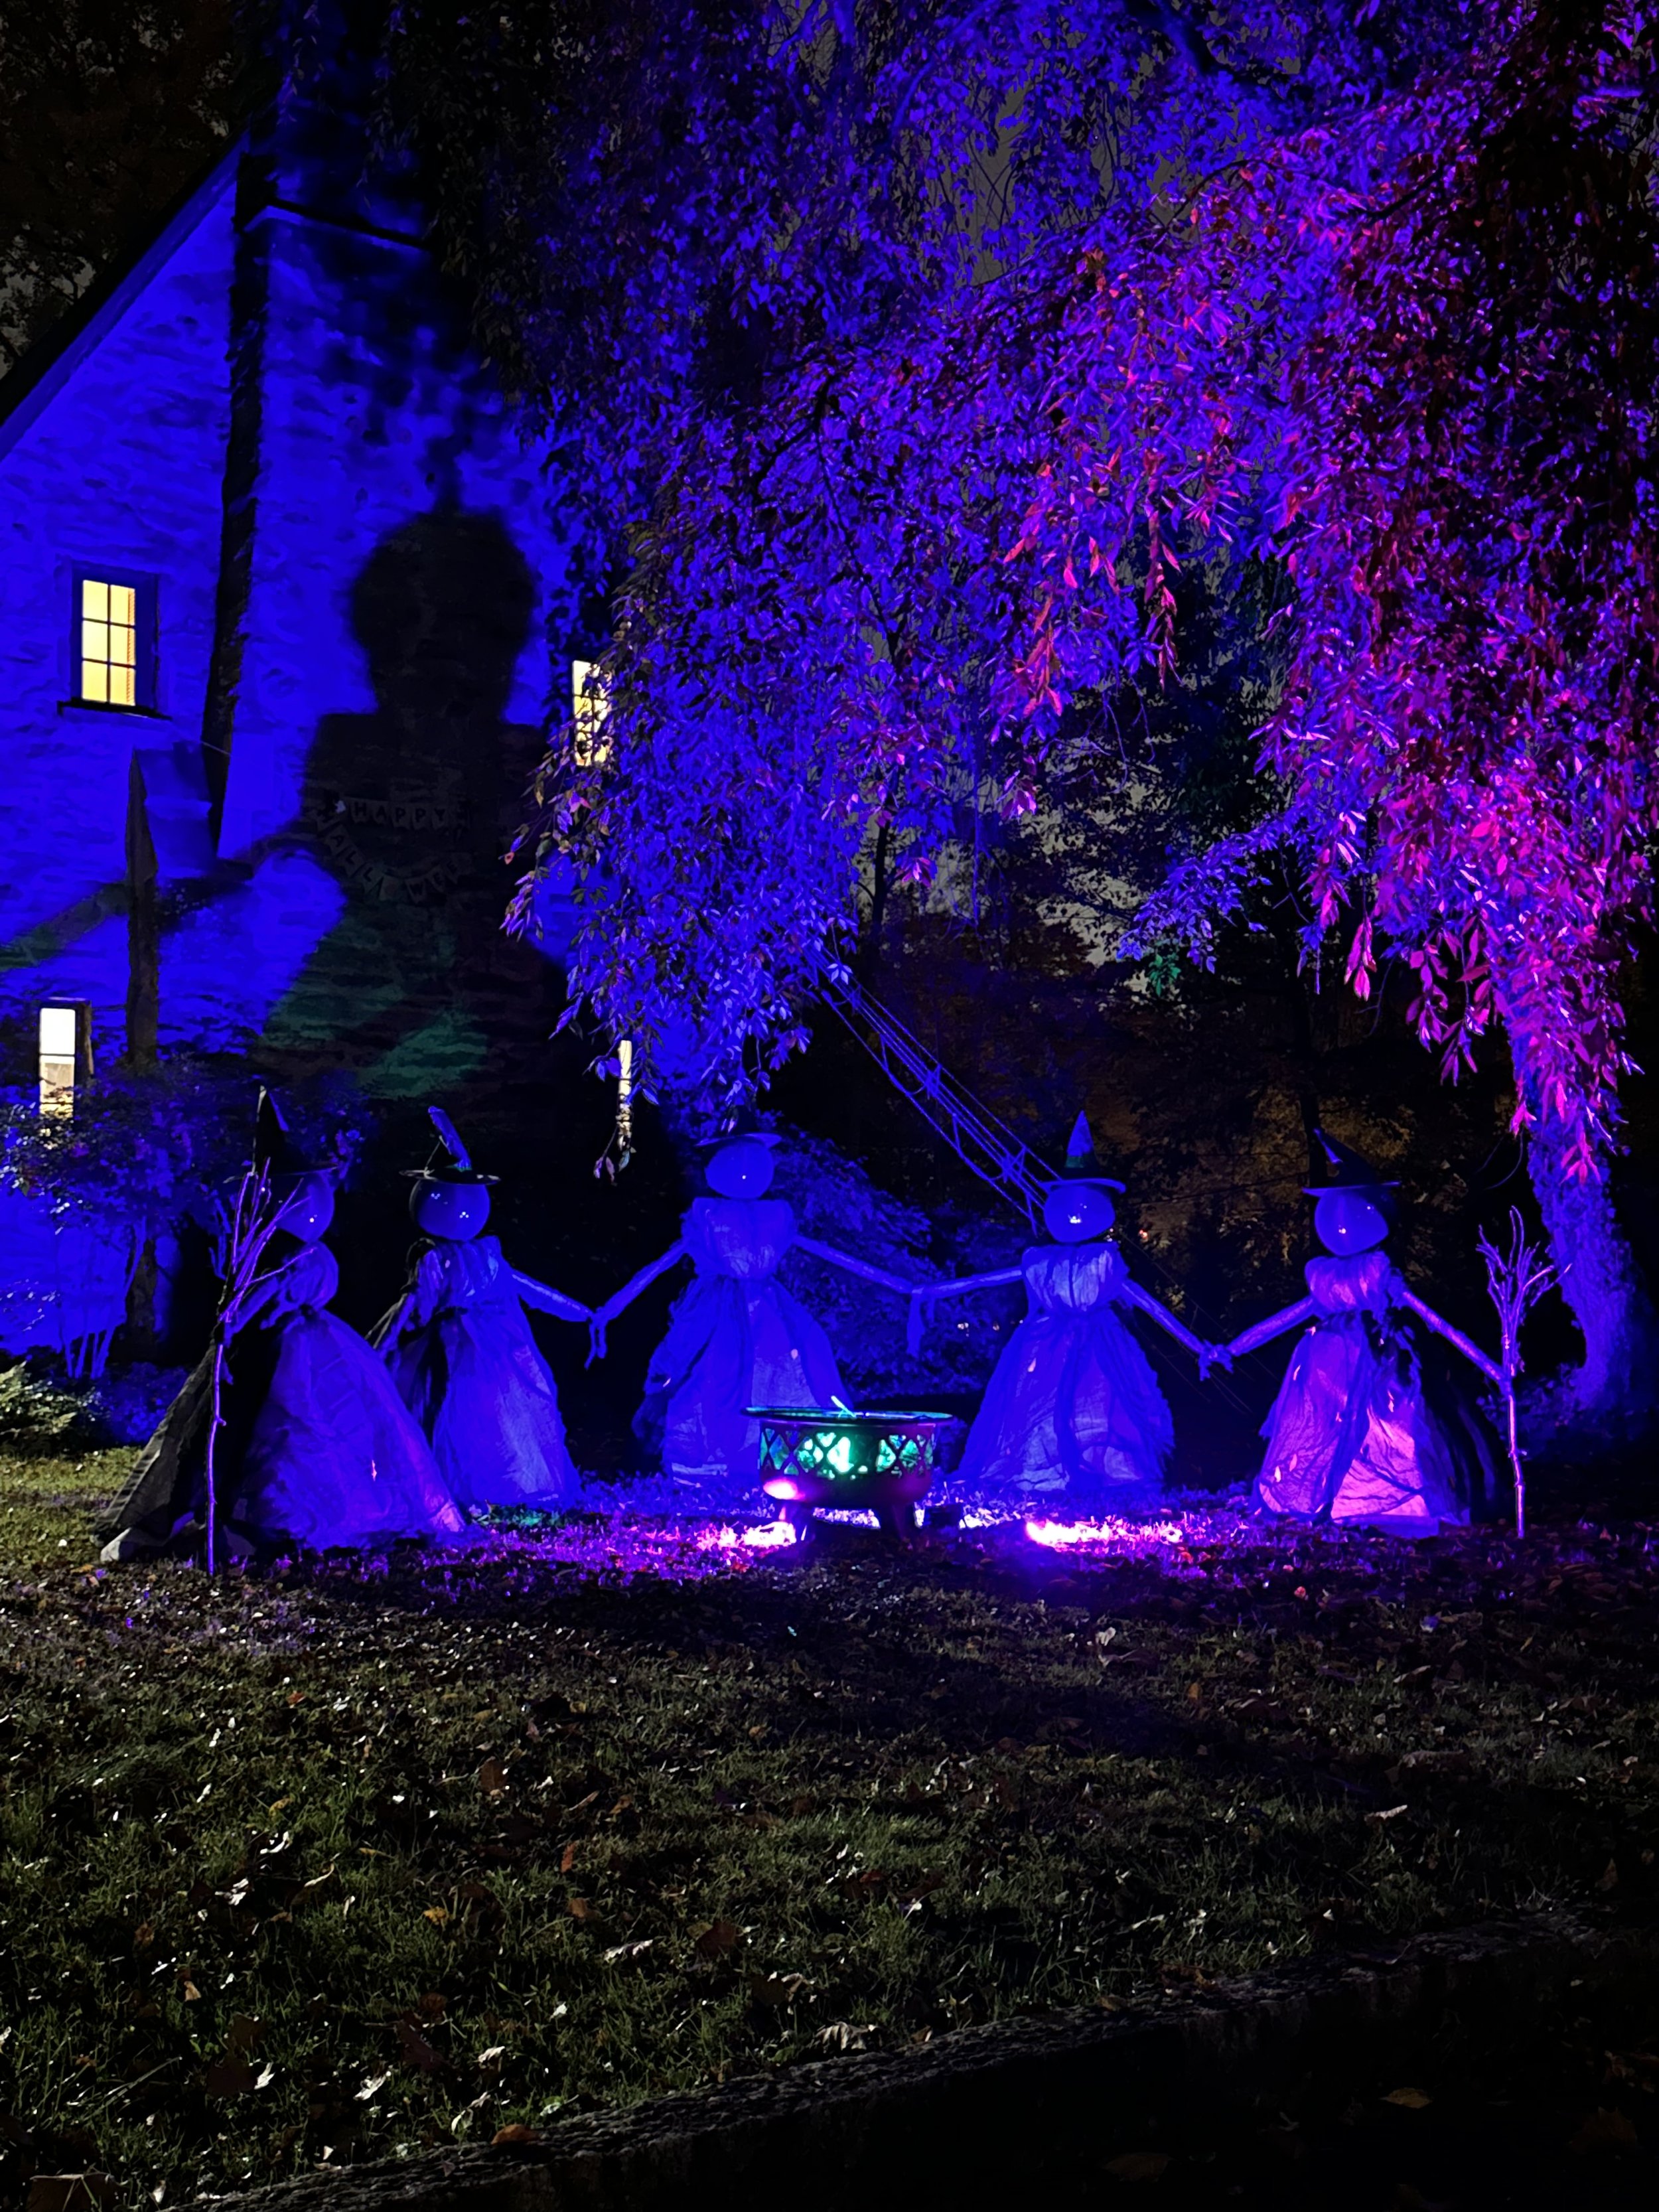
Then finally, if you created the witches somewhere other than their final haunting place - move them into their spots and tie all the arms together. I positioned them in front of our fabulous stone chimney which also has cherry branches hanging down around them for added drama. I pulled an old fire pit that we don’t use anymore into the center of our circle, added plastic painting cover crumbled into balls and then put purple solar globe lights on top (those these don’t get enough sun in the front of our garden, so I’ll be buying some plug-in lights too!). I then gathered some sticks and created a couple of little broomsticks by just tying them on a large branch with leftover wire.
And then the final piece de resistance which truly makes a big difference at a small price, is adding these flood lights around the area for a creepy glow to set the mood! We made a happy discovery (total accident!), that when we set up lights in front of the biggest witch (our test model), it actually casted the most amazing shadow on our chimney. So, we went all in on finding the best spots for all the lights so that we could keep the dramatic shadow. I opted not to get a fog machine for general effect, or a misting machine for the “cauldron” this year, but maybe next year we’ll up the ante a little bit!
We love that it looks really fun during the day as well as at night - that was a big goal all along since the kids don’t really get to see the night-time effect that often as they’re all under 6. And here’s the result!! Make sure to check out the timelapse building reel, and final effects reel too!
What do you think? Will you be making some this year or next year?? We’d love to hear if you do! And be sure to check in with us on Instagram to see what we’re up to next…

And they lived happily ever after… with a spooky little witch coven in their garden!
Love & cuddles,
Lex


