
One Room Challenge - Week 3
Oh boy, these blog post updates roll around quickly each week don’t they?! It feels like week 2 of the One Room Challenge wrapped up only yesterday, but then it would when 4 days of the last 7 were spent staring at our kitchen floor completely oblivious to the world around us!!
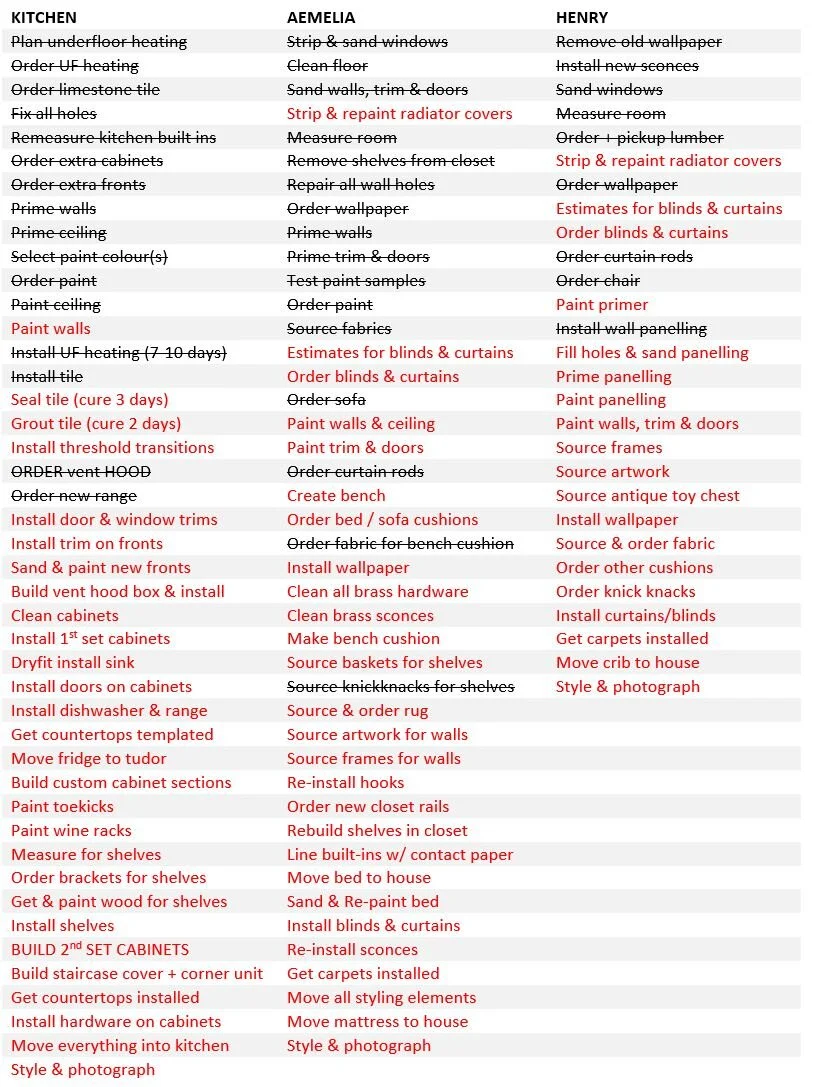
So first… FLASHBACK for those who are joining us for the first time: 8 weeks; 3 rooms. 3 weeks down, and all of our to-do lists are still bulging (see very end of post if you want the visual). Bring it on!
Pre Challenge Kickoff: First Timer & Kids’ Rooms Inspo Post
Week 1: Before Pics, Floorplans & Challenges: Aemelia’s Room (3 yr old); Henry’s Room (18 mo old); The Kitchen (92 yrs old)
Week 2: General Update on Henry’s Room Panelling & Paint Dilemmas
On to WEEK 3!
No progress was made in the kid’s rooms this week besides some background ordering of items and minor trimwork in Henry’s room – so it’s all about THE KITCHEN! The heavy events of this week had been almost two months in the making – as we planned and nailed down our partnership with WarmlyYours, for installing electric radiant heating underneath our limestone tile in the kitchen. Essentially our progress this week was that, laying the floor tile afterwards and making a few other key kitchen decisions like counter-tops and hardware. So if you want the short version – that’s it. Now, go have a look at some pictures below. Otherwise, carry on reading for the full story 😉
THE FLOOR
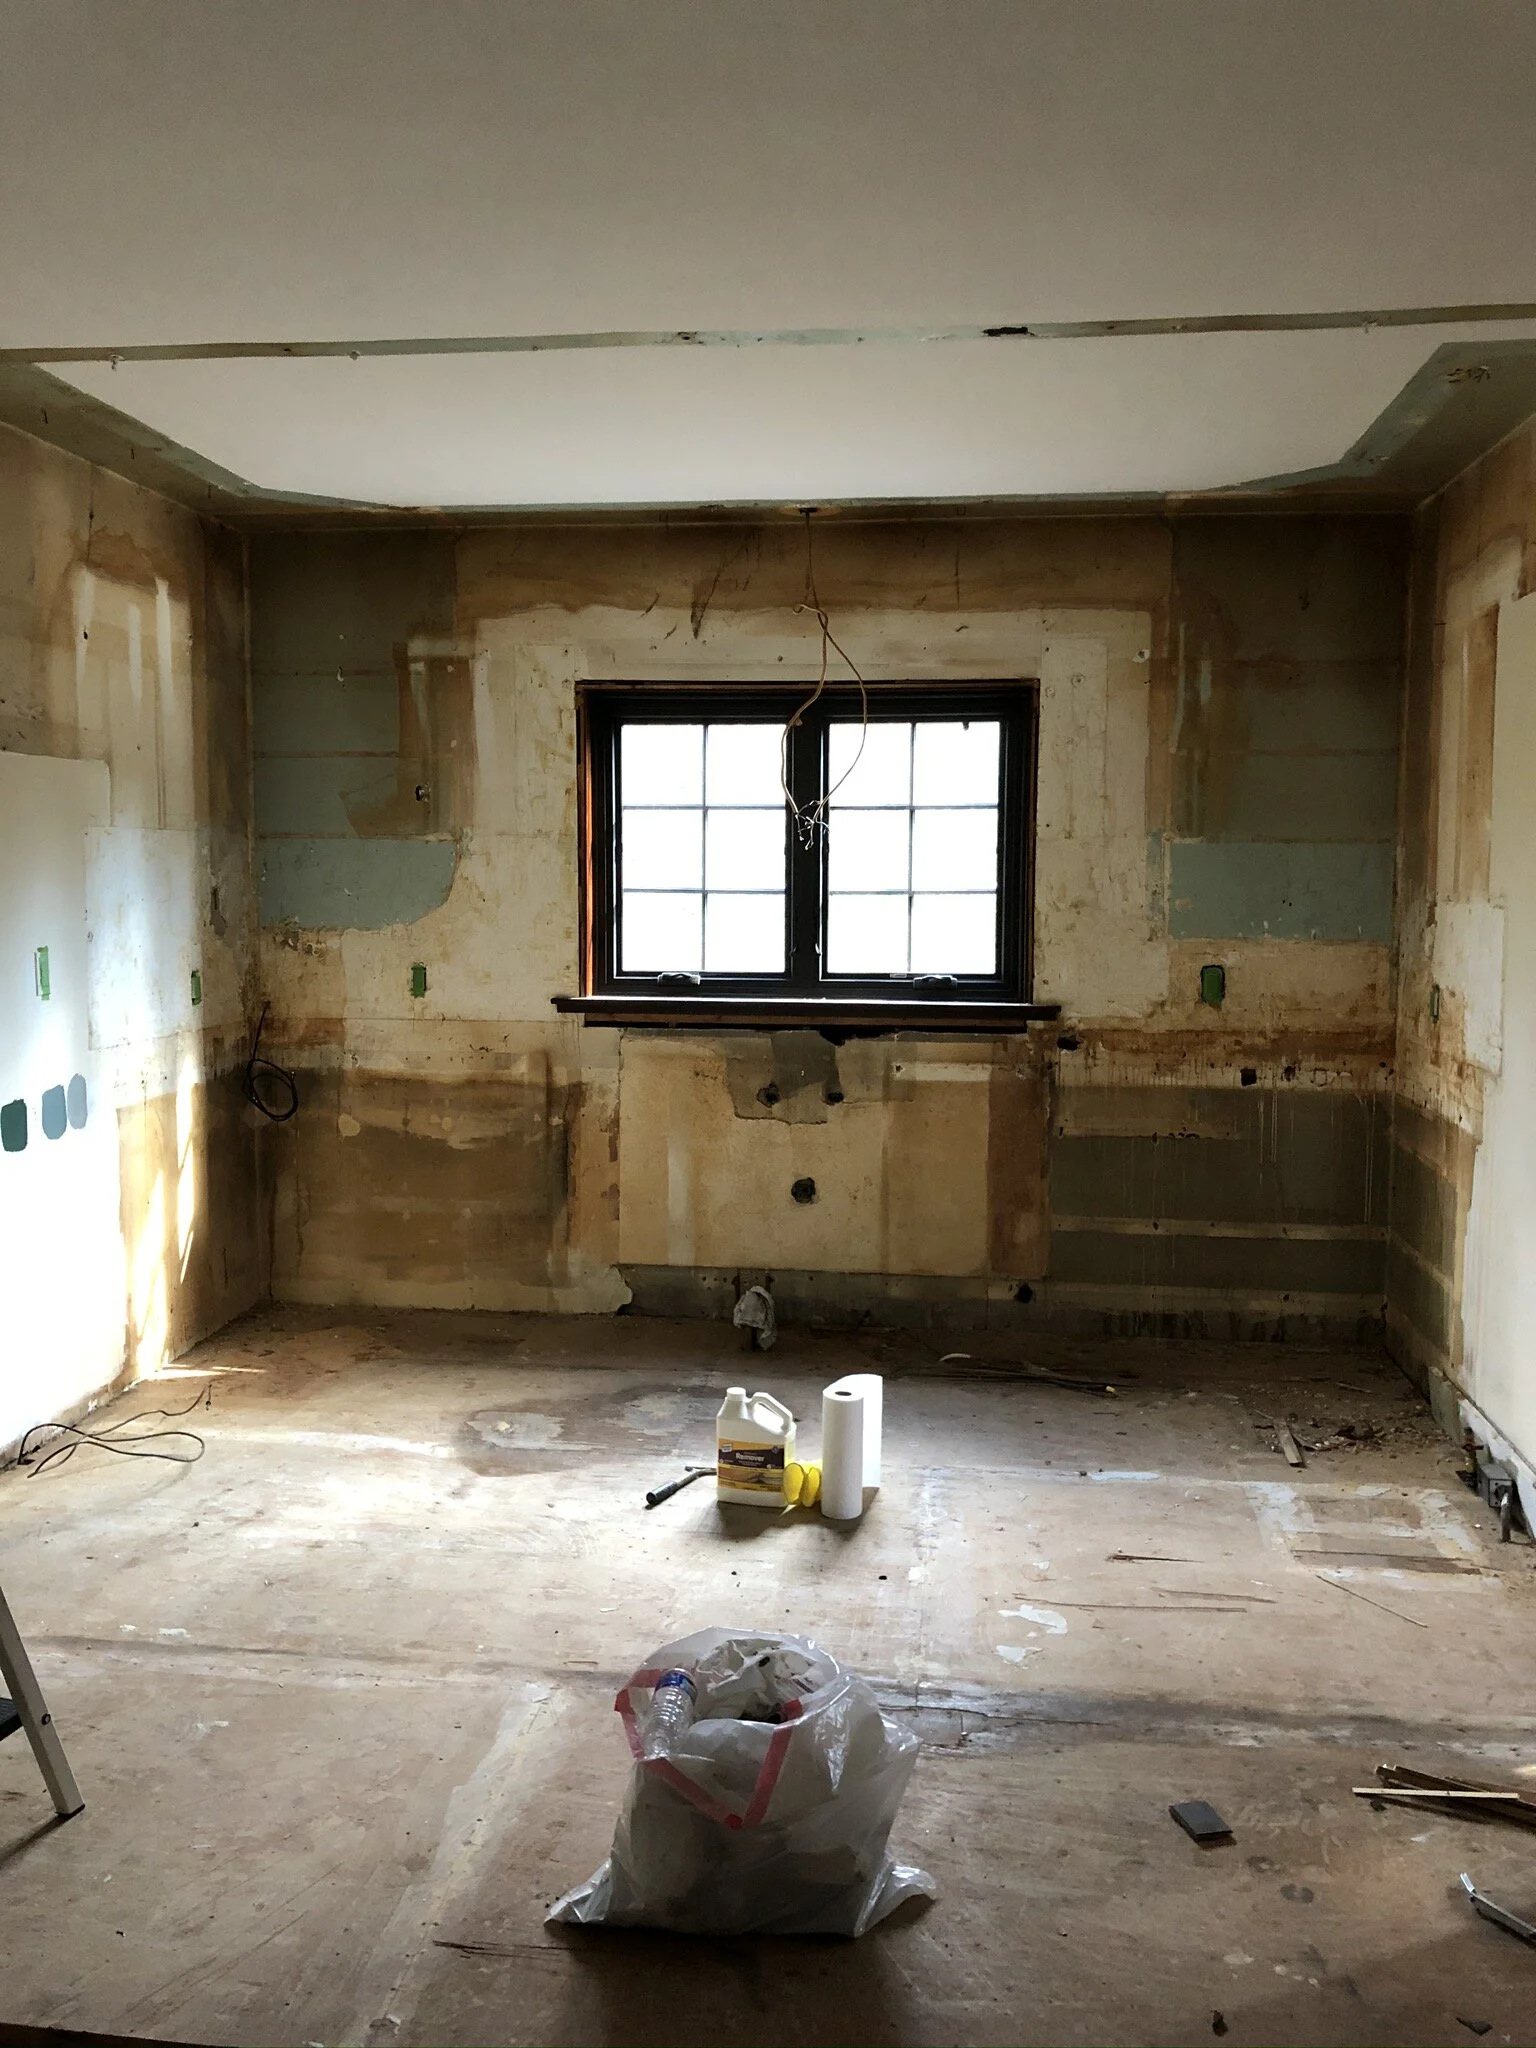
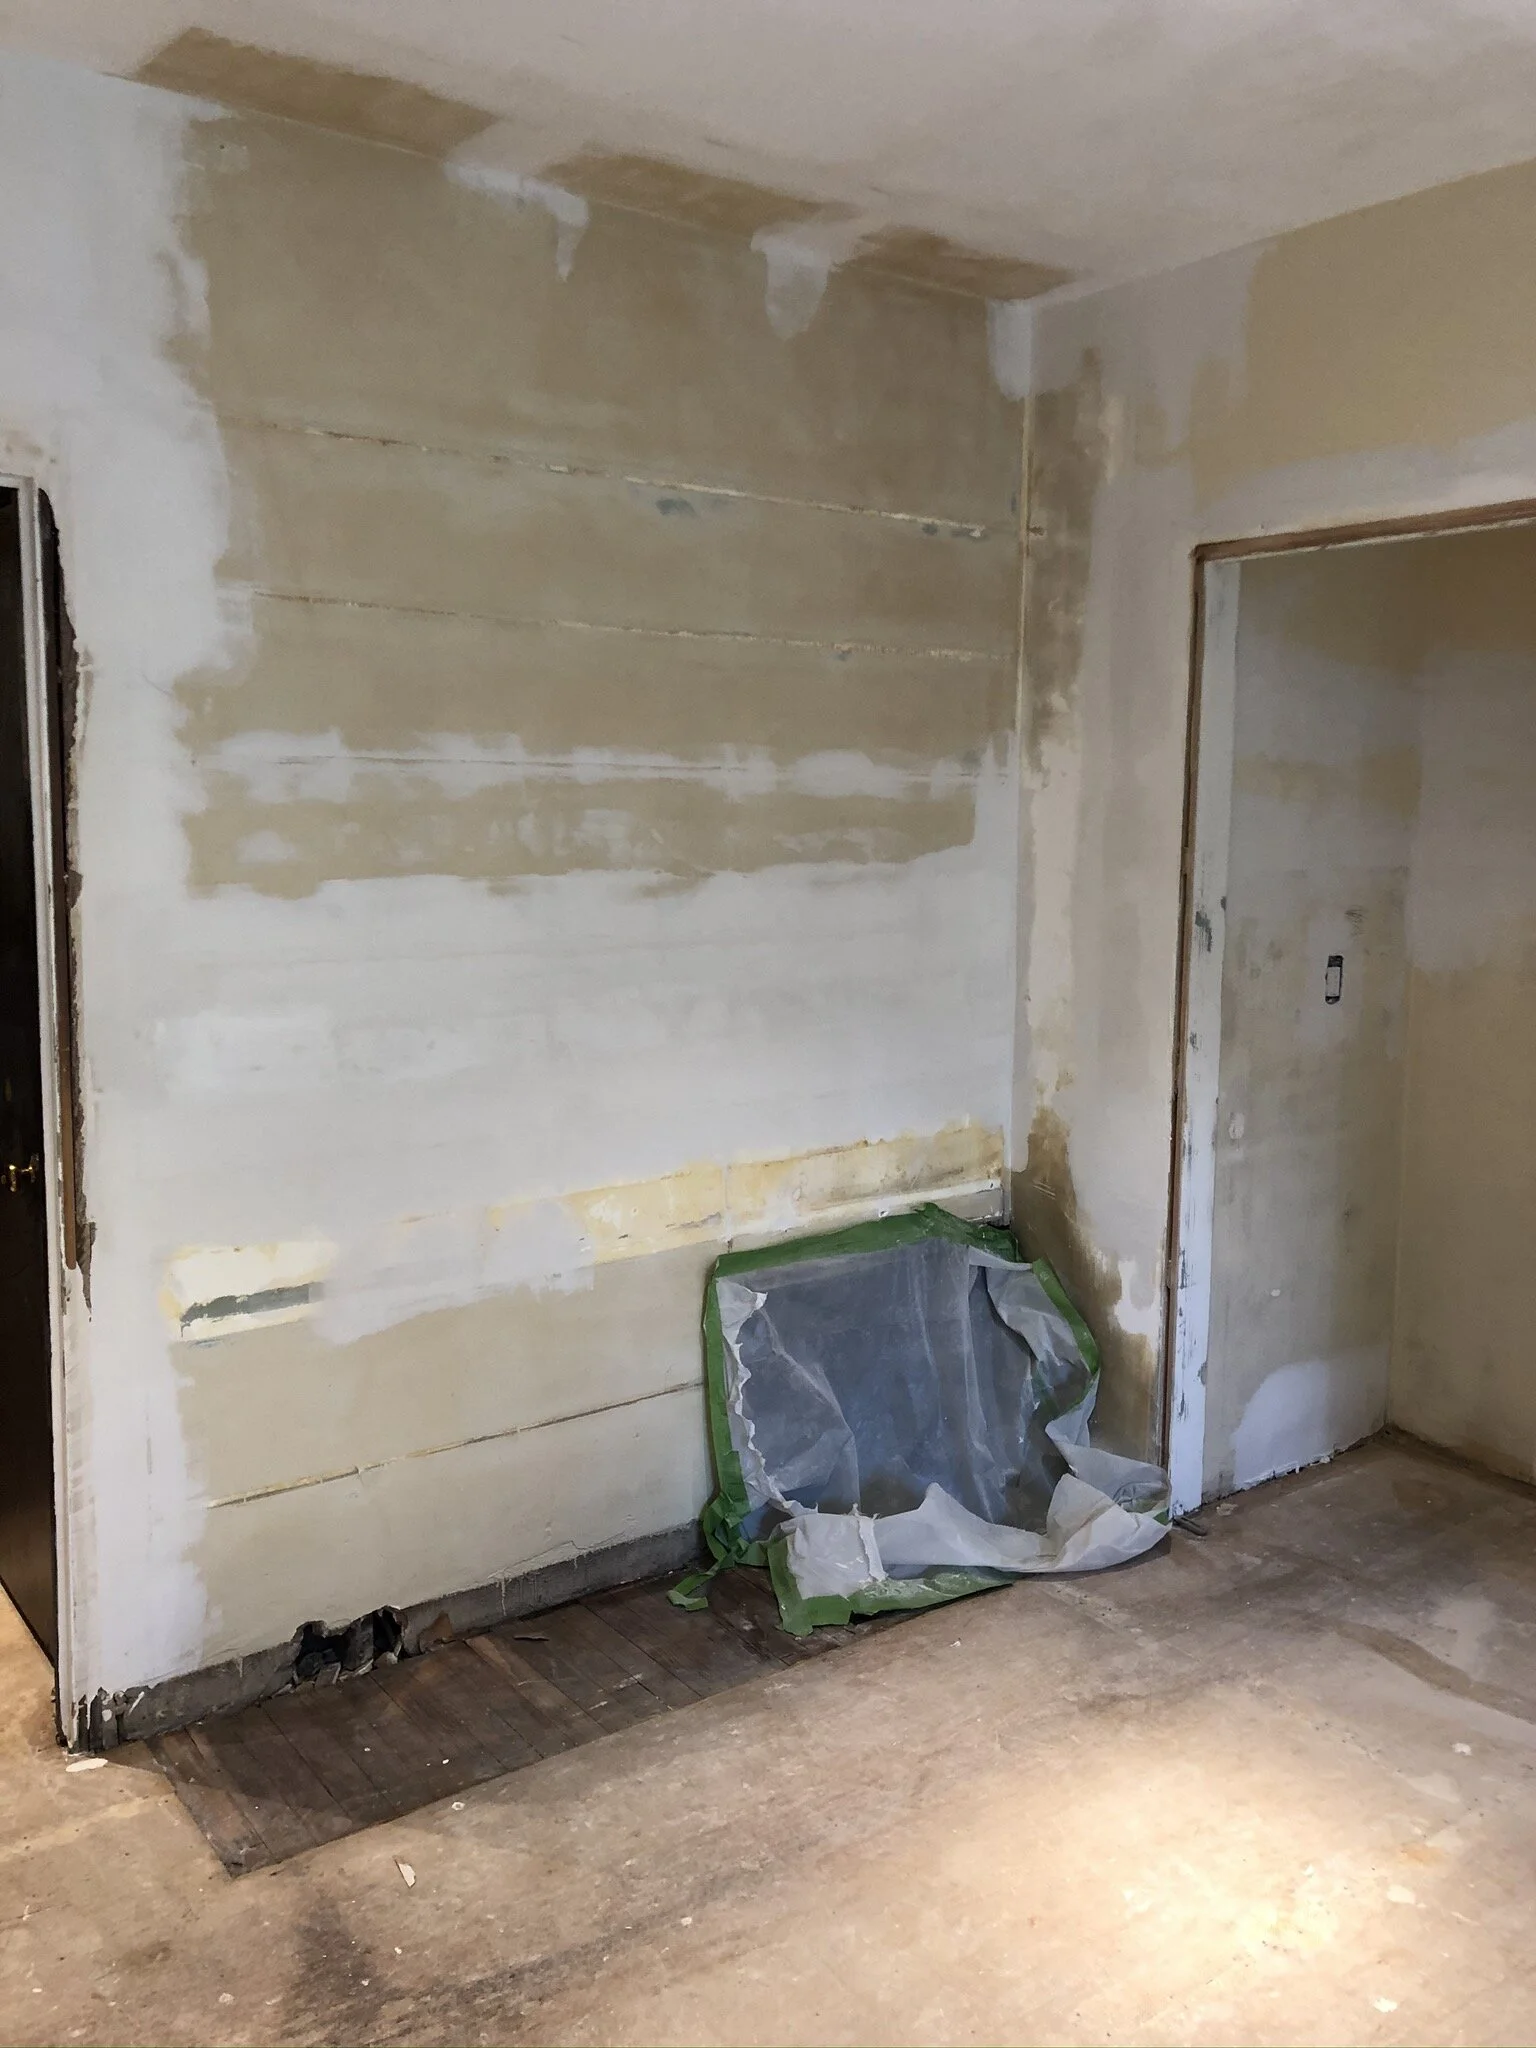
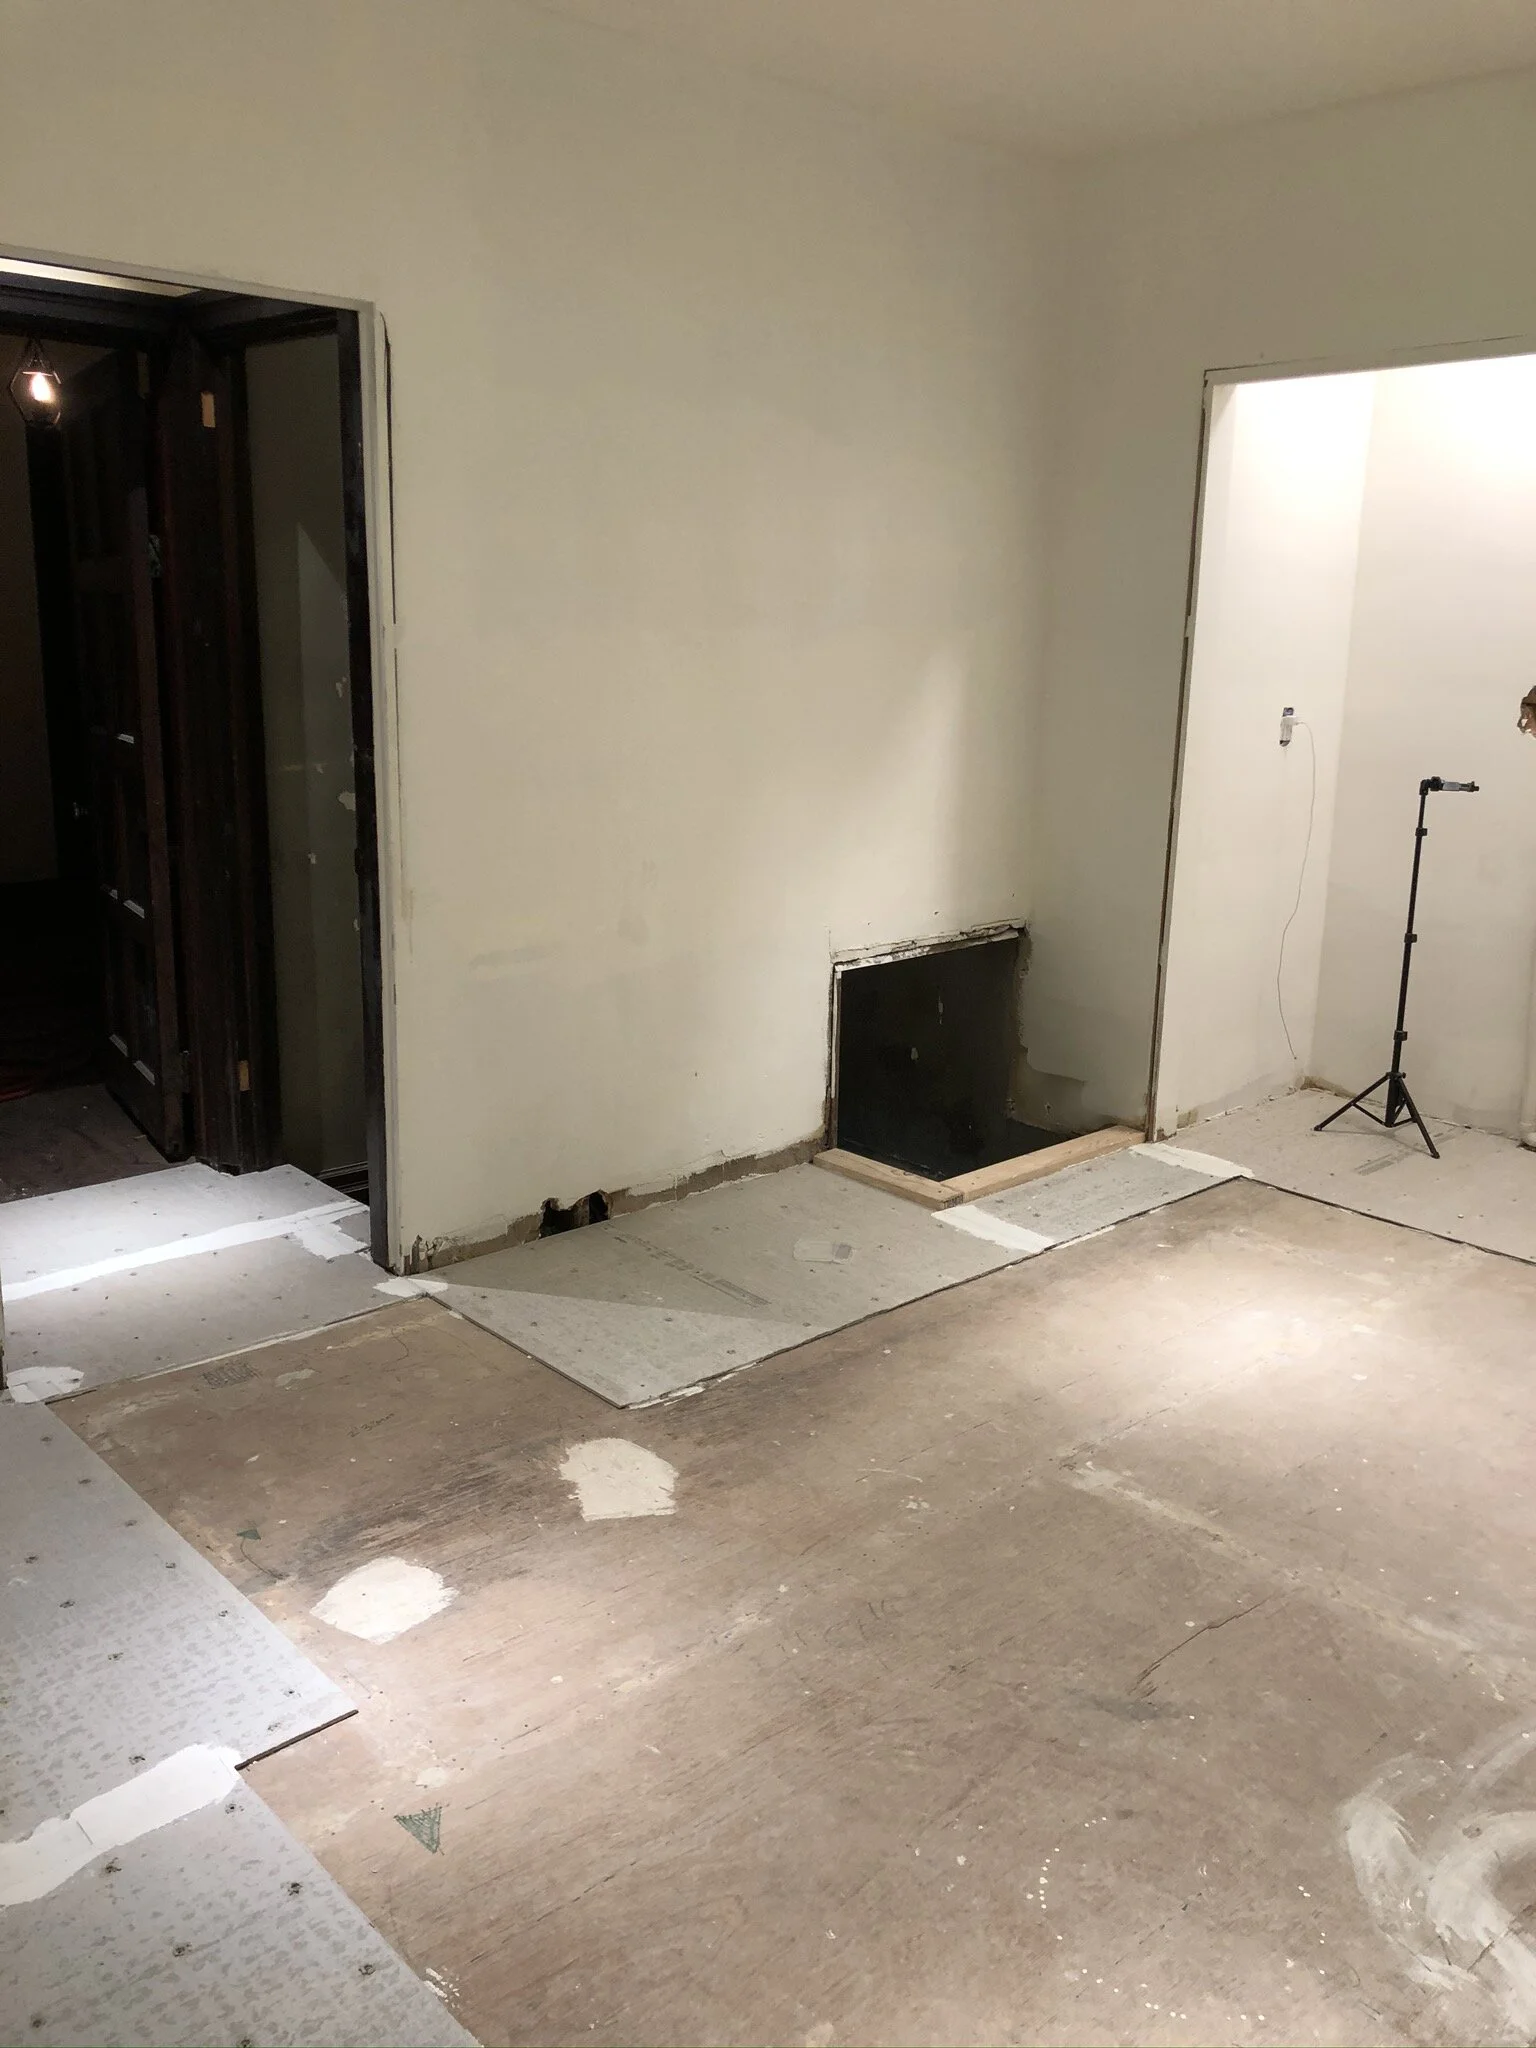
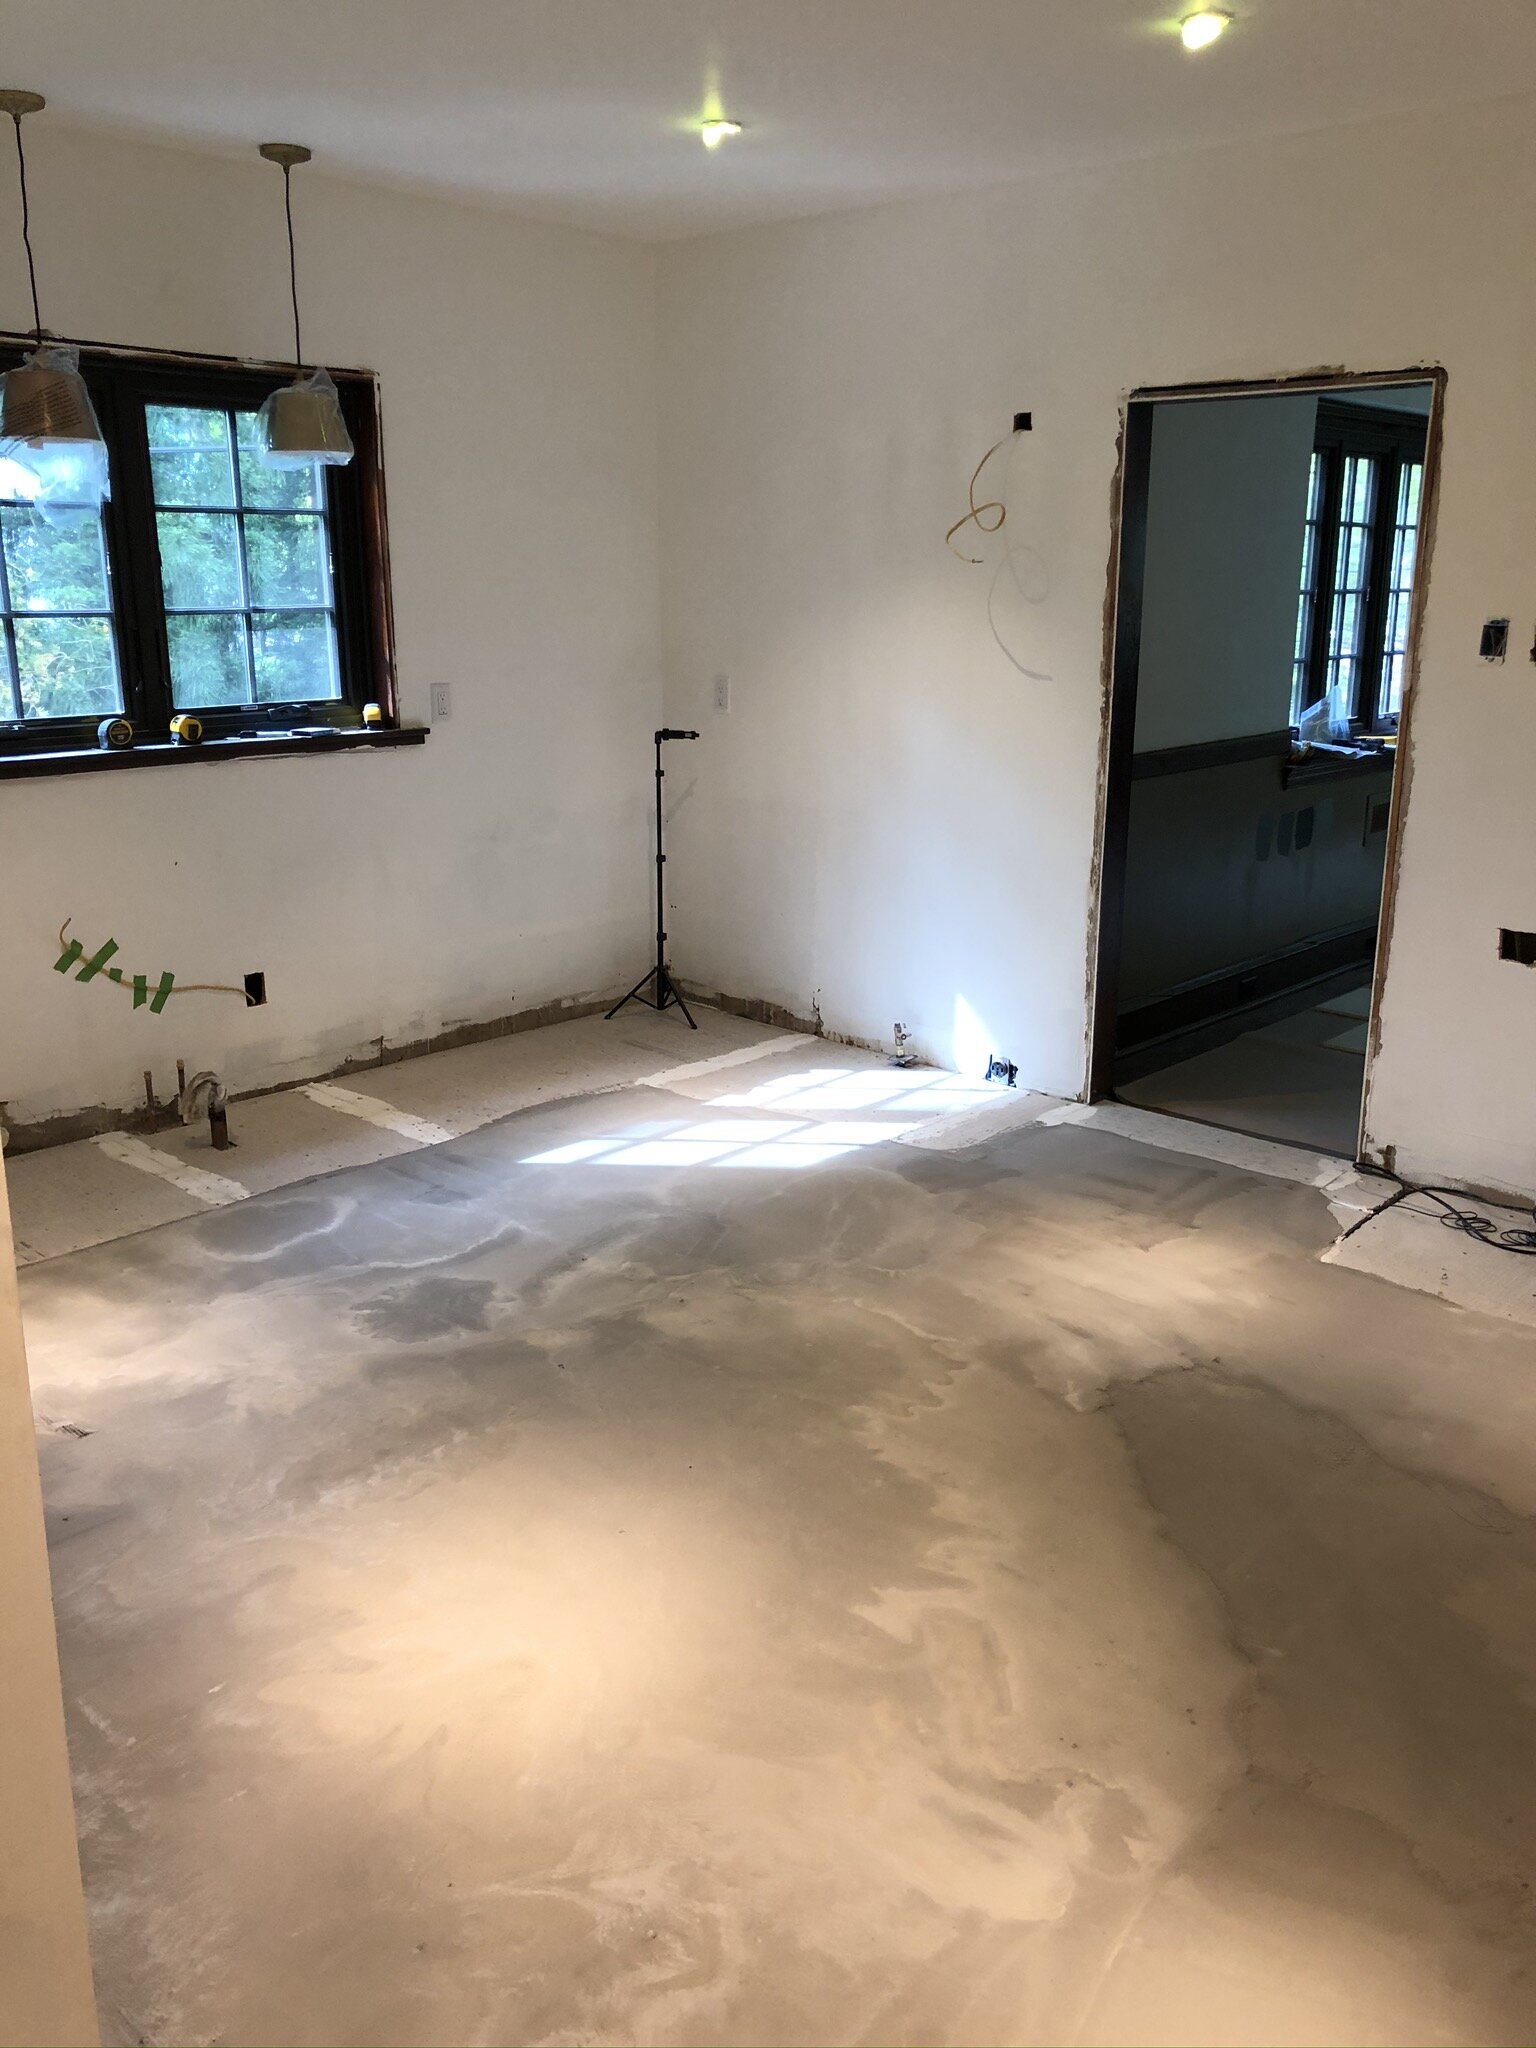
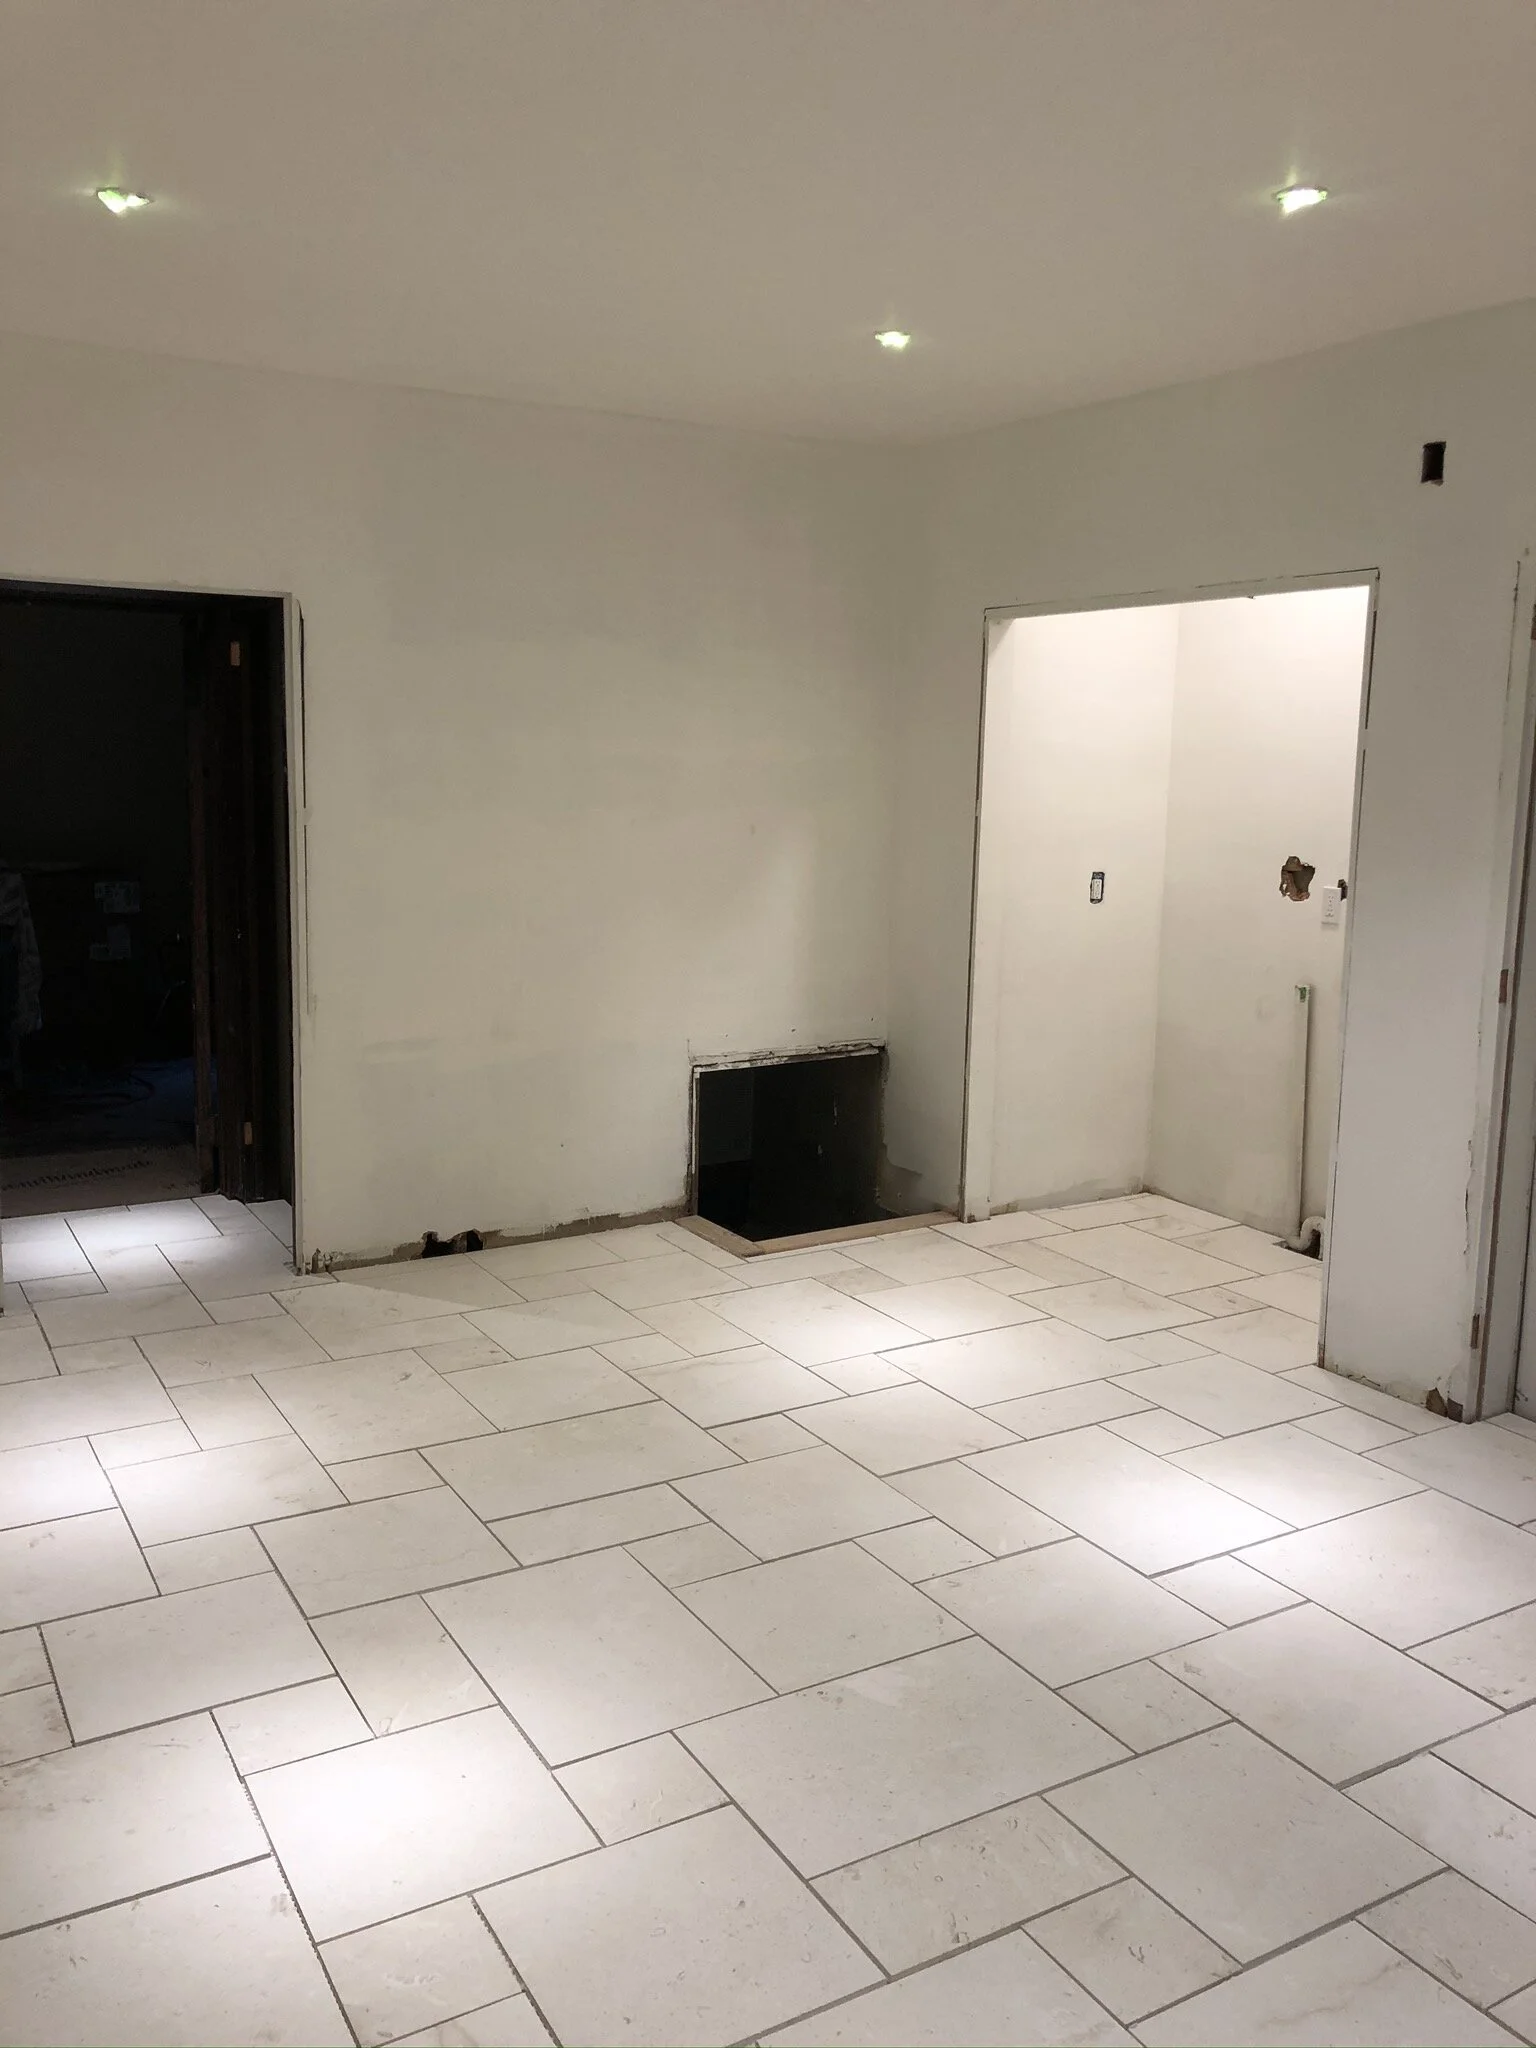
I’ll back up a little to give you some context and thought process. When we first bought this house, the kitchen had a 1970’s wood laminate down. It was in decent condition, but having moved from a fully renovated old house with gorgeous real hardwood throughout, we weren’t so inclined to like the fake stuff. Then we started demo-ing the kitchen cabinets and removing some trim (as needed in certain areas), and we discovered that the original hardwoods were UNDER this laminate, but also underneath a heavily nailed subfloor. We discussed with a contact who knew the two previous owners and found out that in the 50’s some tile had been laid down, and then that tile was removed to make way for the wood laminate in the late 70s. So this standard 5mm plywood-esque subfloor was just sitting on top of beautiful hardwoods, but nailed down in about 500+ places. Professional floor refinishers can work a hefty amount of magic, but there was no way anyone was going to cover up that many nail holes and make it look good again. So we had our crying pity party and moved on. The subfloor was in good knick, solid and level – so we decided that tile would be the way forward.


Growing up and having all of our family in the UK, stone floors are pretty darn common in kitchens and hard-wearing areas like entries, mudrooms, basements, etc over there. They wear incredibly well with age, and when you drop things on them (unless it’s breakable in which case, yes, you’re cleaning up shards of plate) then it all adds to the patina of the floor. Kitchens back in the real Tudors of England had stone or brick floors for the most part – so we knew that this look would keep the kitchen feeling connected to the rest of the house. The worst thing we could have done was install something that didn’t blend with the old-world character that radiates from all other corners of our home.


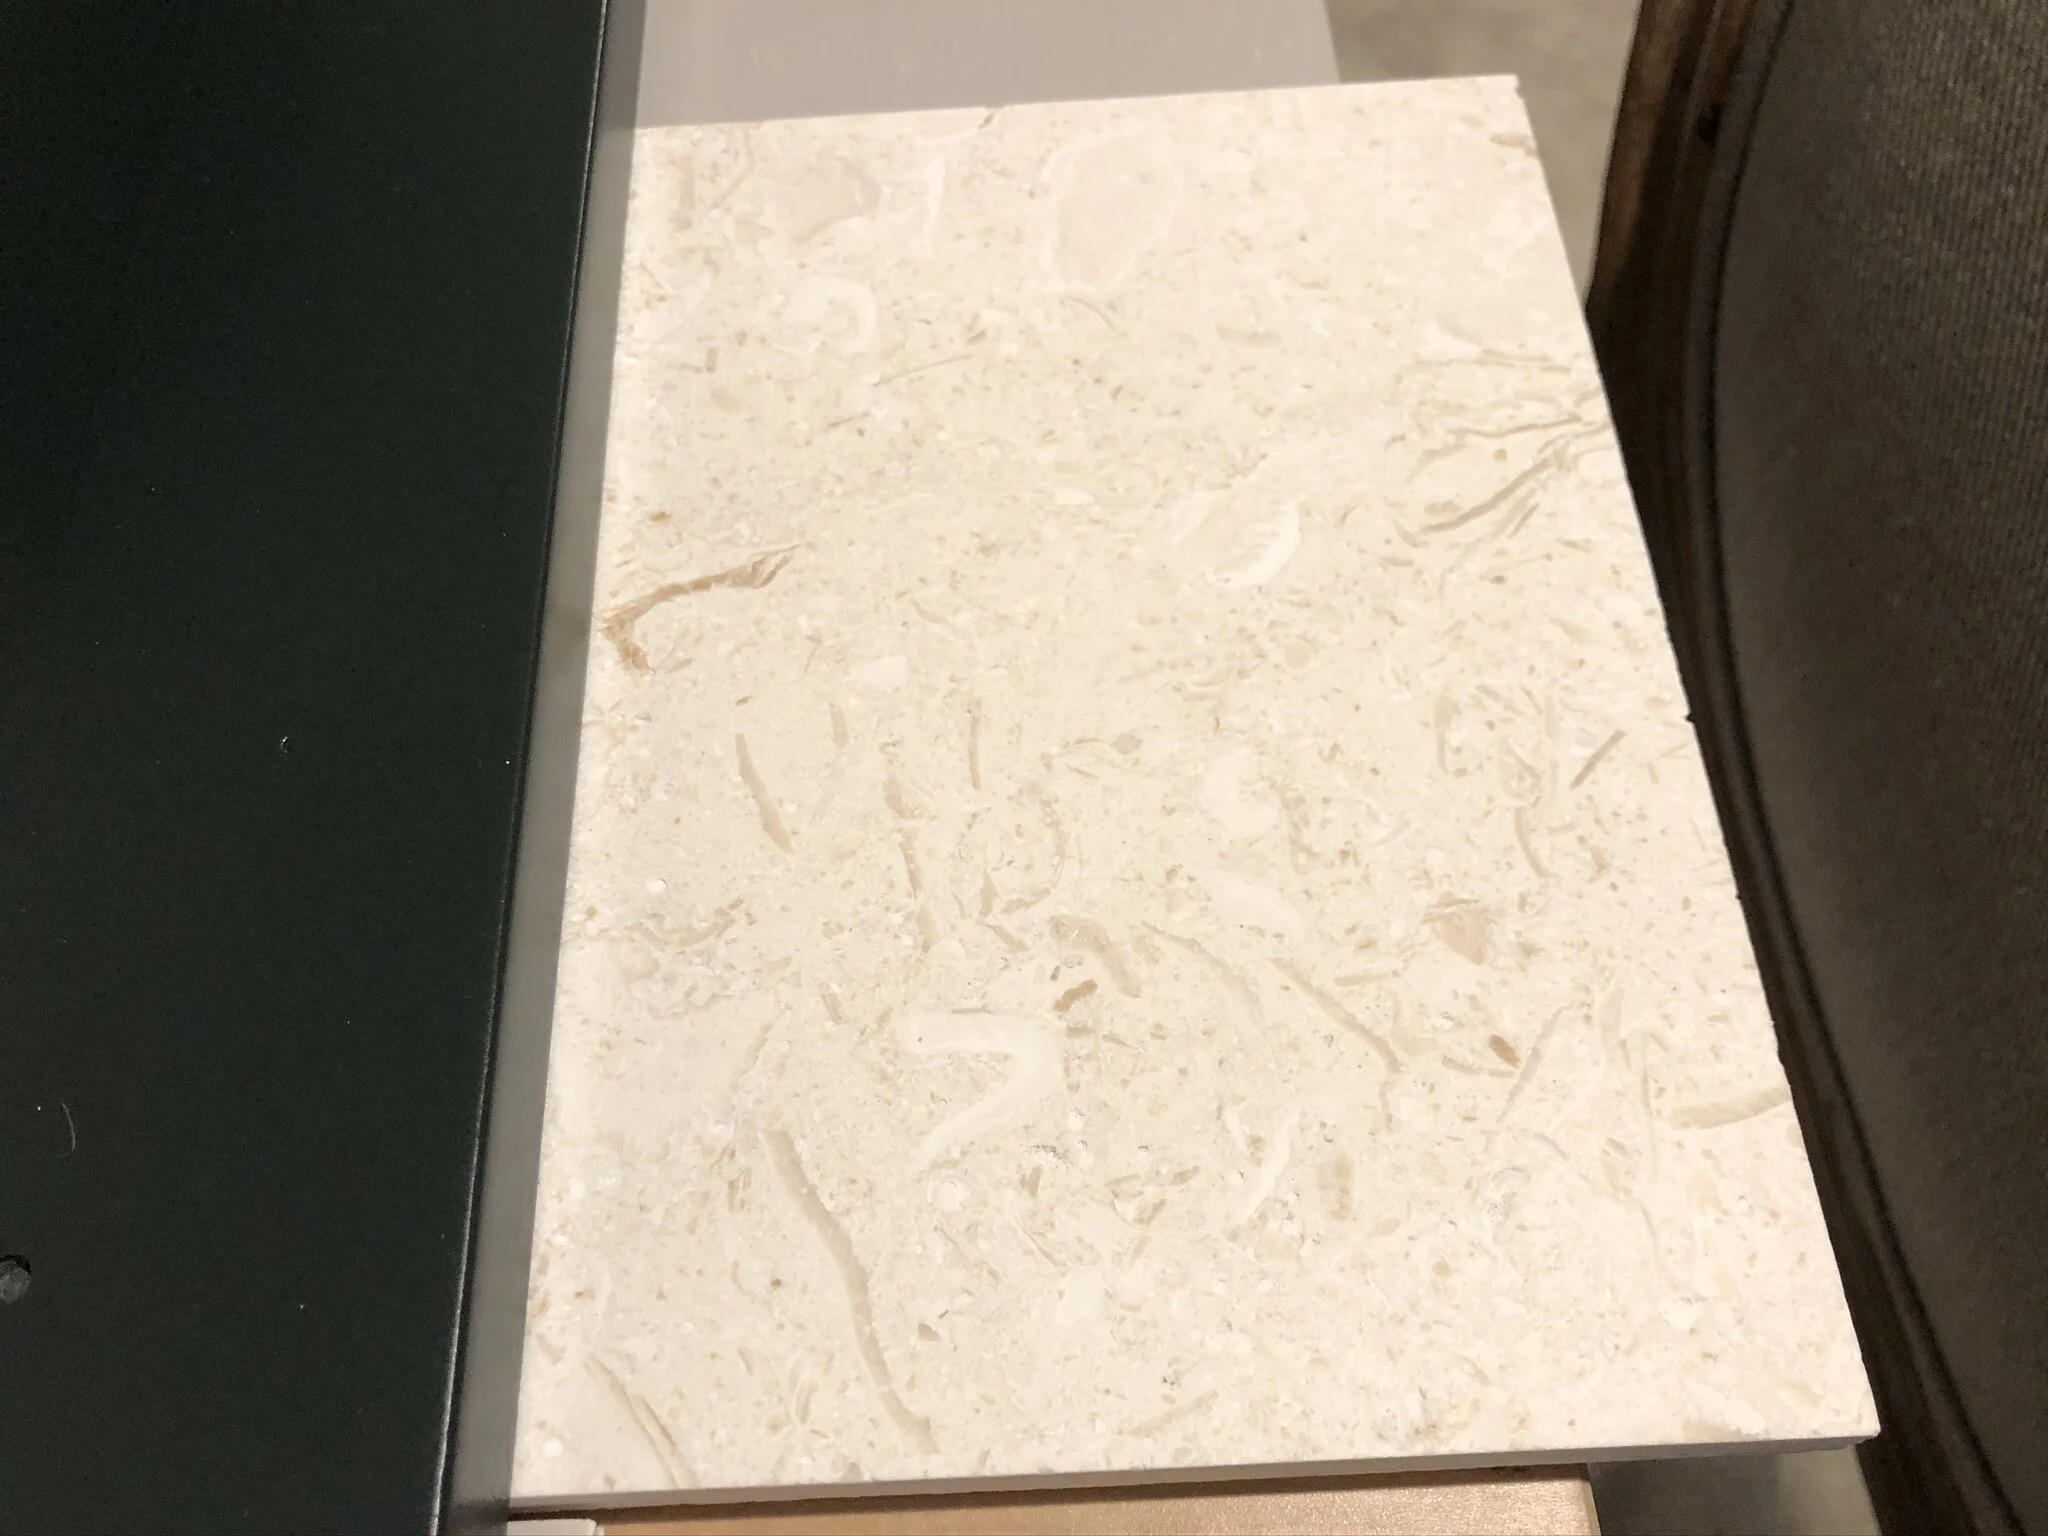
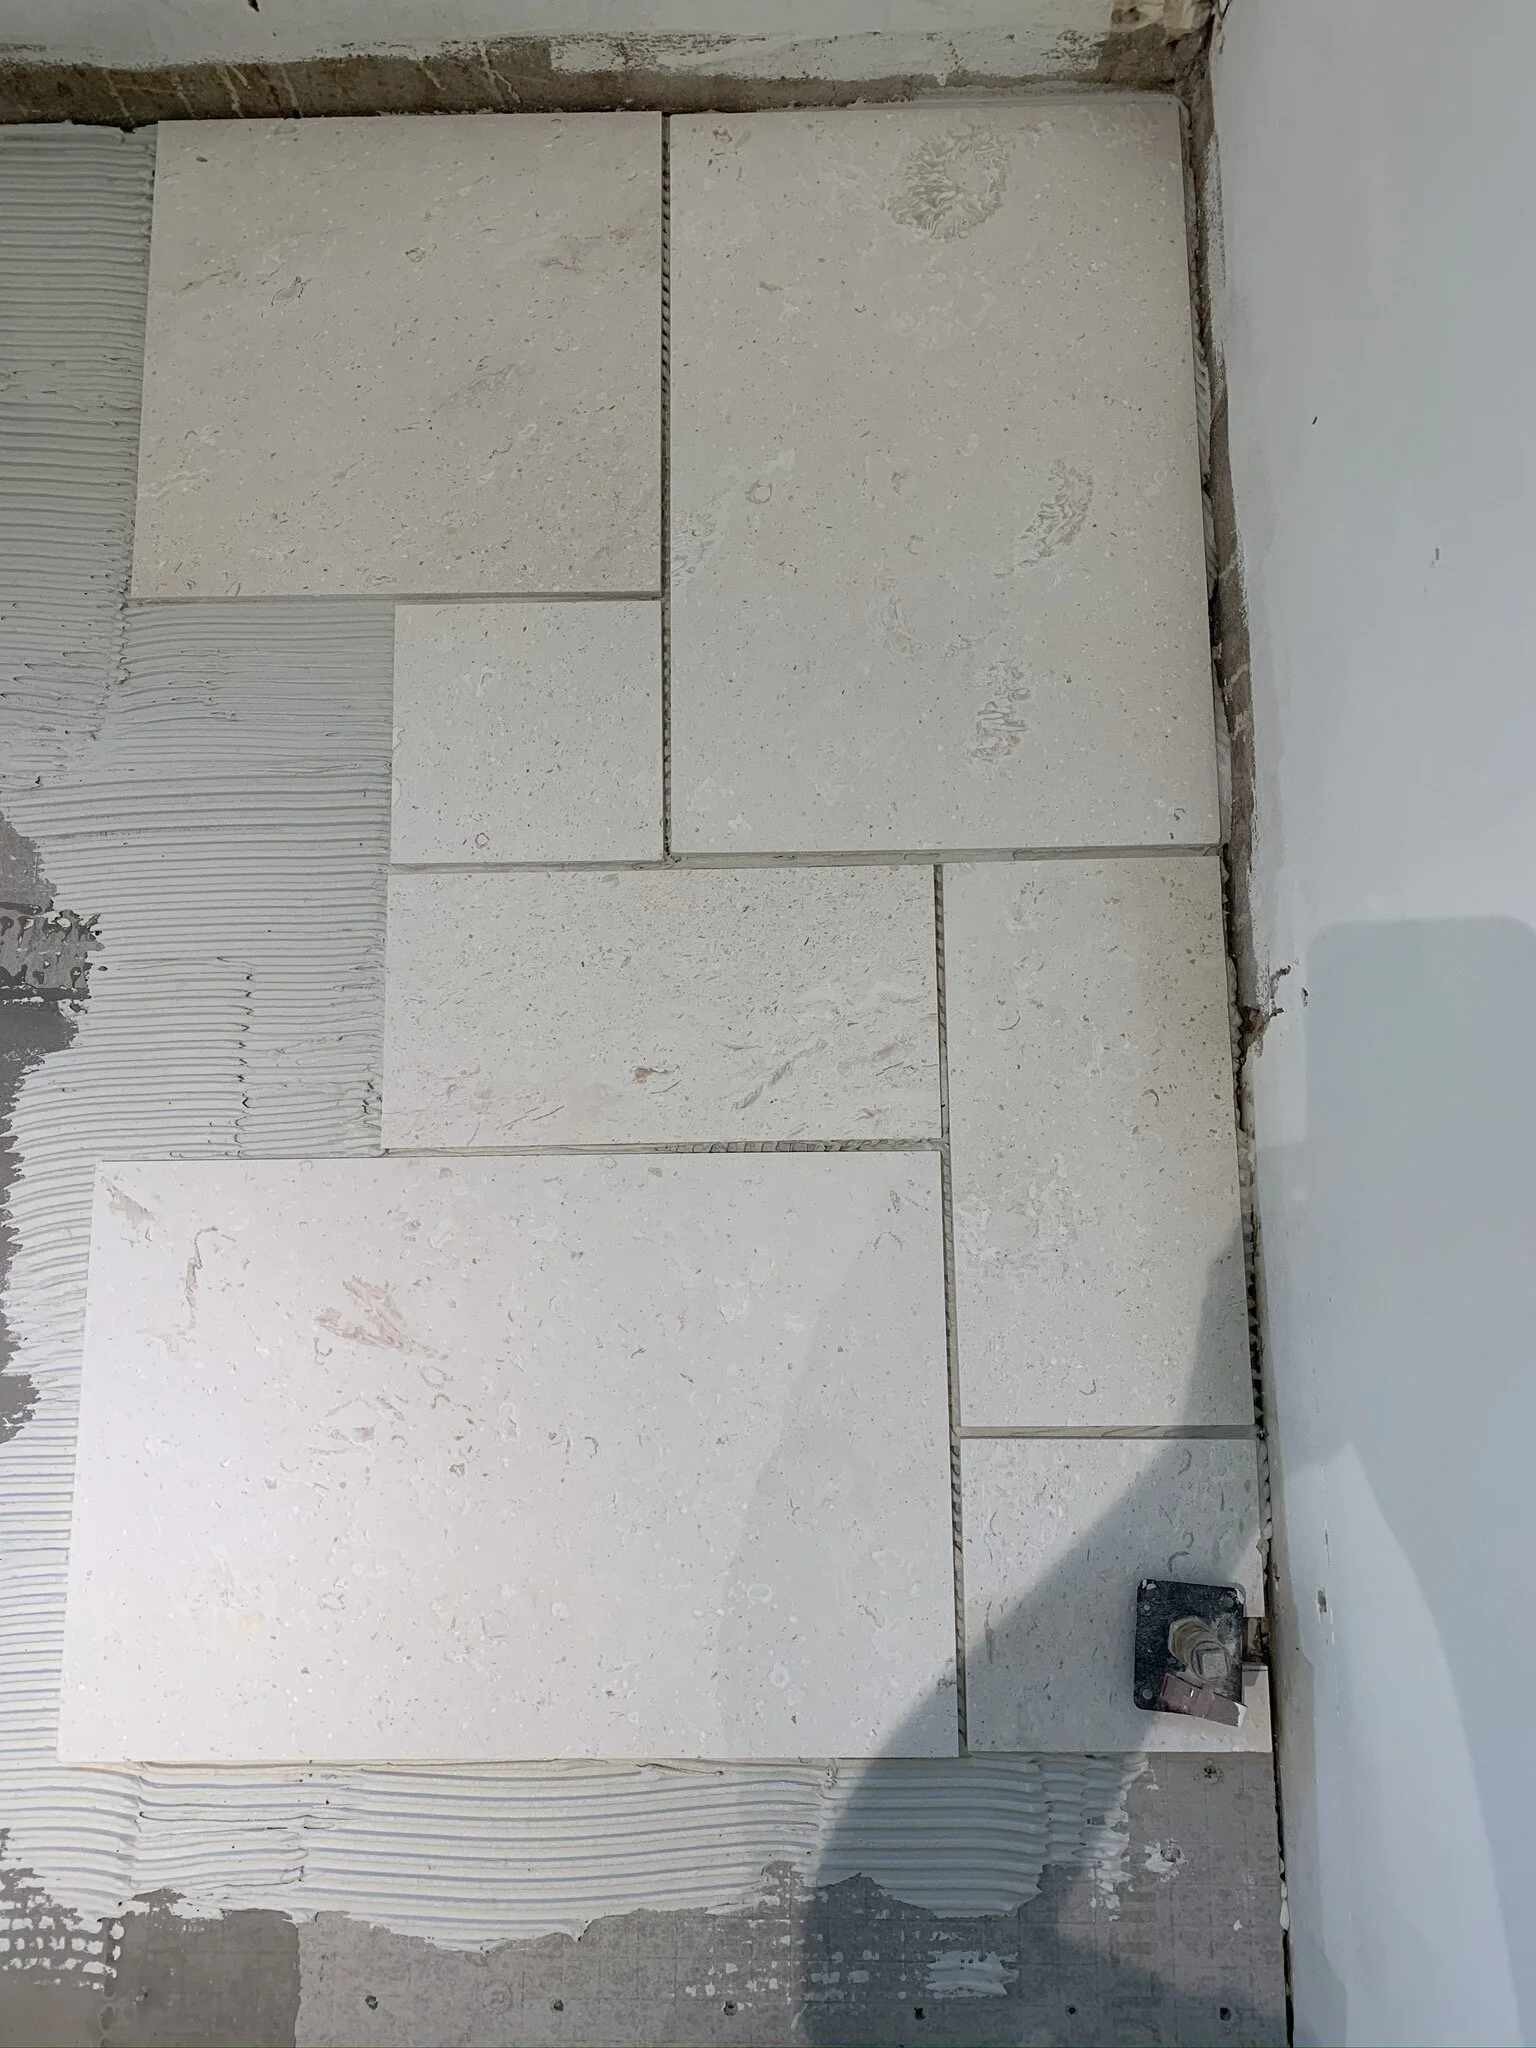
So we searched and searched, and searched for real stone floors. We didn’t want marble because of expense basically - funnily enough we did find this one which we LOVED but the $36K price tag had us keeling over. And most stone floors in the UK are using limestone anyway – so that’s what we focused on. We did contact Floors of Stone (DeVol owned) to find out if we could get some shipped over from the UK…the answer was yes and the price was relatively good which surprised us. BUT… we would also have had to arrange our own freight company to pick up the stone at the USA port of entry (New Jersey), customs could have been a nightmare, and then COVID hit and everything went tits up anyway. So, we opted to find something Stateside. Thinking time was of the essence, we ordered various limestone samples from Floor & Décor, Wayfair, and WallandTile.com. Our decision making was based on (1) balance with the Studio Green cabinet colour, (2) dimensions of the tile and weight on the floor and (3) ease to lay – e.g. mosaics often come with varying height stones which make them hard to keep level. All those factors together we chose “Fossil Limestone” from Wallandtile.com and then waged a healthy debate between their tumbled and brushed products. We really wanted a tumbled finish which has a more wavy, rustic edge versus a flat straight edge, but the tumbled sample looked stark white compared to the nice beige tones of the brushed sample. A phone call or two to the company had me even more confused – they assured me it was the same stone but just a different finishing technique, but I couldn’t get past the 8 shade difference between them. They even sent me photos of each batch in the pallets before we ordered, but those photos weren’t the best and still didn’t inspire me with confidence. So, we played it safe and ordered the brushed. I will note – upon arrival of the stone, there is in fact a huge shade difference between different tiles. We actually really like it now – but I’ve never seen quite that extent of variety before!!

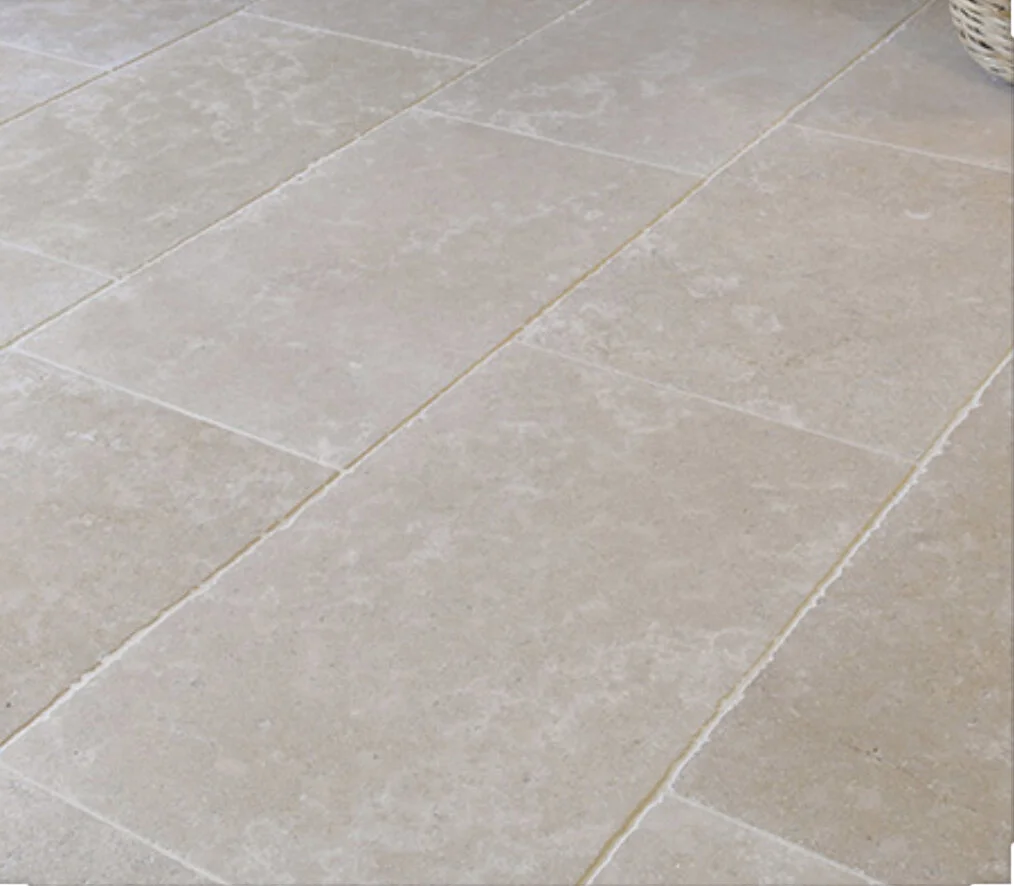

The next decision we had to make was tile pattern. We put it out to the masses on Instagram to decide between 3 patterns: large format basketweave (using 18”x24” tiles), a standard “brick thirds” lay, or a more intricate “Opus” pattern, also sometimes referred to as Versailles or Venetian which is essentially 4 different size stones – 2 rectangles and 2 squares, laid out in a non-linear pattern that intersects perpendicularly. Sounds easy right?! We had a favourite already, but we were curious… turns out most people suggested the large format basketweave. But if you’ve spent more than two seconds following us, you’ll know we like to choose THE MOST COMPLICATED thing possible and do that. So we went with Opus. We only have ourselves to blame… I will say though, this decision was heavily influenced by the ability to buy the stone from Wallandtile.com already pre-cut into the 4 different sizes. We knew this would reduce the tile laying period by a day or two not having to cut every stone to the right size – and now after the fact, we would 100% do it the same way again.


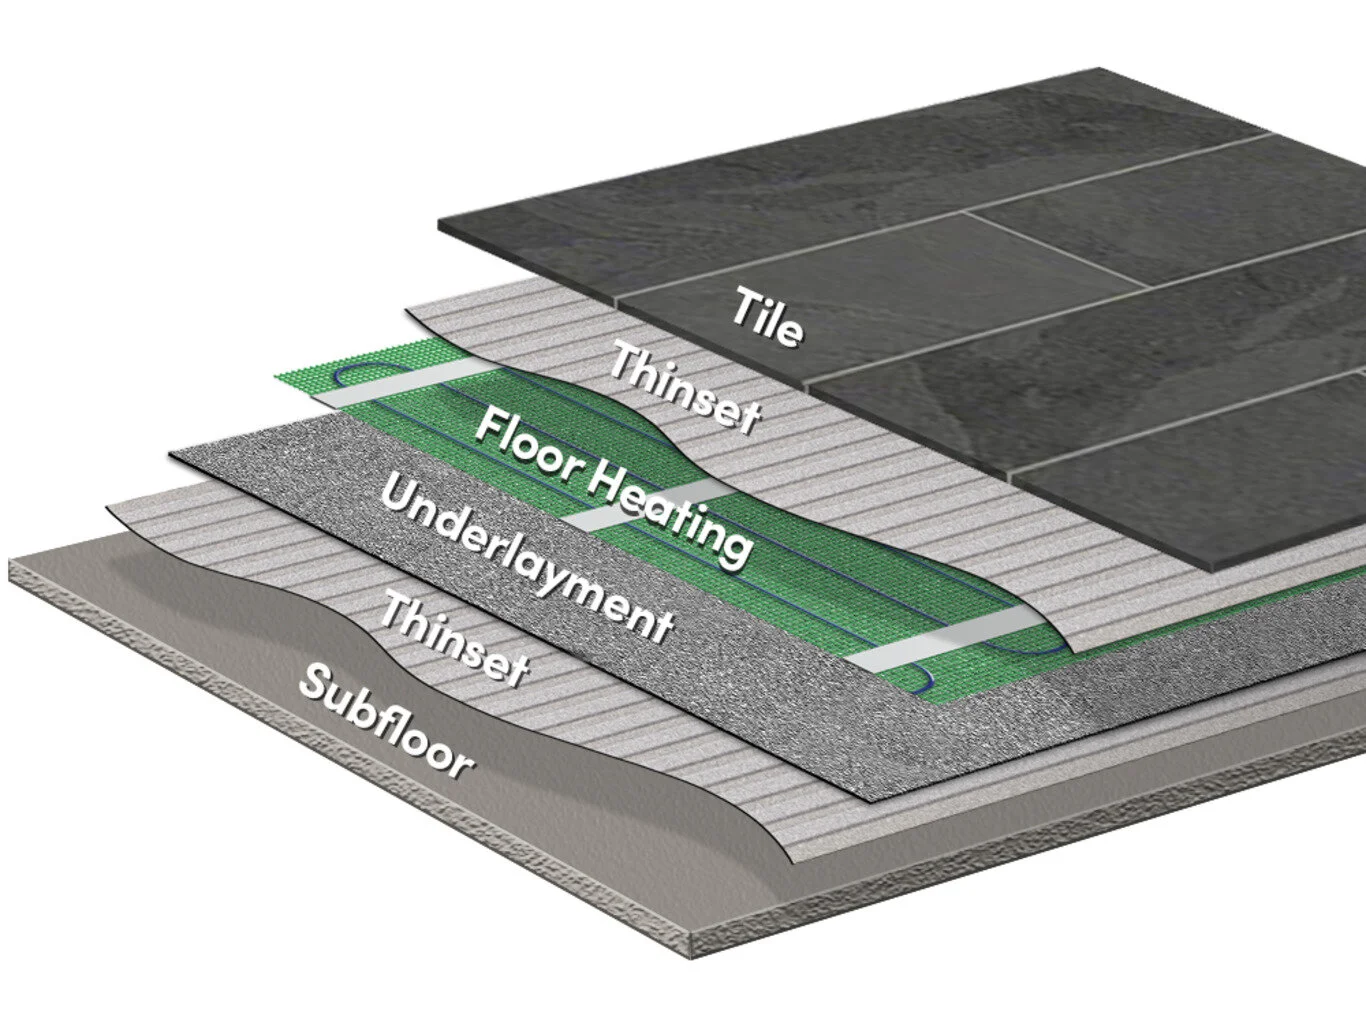
As all this was occurring, we were working behind the scenes with WarmlyYours to hash out the details of the radiant heating floorplan. I’ve written a whole separate detailed post about that planning process and our partnership, so check that out if you want the complete low-down. In a nutshell, we were connected with an awesome project manager on their end who took our kitchen plans (which changed at 3 different stages), and customised a tailored heating mat plan using their TempZone FlexRoll system which is perfect for DIYers. Their custom plans take into account your specific square footage, cabinet and appliances layouts, etc so that the floor is heated only in open areas (i.e. nothing permanent on top of the floor which can cause fire hazards). And each mat is tailor made just for you with its own specific resistance, voltage, etc to ensure you get consistent heat across the area you desire. Simples!


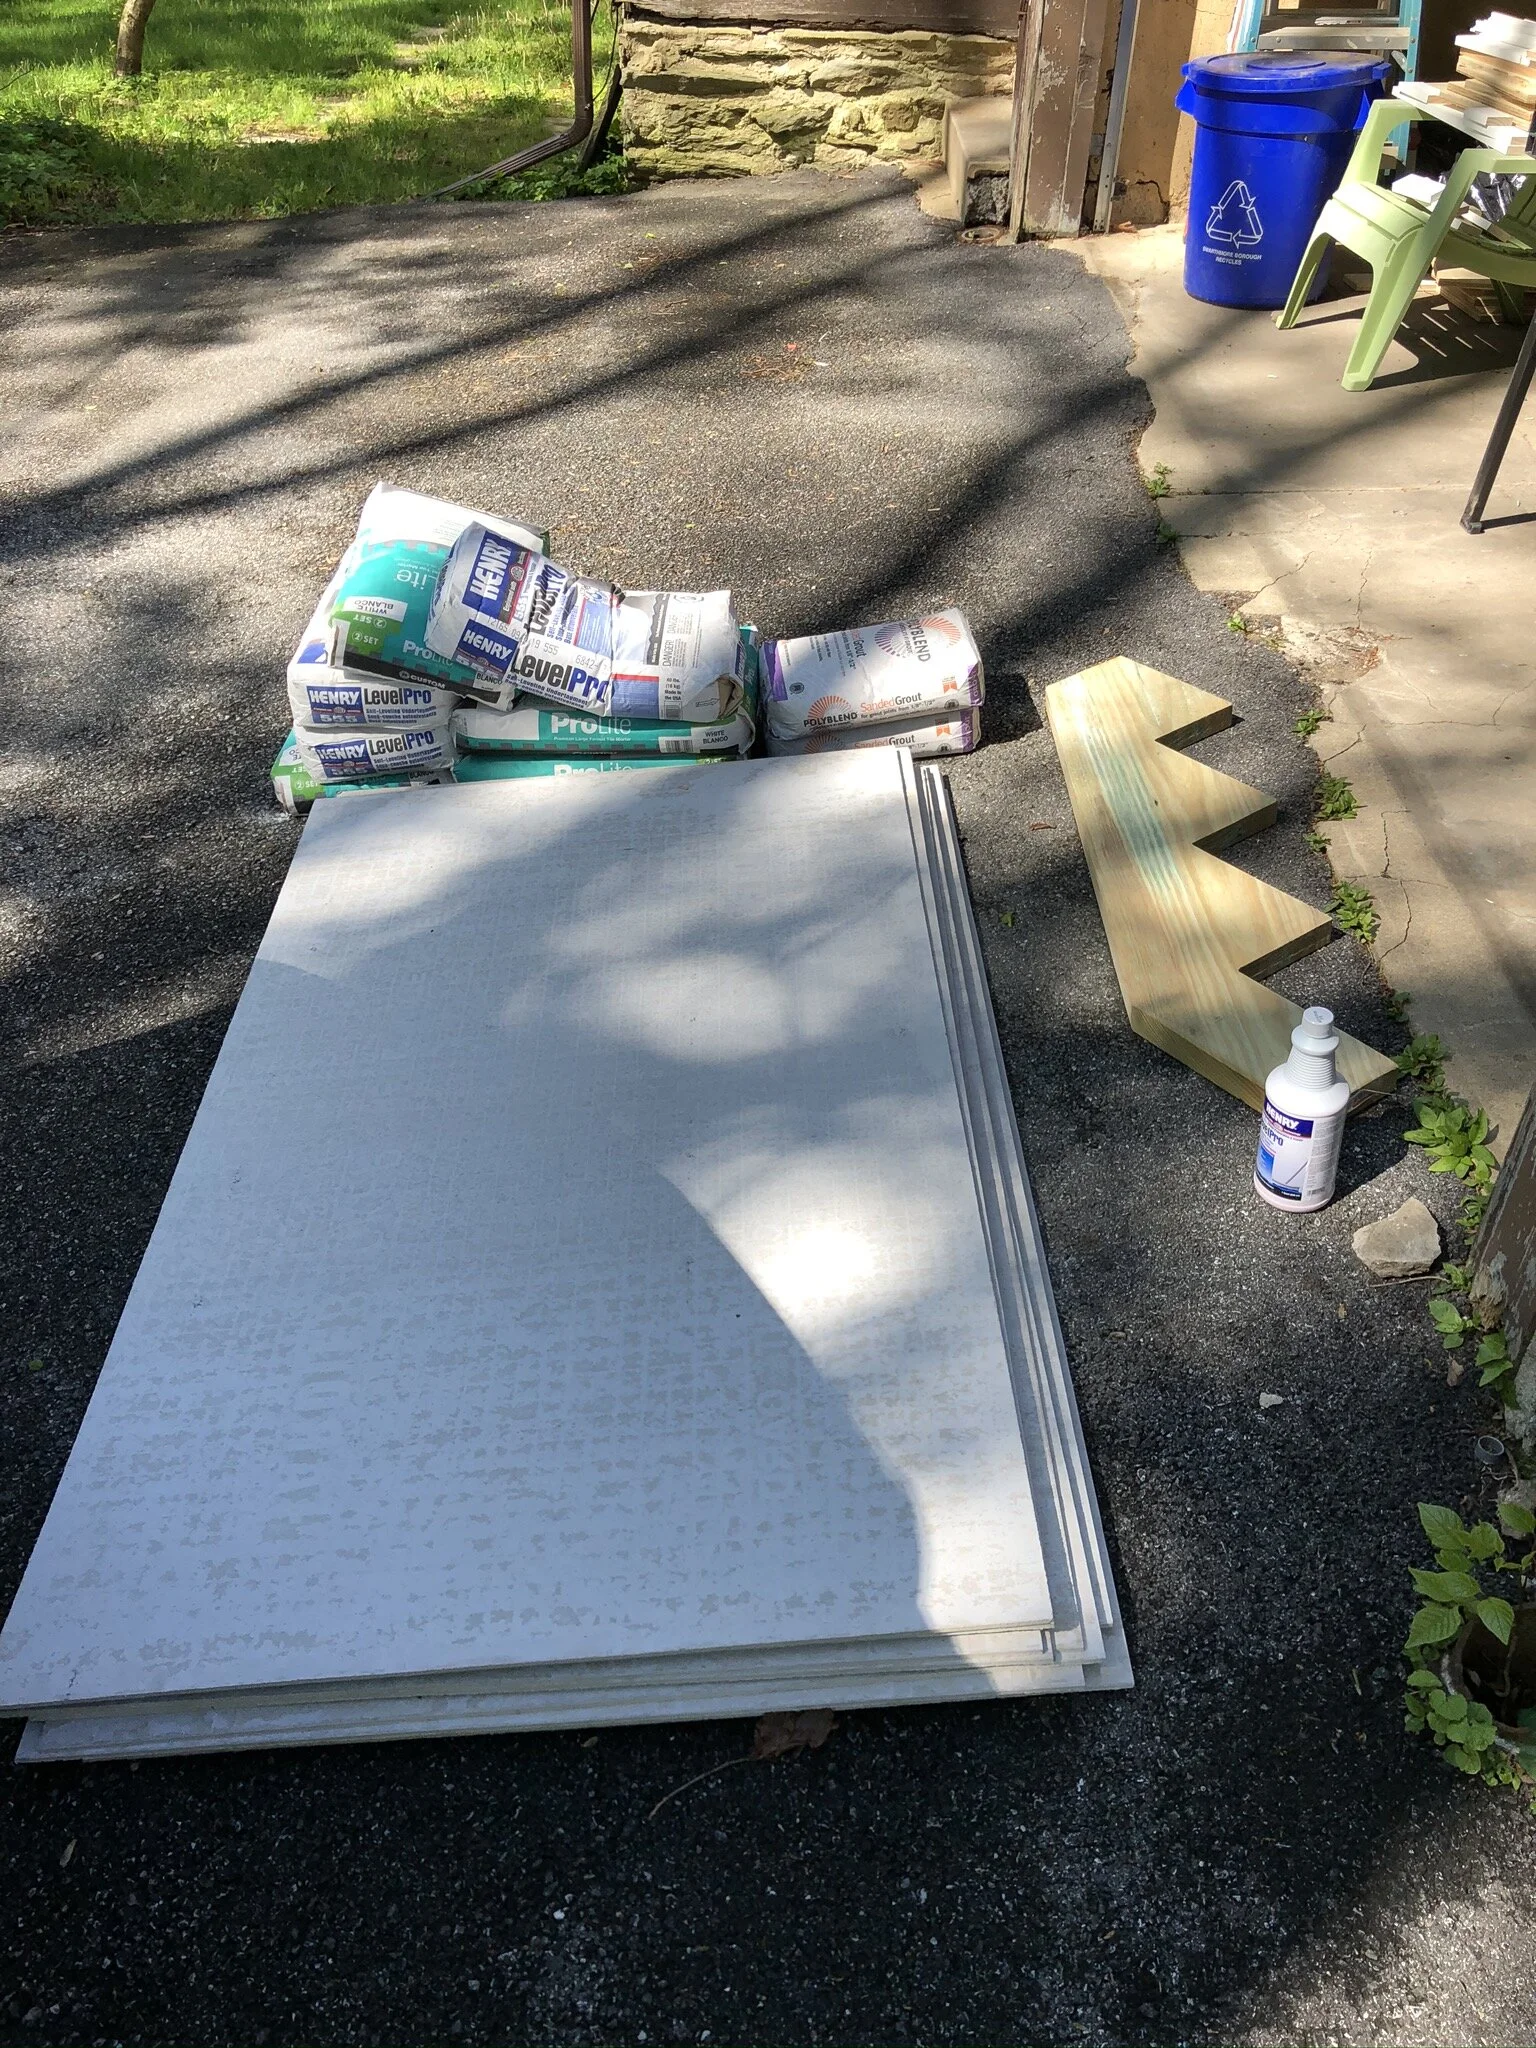
With the plan in hand, research on how to lay it all done, and the mats winging their way toward us, we got down to the file hurdle – which was gathering all the accoutrements needed for laying floors. We required HardieBacker, copious amounts of Self-Levelling Underlayment (cement), copious amount of thinset (mortar), cutting tools, spacers, self-levelling primer, buckets and more. Being the good little homebodies we’ve tried to be (#stayhome), we ordered it all from Home Depot with delivery arranged to go to our house and drop the heavy and large items in our garage. We set up a day for delivery and then planned our 4 day floor laying event for two days after that delivery, including arranging days off of work for Stu, babysitting from the grandparents, food shopping etc. Well… they phoned us THAT MORNING… to say that it was going to be another 5 days before they could deliver. ARGHGHGH. Many expletives were uttered / forcibly yelled. Stu got angry on the phone (which he never does). And we delayed our floor extravaganza for another week. Whomp. Whomp.


Fast forward to last Thursday (May 14, 2020) and we were ready to finally dive in. We knew a solid 4 days would be the best and fastest way to keep ourselves motivated and get to an 80% completion zone for the floor. Spreading it out over multiple weeks would only have caused us to take our time more and further delay the rest of the kitchen progress. By putting this pressure on ourselves to complete X amount of tasks each day, it meant we were driven to get to the next step and finish it because we HAD to. I’ll write a detailed post on the ins and outs of laying every aspect of the floor, but I assume the majority of our ORC followers aren’t so much interested in the gory DIY details as much as the overall process….so here’s the highlights.
DAY ONE
Patch subfloor, clean and ensure hole free. Measure & mark out plans for cabinets, HardiBacker & WarmlyYours heating mats to save time later. Measure & cut Hardibacker. Mix thinset + lay Hardibacker, then follow with BackerOn screws and cement mesh tape. This was an insane day that saw us getting home close to midnight covered in scratches and bruises from the HardiBacker (since it’s fibrous it’s much more difficult to break than Durock). Leave thinset to cure overnight.


DAY TWO
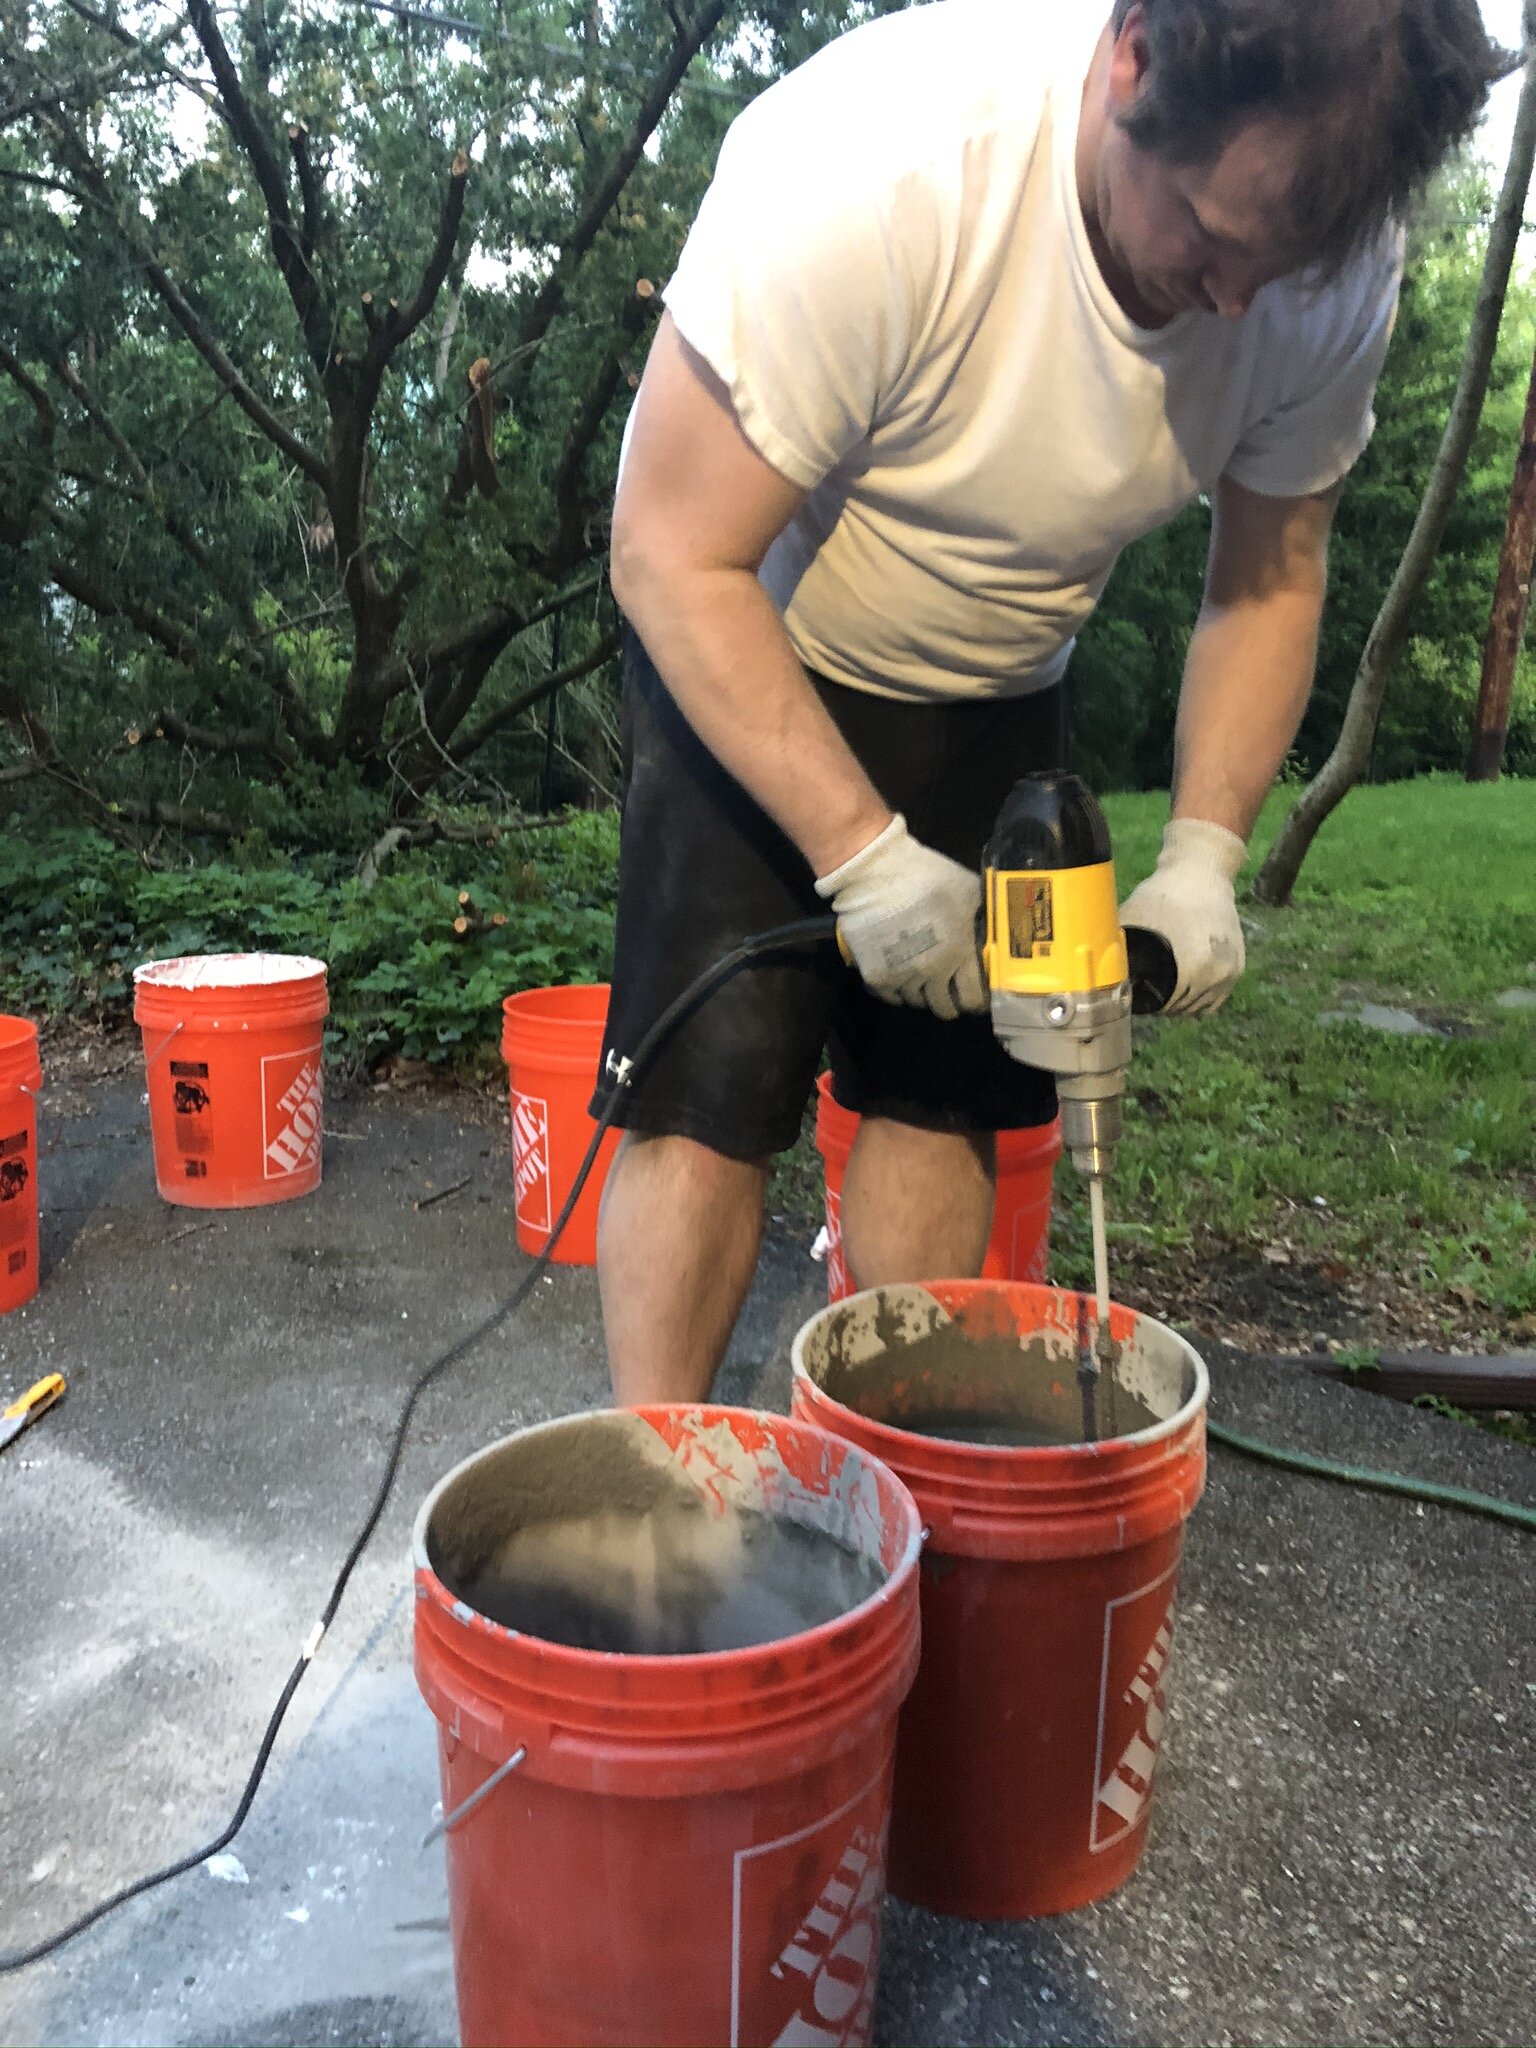
Caulk edges of Haribacker. Measure & check heating mats electrically. Lay heating mats per the WarmlyYours SmartPlan customised for our kitchen layout. Secure heating mesh with staples and hot glue (for any free form cable). Cover mats with self-levelling underlayment primer, and let dry for minimum two hours. While primer drying, start laying out tile in dining room to talk through potential tile laying problems we might encounter and how we’d address them. Discover spacers aren’t going to work… chat about it for solid hour. Mix up self-levelling cement and start pouring! Panic when we realise we don’t have enough – run to Home Depot, stand in 70 person line while panicking more that all the cement is drying fully at the house, buy 8 more bags. One hour later, mix up 6 of those and pour in. Shrug shoulders and hope for the best!!


DAY THREE:
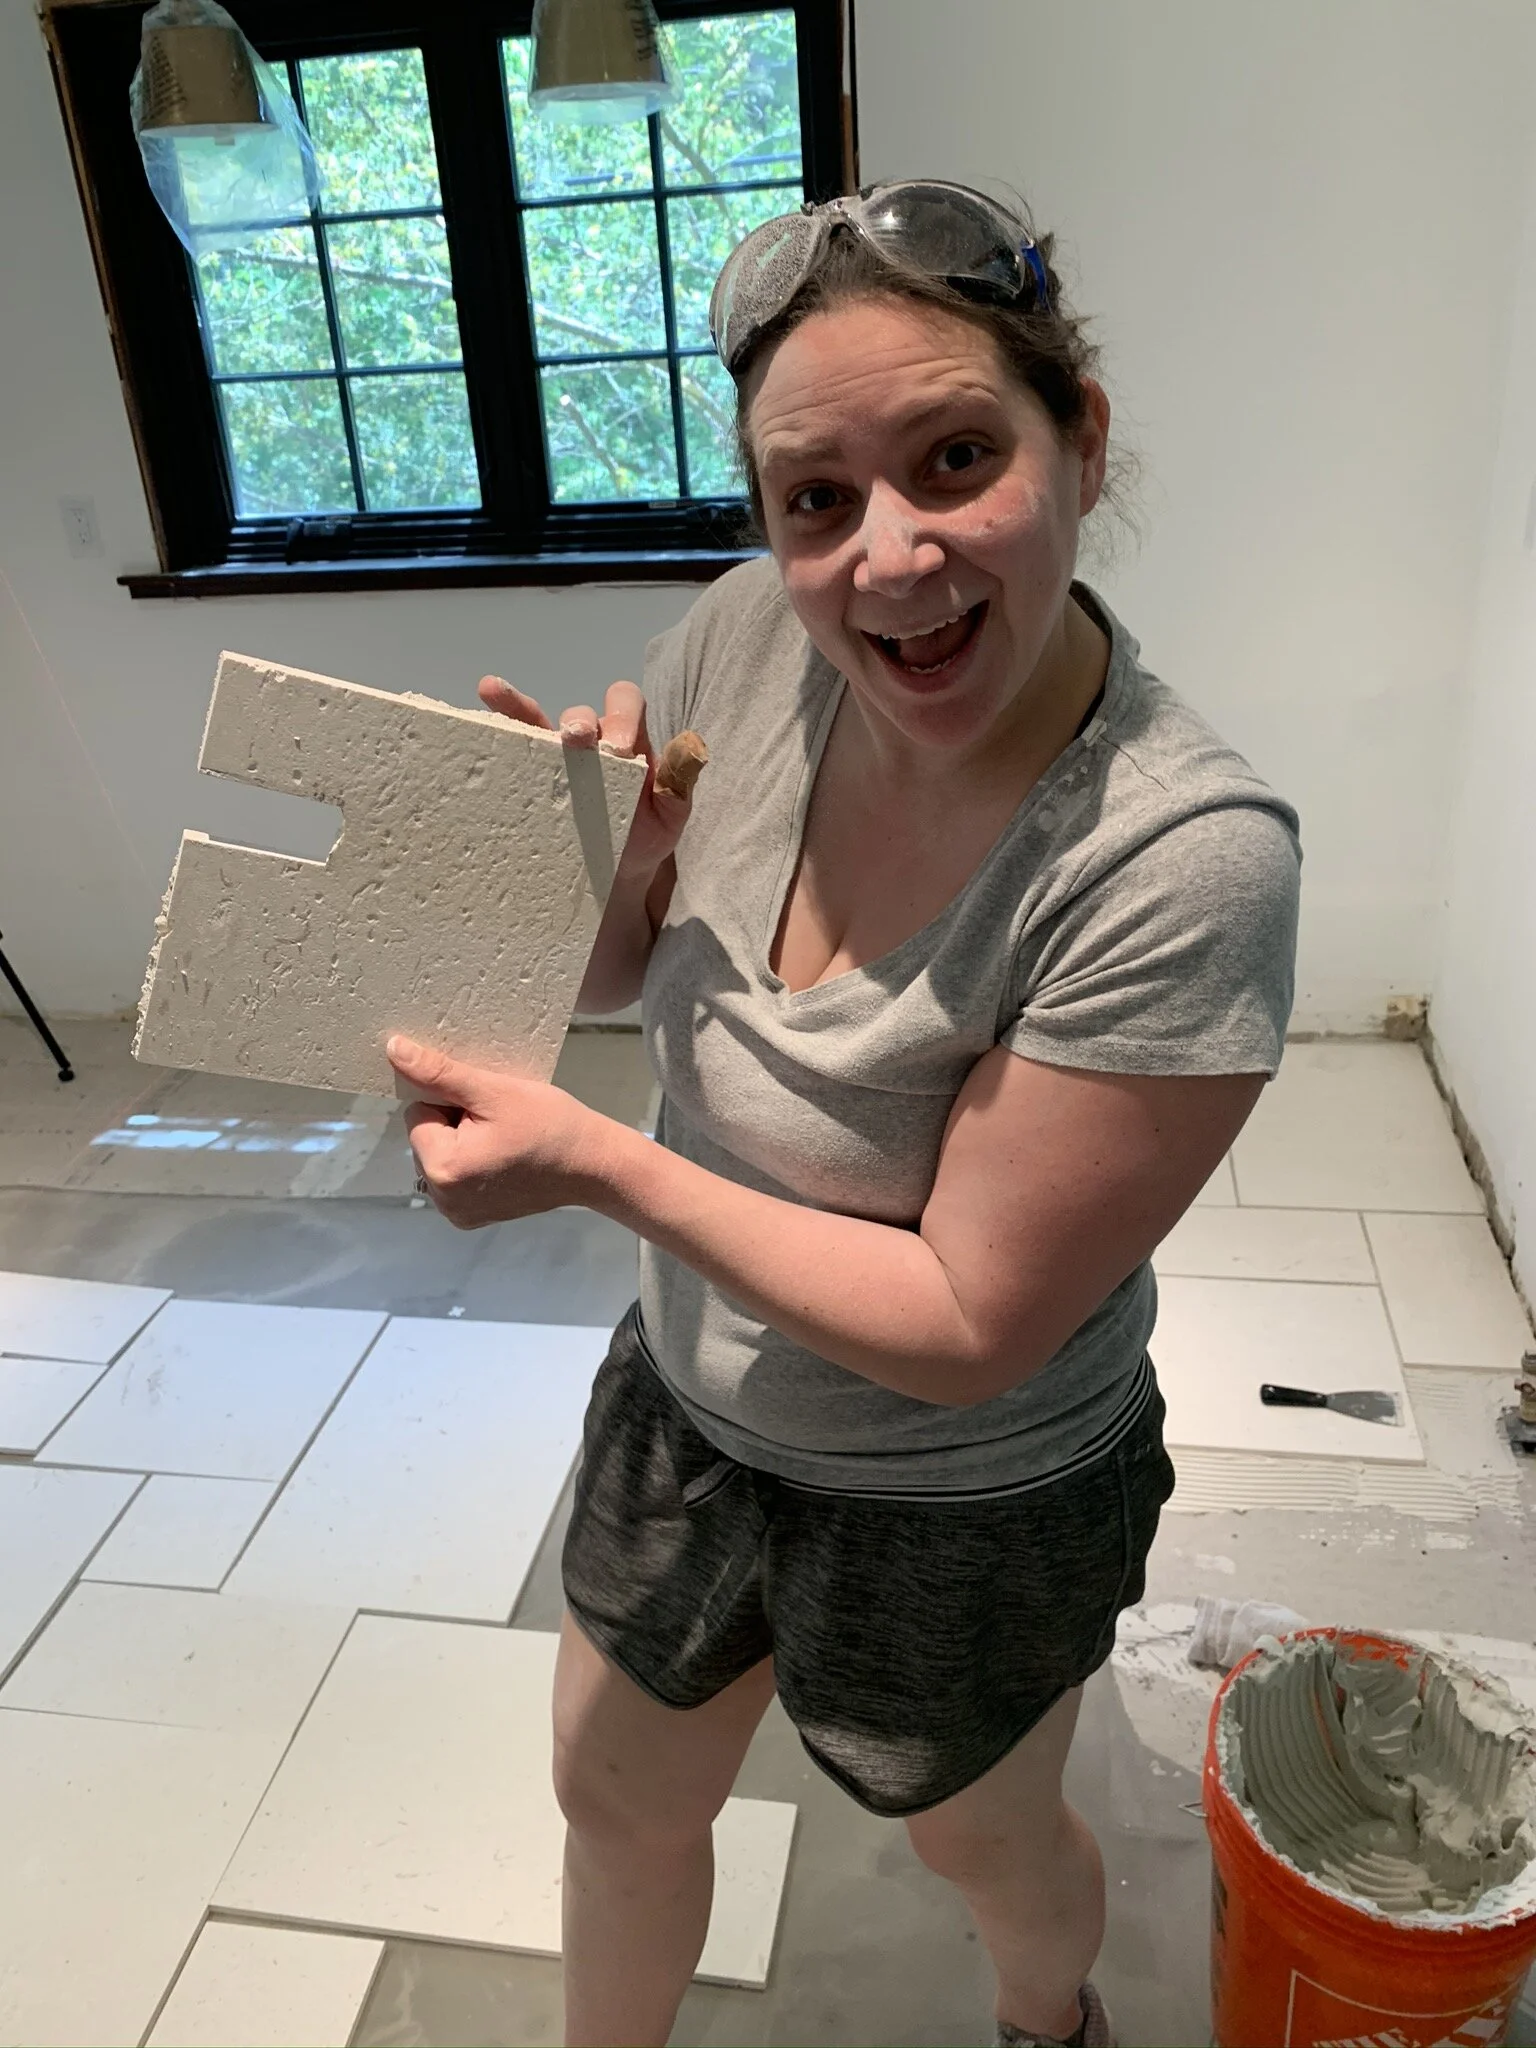
Check out cement levelness, generally okay – a few spots that weren’t great but made up for it with thinset. Started laying tile! We took about 4 hours to lay the first 3 feet of tile, trying to make everything perfect – but discovered within the first couple rows that the thinset was drying so quickly that we couldn’t move tiles more than 10 minutes after we put them down. After a few not-so-polite and potentially divorce inducing argie-bargies, we kissed, made up and abandoned all hope on spacers, lasers or trying to make things perfect. We trusted out instincts and started winging it instead. Felt a lot more comfortable and the rest of the floor went MUCH faster. Tile cuts were bloody terrible as we were still using an 8 year old piece-of-crap tile saw that we bought second-hand from an old colleague… so we left most of the parts that needed cuts until Day 4…


DAY FOUR:
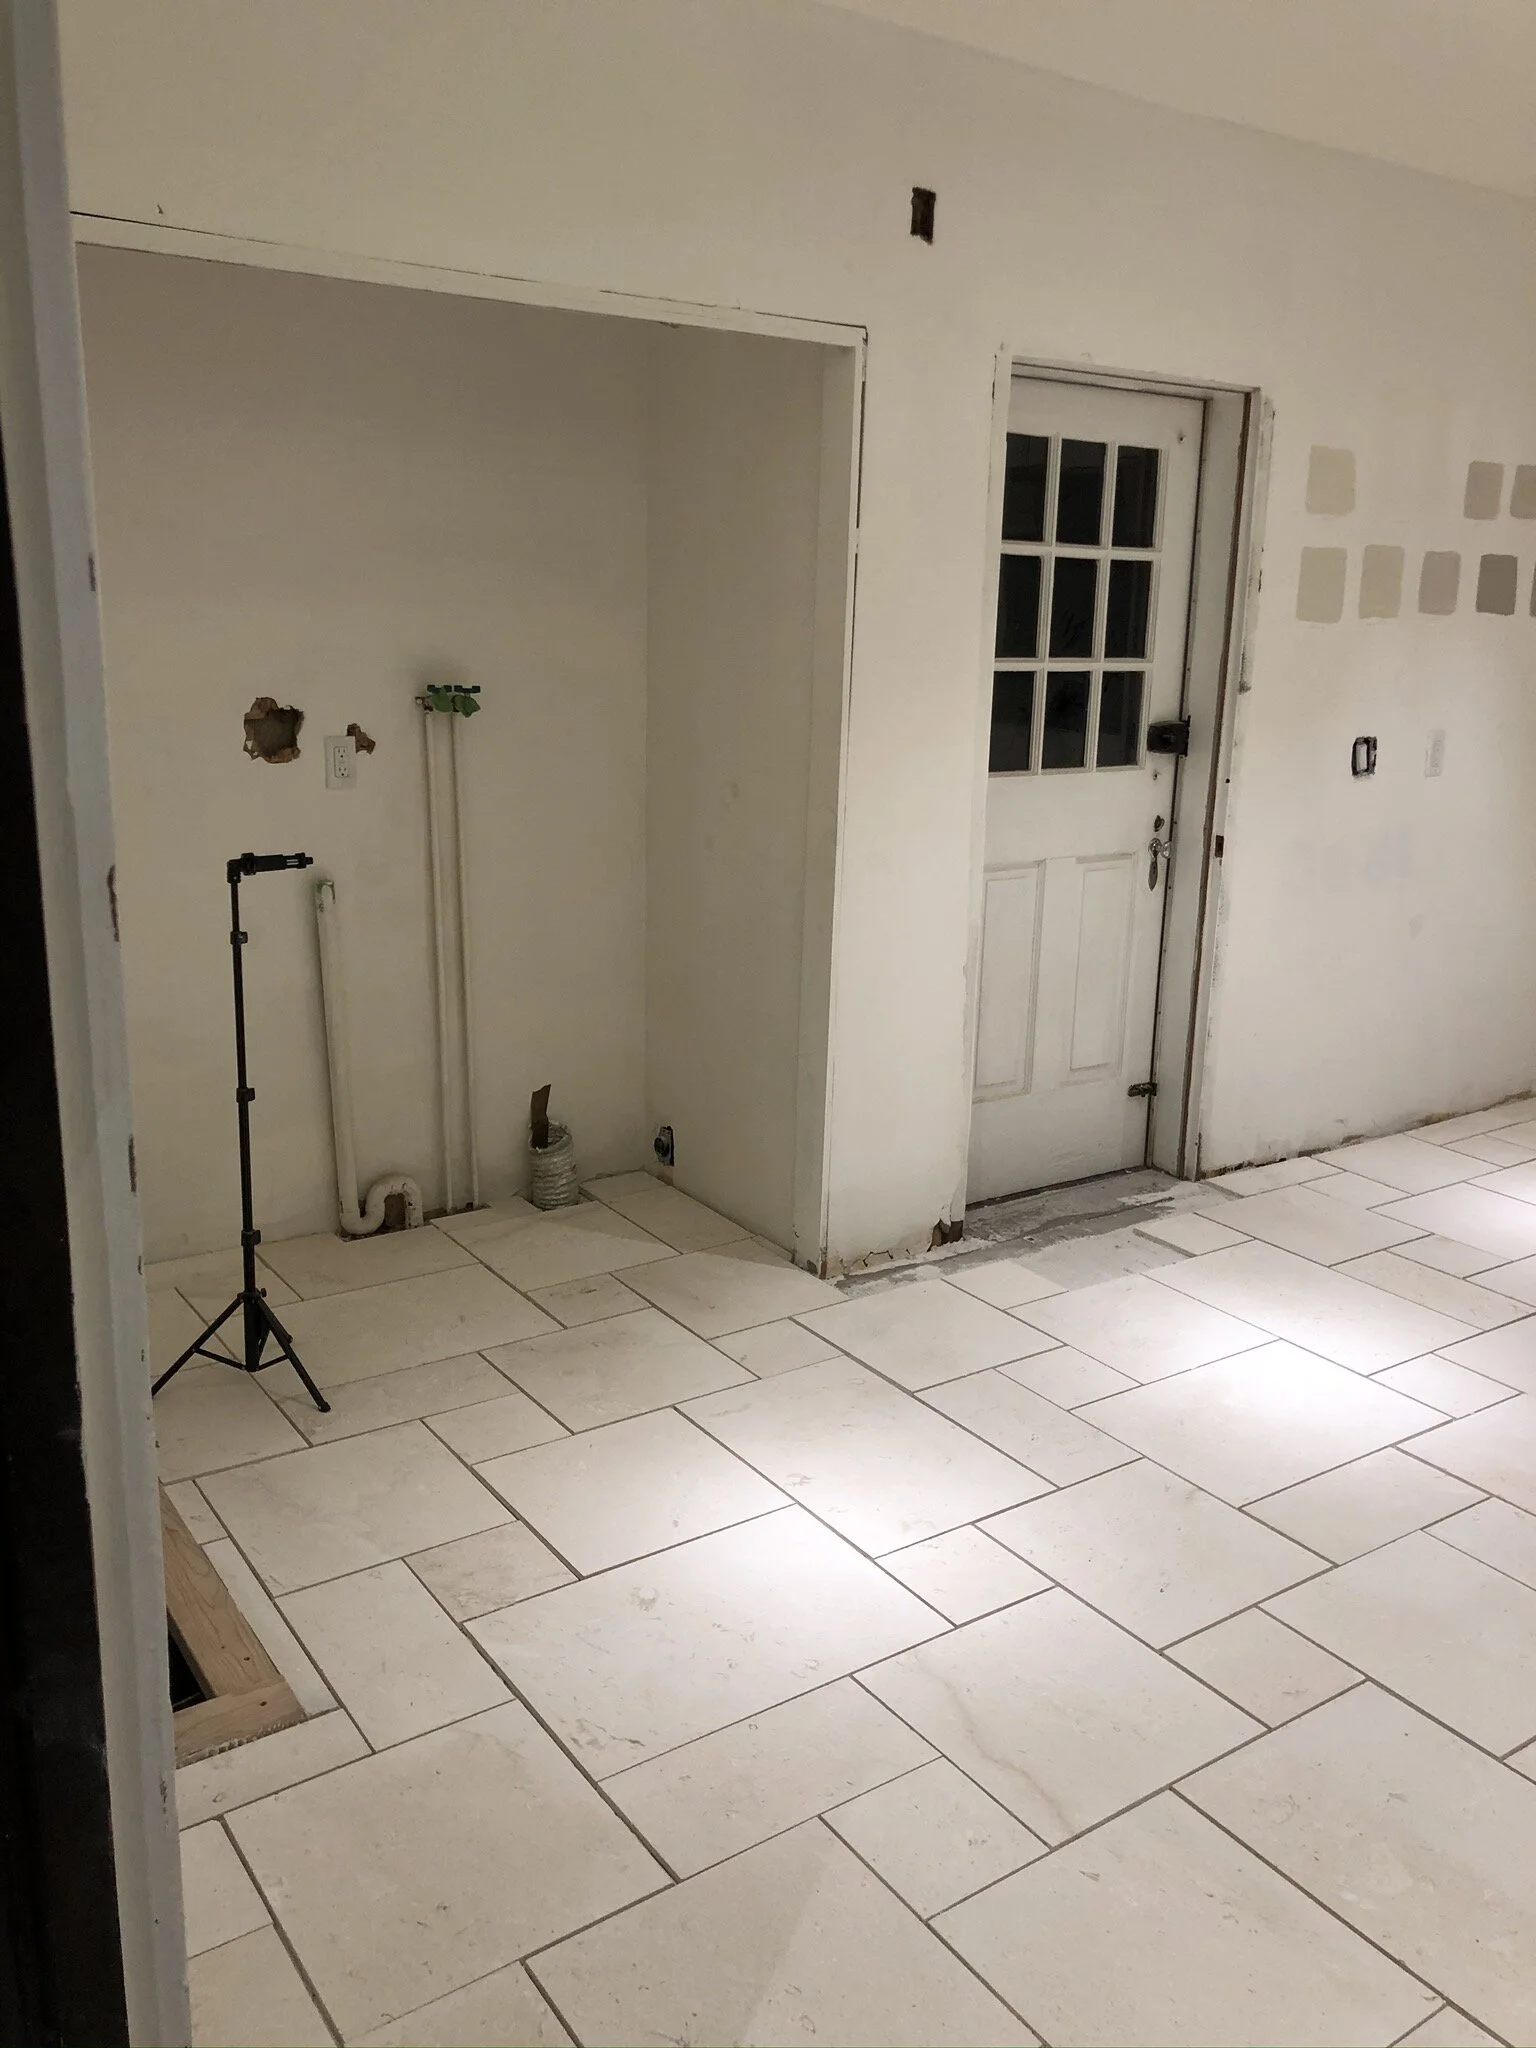
Final day! Battered and bruised, we were so confident that this would be a quick day. #wrong Finished up the remaining 5% of floor that didn’t get tile including all areas that required about 100 cuts… but we bought a new stand-alone tile saw with fancy moving tray, laser line, and water spout that CHANGED OUR LIVES. Literally – I didn’t eat tile all day so it was a huge win. We thought this stage would take us about 2 hours – it still ended up taking about 8 hours. But boy were we happy with the final product!!! And there ends our tile saga so far. We’ve still got to seal the stone, and then grout, and then seal the grout after that – but a 90% completion state feels SOOO GOOOOOD!!!


THE COUNTER-TOPS
If you’ve read this far, go get yourself a cookie, because good god can I waffle when I write. But onwards – our next decision dilemma is the counter-tops. We had been planning on doing budget butcher block counter-tops ourselves, purchasing from Floor & Décor – but as we do more research and I fancy up the design, the stock bought quality just doesn’t sit right with the design, installation sounds like it’s more difficult than we originally thought, and we’re learning more about the drawbacks of butcher block in general. Additionally, this kitchen renovation was never supposed to be permanent – we were only doing a quick face-lift to then change it into the butler’s pantry when we did the BIG kitchen renovation as part of a new extension. But lately we’ve changed our minds on the extension, have had a large slice of humble pie and decided to push it out by 5-10 years. So we are a lot more comfortable with this now being our real kitchen and don’t want a “temporary” counter-top anymore.
The butcher block also fit in with the ‘British country house’ model I had been using as our design aesthetic, but that too has melded into ‘understated elegance’ meaning beautiful with a hint of glam, but usable, liveable, and welcoming. We started re-thinking doing the counters ourselves and considered a professional install instead – which lead us to well why not just do Soapstone which we’ve both always loved and is super hardwearing, low maintenance (hoorah), and a similar price point when buying from a fabricator. We don’t want to make the kitchen too glam, but having decided more on our connecting dining room design, the soapstone fits in a bit better too. We haven’t made a final decision yet - as the third option is still doing DIY but getting really nice wide oak planks that we refinish and connect ourselves (akin to the Devol kitchen pictured) – but we need to decide shortly as time is running low to get it templated and installed if we do go the professional route!! If you have thoughts, we’re all ears.


AND FINALLY…. THE HARDWARE
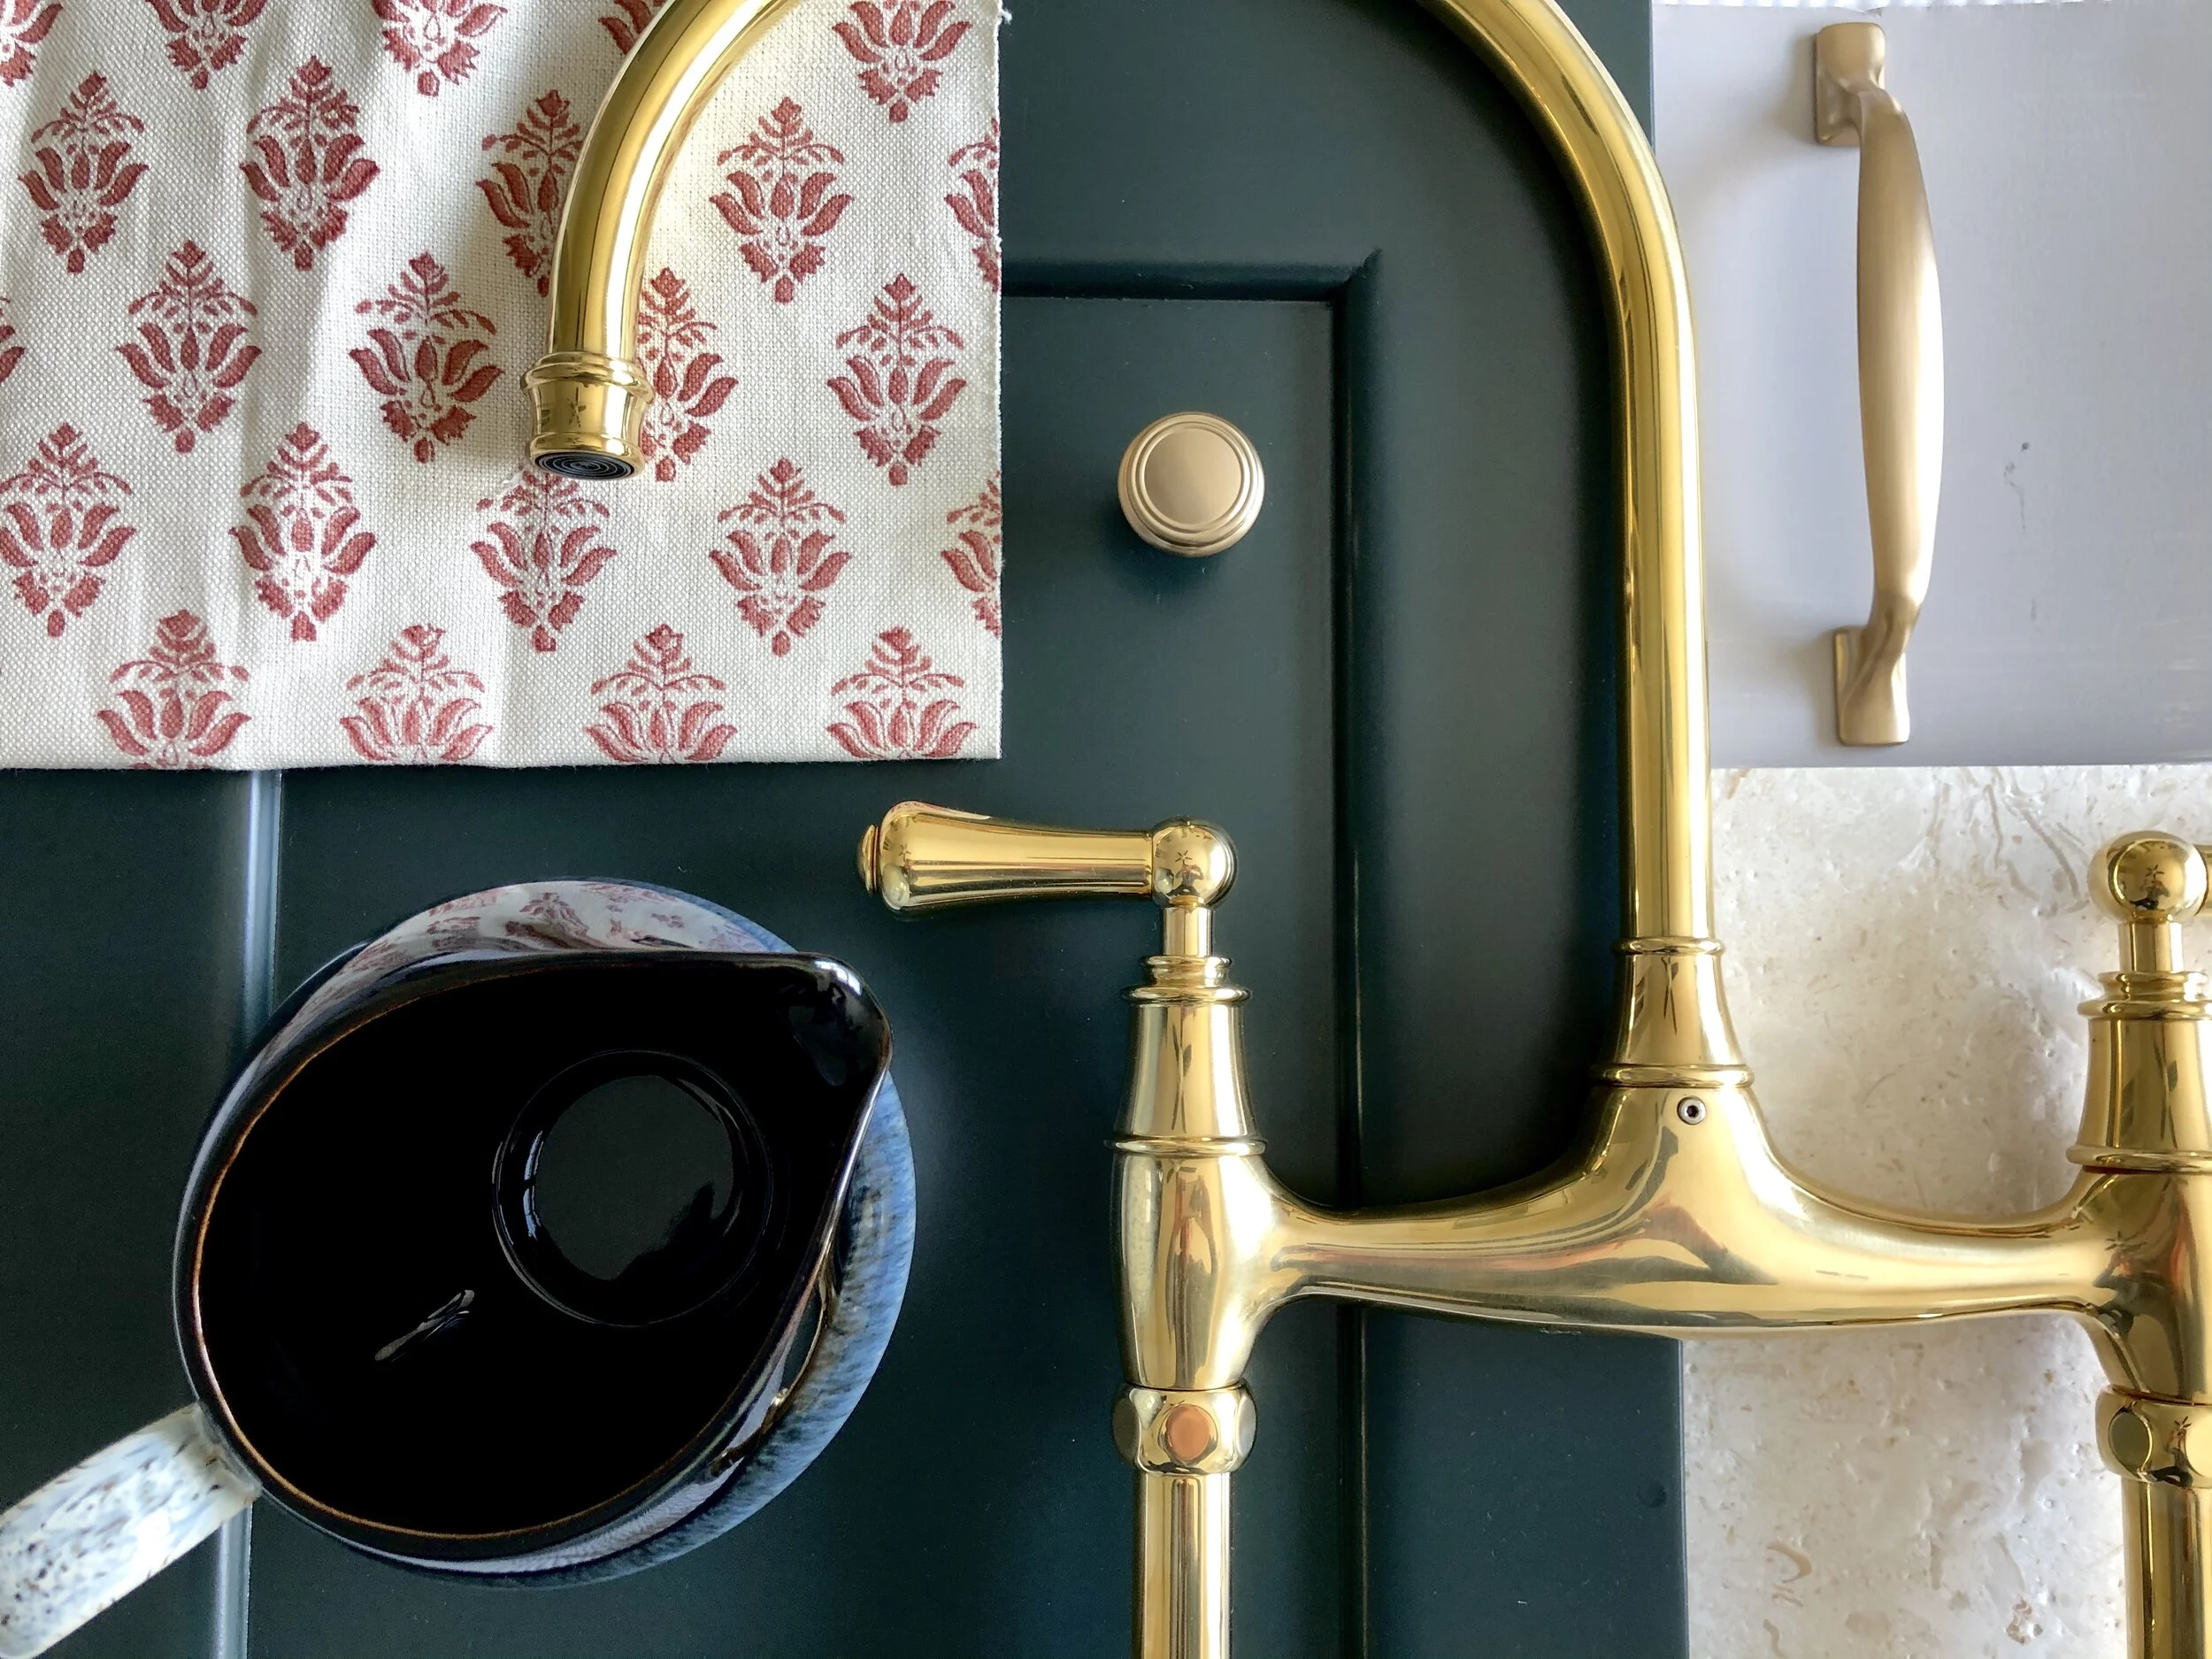
To conclude this week’s novella, we thought we had also selected hardware for the cabinets already. It’s yet another decision I continually flip flop on, but until we’re a few days out from actually installing the handles, in my mind, we still have plenty of time (ha!). We originally chose some fixtures from Top Knob, which were featured in the Week One flat-lay. We really liked the profile of the bow handle which I think is what sold us on the set, but as I’ve been re-staring at that flat-lay and making other design decisions for the space, the handles continued to shout at me and not in a good way. The colour was off as they are not a true brass product but rather “honey bronze” as the company names it and it just felt weak and cheap (even though they are not) in comparison to the Perrin & Rowe bridge tap in un-lacquered brass. Our other issue was that they only had the bow handle and ridged knob, but not the latch we wanted, so we were looking at Rejuvenation separately for the latch (under the sink). I don’t really like ordering the same finish of hardware from different places as it always feel incongruent to me. Somewhat fortuitously an interior designer called Rachel Halvorson happened to write a blog post all about cabinet hardware earlier this week, and while I had checked through most of the companies already – there listed was YesterHome UK with some beautiful un-lacquered perfectly English round knobs, bow handles in exactly the right length and latches – a full set of what we needed in precisely the right shade. It was funny because I already followed the company on both Instagram and Etsy, yet had never happened across their hardware section! Everything happens for a reason aye?


And there ends this enormous post which I have attempted to trim multiple times without much effect. If you read through all that, you have my utmost respect and sympathies, you are apparently a true fan of us two crazy nuts. <3
In next week’s episode of Game of Stones: A Song of Sealer & Paint…. the stone floor shall be sheathed with modern dragon-stone (sealed), Aemelia (master of colour, enforcer of rules, mother of bunnies)’s abode is to be festooned with wall covering (paint), Henry’s castle features (wall panelling) shall be completed, and the building of House Brooks shall continue. Too far? Too cheesy? Have you met us? #sorrynotsorry Stay tuned!!
Love & Cuddles,
Lex
THE TO DO LIST VISUAL… LESS RED = PROGRESS!

IMPORTANT LINKS:
One Room Challenge sponsored by Better Homes and Gardens.
Featured Designers for April 2020:
A Glass of Bovino | Beginning in the Middle | Beth Diana Smith | Clark + Aldine | Coco & Jack
Deeply Southern Home | Design Maze | Dwell by Cheryl | Erika Ward | Home Made by Carmona
House of Hipsters | Hunted Interior | Kandrac & Kole | Kate Pearce | Katrina Blair | Liz Kamarul
Veneer Designs| Rambling Renovators | Renovation Husbands | Studio Plumb