
The Big Re-Wire
Once upon a time… we bought a very dimly lit 90 year-old house where we knew there were a lot of “basic” system updates that would be needed within a few years. Electrical, plumbing, radiators, etc had barely been touched for nearly a century when we closed on the house, and except for a few spliced pipes where PVC now stood out like a sore thumb, the house was in desperate need of some modernizing upgrades, for safety, comfort and aesthetic reasons.
N.B. Disclaimer: We are not experts, nor contractors. These posts reflect our experiences at the time and our learnings based on the contractor we hired, and/or the work we did ourselves. Costs are always relative - to our area (which is on the more expensive end) and industry economics - such as supply & demand, COVID impact, etc.
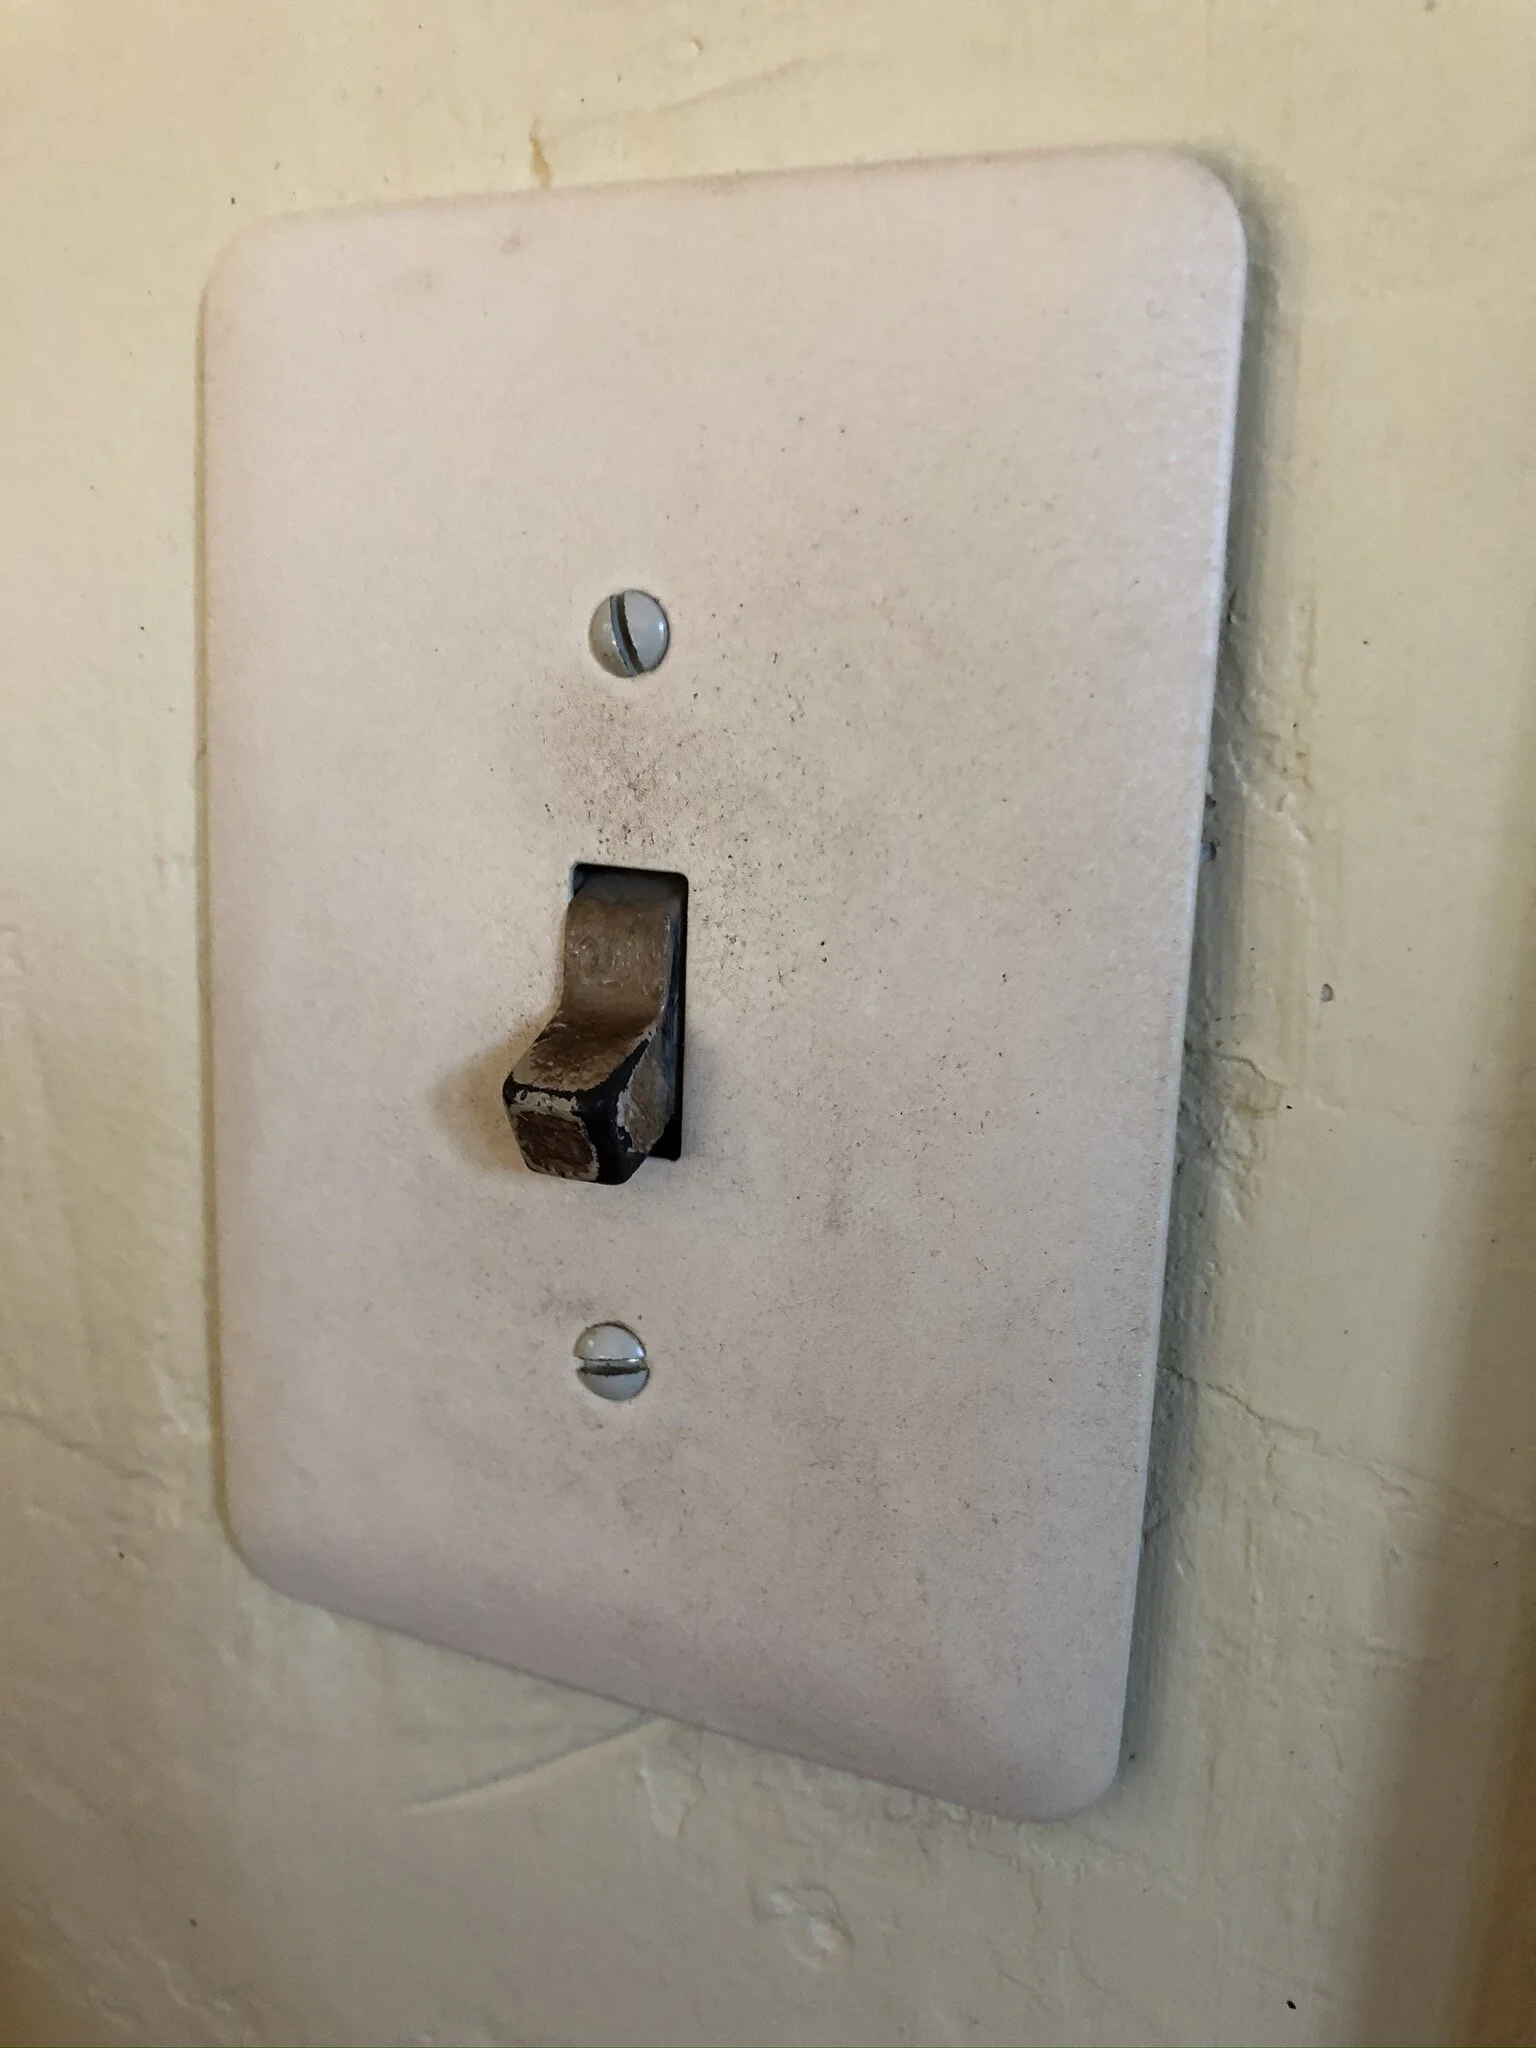
Our house originally had wiring that was a level above knob & tube, the original Romex apparently, but not much safer. For example, when I first tried to clean the hardwoods with an electric mop, I couldn’t plug in the mop because precisely one of the outlets was 3-prong and it didn’t work. None of the outlets were grounded. We also had no GCFI switches in the bathroom, and only one in the kitchen which meant most appliances weren’t running safely either. You could visibly see fabric wiring and fraying of the wires within multiple light switches, and even some burn marks in a few areas… never a good sign! (See below for those two sets of switches that didn’t even have plates with the fraying wire behind!) Many of the lights flickered or had a long delay when you turned them on, suggesting a much bigger problem too. And minor point, but NONE of the light switches or outlets matched in the whole house!! It drove our OCD mental, even amidst a state of chaotic renovation.


And then came our kitchen incident back in January 2020, where we had demo’d all of the cabinets and were in process of removing the dishwasher, when Stu got a nasty electrical shock. We thought we had turned off all of the electrical for the kitchen, but apparently not. Never ever trust electric panel labels — always test using one of these voltage testers!! #lessonlearned. A free wire had touched the metal junction box, caused a massive spark and a healthy shock, and understandably, Stu was a bit frightened. I have a solid fear of anything electrical due to a very vivid electrocution nightmare when I was younger, plus a section of my mum’s house burning down. So, we have a healthy respect for electricity and agree it’s one of those projects that is best when DIYed at minimum and left to the experts. At the end of the day, if you get electrical wrong, you could not have a house and that is just not a risk we’re willing to take! Cue us calling out an electrician to help us disconnect that dishwasher, and while he was there, we asked for a quote to fix all of the outlets and lights in the kitchen.


Original Plans Always Change
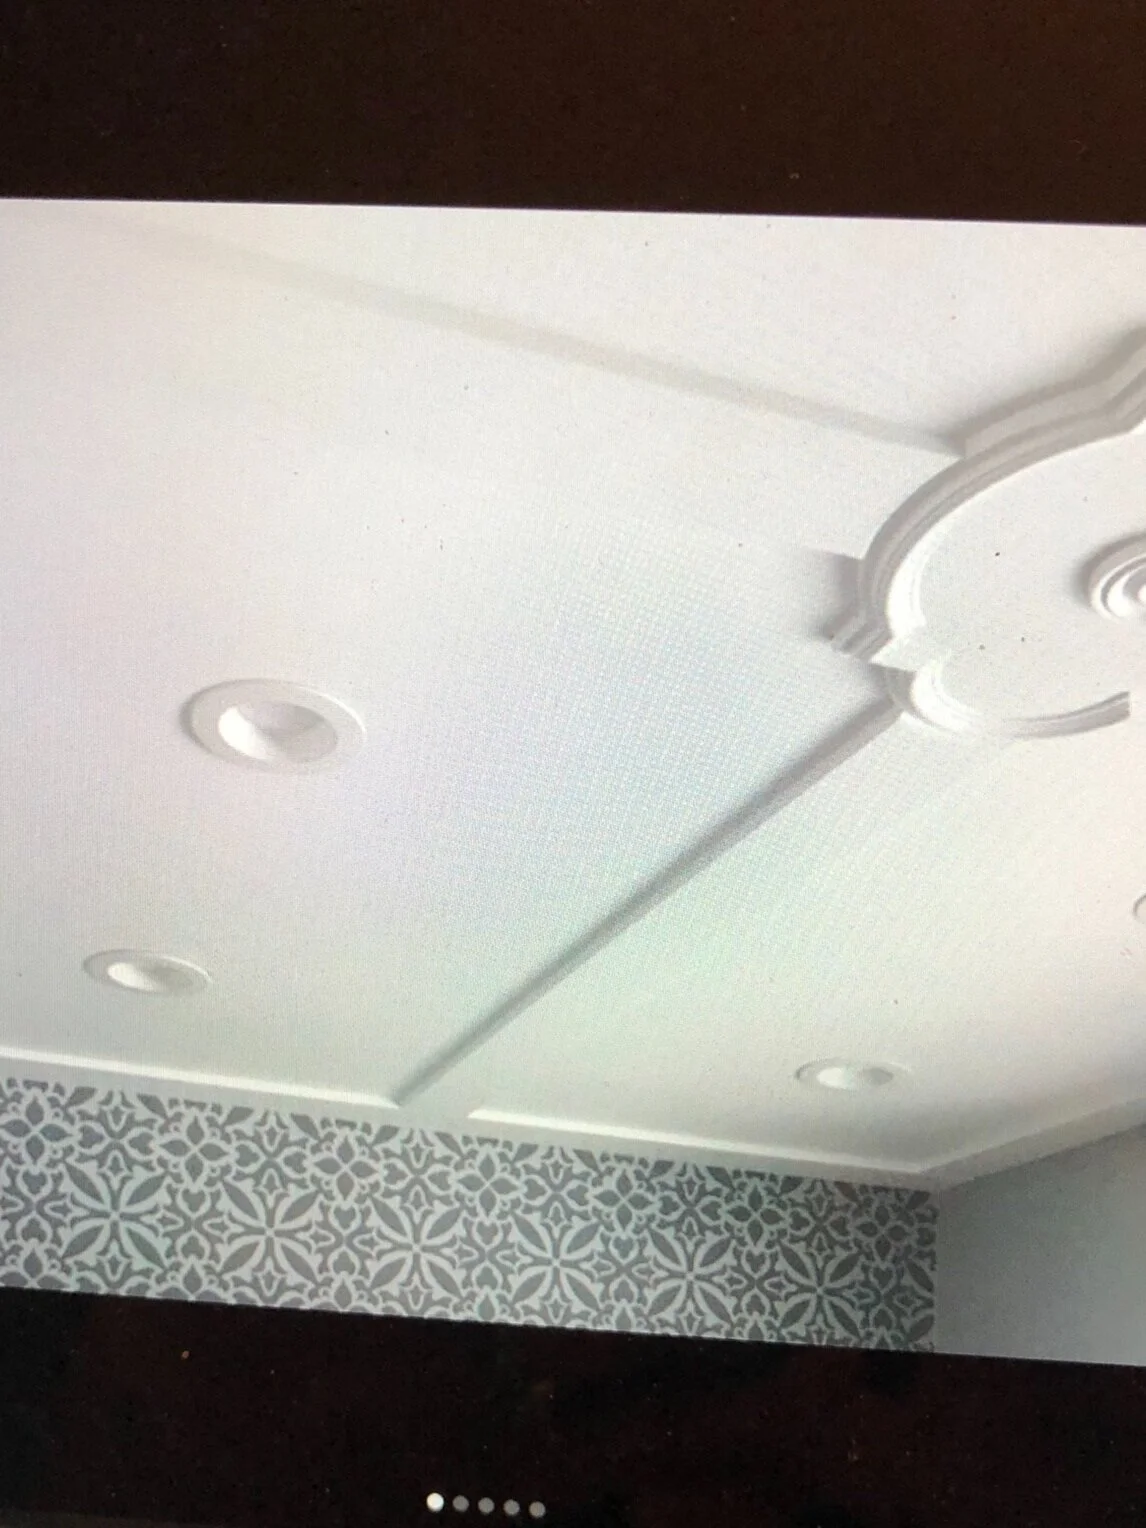
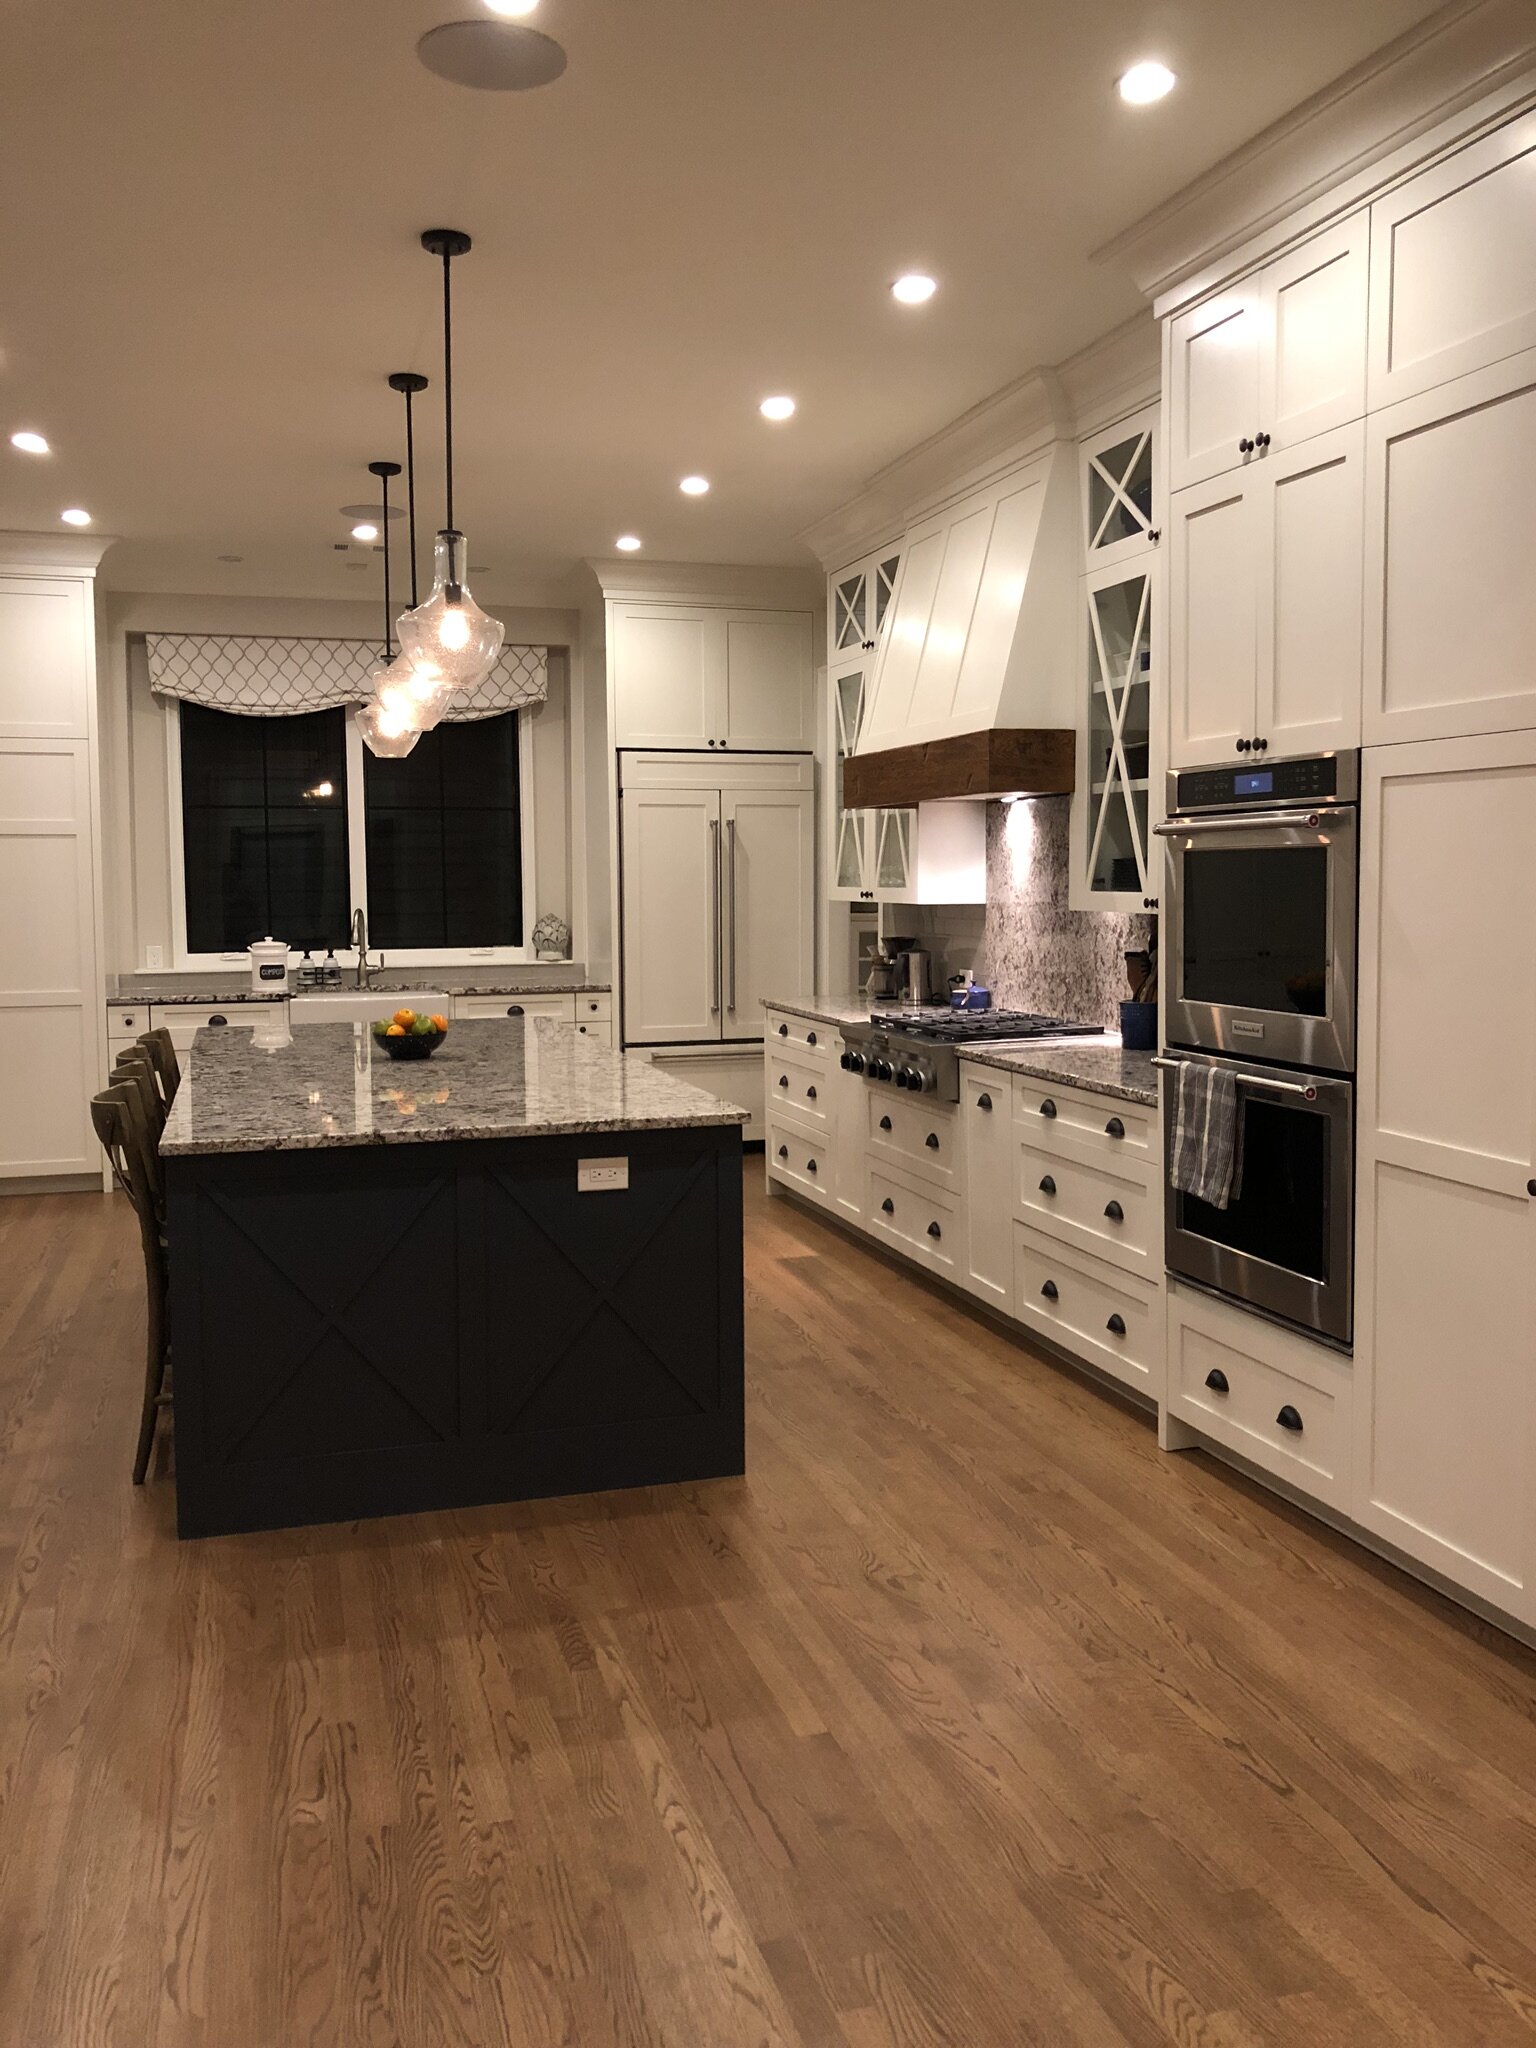
We had originally planned to upgrade the wiring in the house room by room. But after a lengthy discussion, we bit the bullet to take on the whole house at once for efficiency and time reasons. Since we were already renovating, it made sense to take on the extra holes in the wall for dropping new cables, the added risks of lead paint dust in rooms where that was occurring, etc all while we were already in a state of disarray and battling those problems for other reasons anyway. While we were at it, we decided to also add some small British style spotlights in a few rooms and areas to give us a better level of light. Even with excessive lamps, the hallways, for example, were very dark and not good for the eyes. I’ve battled with contractors before about putting in small 2.5 inch spotlights versus the standard American 4 inch “can” lights for recessed lighting, and this time I firmly stood my ground!! Keeping it concise, it was important to me to have a small, unobtrusive profile that modernised to our needs, but didn’t jar with the historical integrity of the house. I’ll be posting a second full blog post tomorrow which details why I’m so adamant about this, how we figured out the number of lights to put in, and the pros/cons of the lights. They are a specific look, and not for everyone’s taste or lighting situation. But ask most ex-pat British designers in the US, and you’ll find them constantly having this battle with their contractors as well. Moving on… Stu equally wanted some technological updates like adding CAT5 cables in various places to handle our mesh network and his extensive internet needs for work (software), and we even discussed adding speakers to a few rooms, but ultimately decided against it, as it felt too modern for this house. We’ll be using freestanding SONOS systems instead that we will carefully disguise throughout the house.


Based on all of this, we called up the electrician again and asked for the full house quote. It came back below what we expected and less than a week later, we’d signed the deposit cheque. Fast forward to March 2020, we were rolling with a full electrical re-wire!!
Moola Moola
The big question every always asks (and very few actually answer) is “how much did it cost?” It wasn’t cheap by any means… but we think we got a reasonable deal, and our contractor is now our gold standard for any other contractor as his customer service is impeccable, so that alone made it worth it. But please remember per my disclaimer above, costs are always relative to your location, economic and industry impacts, and demand in the area. We are in an expensive area, and started the project when demand was high and COVID forced pricing throughout the roof.
To start, we paid roughly $12K just for all of the re-wiring. It was not a small amount of work! This included:
re-wiring and grounding existing outlets, approximately 4-5 outlets in every room (13 rooms); as well as adding outlets where they did not previously exist to meet local electrical code standards (for us: every 4’ in a kitchen, every 12’ in a room, with at least one per wall)
re-wiring/fixing doorbells
re-wiring all of the original overhead, sconce and outdoor lights we were keeping (about 12)
2 new electrical panels (basement & attic)
all garage and basement wiring
adding 4 new sconces in two bedrooms
adding 3 separate security lights
adding GCFI outlets in all bathrooms and the kitchen
adding 6 new smoke & carbon monoxide detectors, again per local electrical code this was a required addition
replacing old manual thermostat with new WiFi enabled Honeywell T5 Smart Thermostat
changing out every light switch and plate
setting up all of the wiring for the new spotlights
removing all visible old wiring
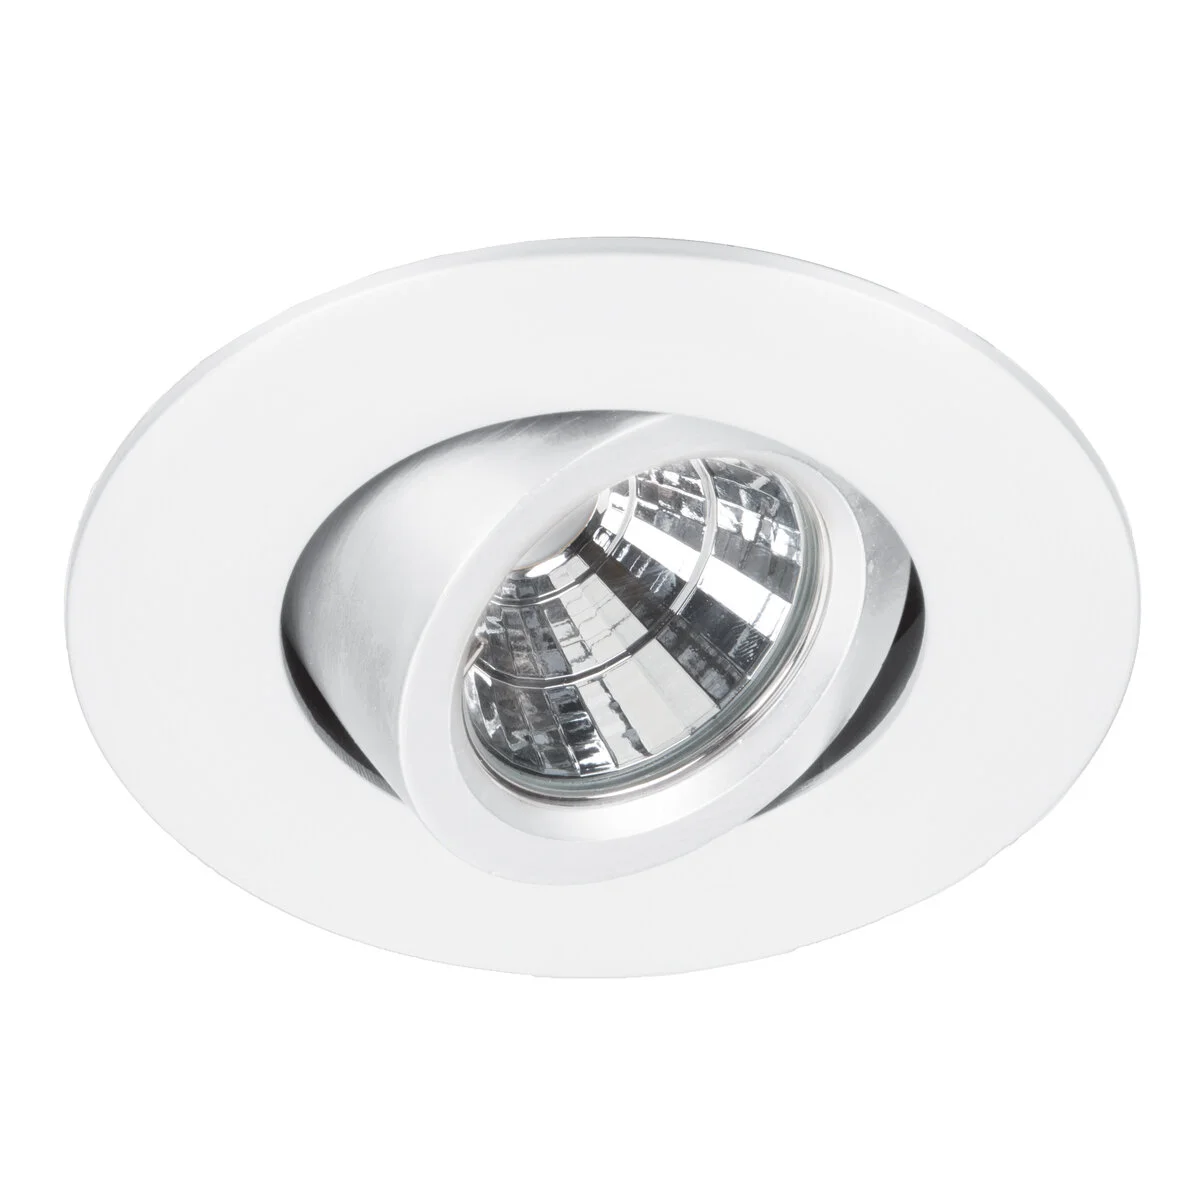
We then added another $5K or so for the spotlights themselves and the installation of them. We chose these WAC 11W Ocularc recessed downlights. They recently changed the name from Oculux, no idea why. We chose these as we had used WAC lighting in our previous Atlanta home which we loved, and they offered the highest lumen output for a recessed light. (The second post will discuss a lot more on this topic…). Our contractor found two other similar light options, which were cheaper, but we preferred this profile, we knew the brand name and I liked the shadows these cast in particular. That said, we did learn another good lesson which I detail later on.


We then topped off our project with a final $4K to go the extra mile, by selecting more historical reminiscent aged brass light switches and plates by Forbes & Lomax. These were certainly a luxury and unnecessary item, but to go through a full re-wire and then put white plastic plates back in a 1929 Tudor home felt completely wrong. Personally, I think this makes a huge difference in the aesthetic appeal of the house. Stu and I made a pact when we bought this house, that we wouldn’t fill it with cheap, rubbish. We promised ourselves that we’d use this as our next adulting step in making intentional, investment-minded purchases for any renovations as well as finishing touches. And this was the first of those purchases. We opted for toggle switches over push buttons (which are technically more historically accurate for the period), because we liked them, but also because I’d read in a few places that push buttons tend to fail more quickly. Not sure how true that is… and I’d link the article, but can’t for the life of me remember where I read it. So just take that with a grain of salt!!
Last thing to mention with Forbes & Lomax switches/plates is they do require slightly different junction box placement. Most junction boxes sit flush with the wall, and then the plates sit on top of them, covered by the rounded edges of the plate. However, Forbes & Lomax requires the junction boxes to sit lower in the wall cavity, as it is a solid flat plate that then sits barely proud of the wall. Minor detail, but an important one for your contractor (or you!) to take into account if you’re considering this style. Handily, they provide all the technical information you need at convenient links on their site (not sponsored, I just really like readily available information!!).


So in total, our full electrical re-wire including recessed lights and switches/plates rounded out to $22K. We hadn’t expected to write that size cheque so soon after buying the house, but we also knew it was worth it and would be a valuable return on investment. I will mention this in every systems update post… but we bought a cheaper house needing significant work, knowing that we were budgeting a certain amount for these major upgrades over the next 2-5 years. When all is said and done, it will increase the value of our house along with everything else we are doing. The “unseen” upgrades are always the hardest to stomach, and the least Instagram-worthy most of the time, especially because it feels like you have nothing to show for them… but they are always important.
Crossing the Finish Line
So our re-wire project got underway almost a year ago today… and just yesterday the electrician finally installed the last piece… a CAT5 port. Haha!! Does it really take that long? No… if everything had gone to plan, they would have been in and out in 2-4 weeks. But we had a variety of long delays due to COVID suddenly hitting at the start of the project and our general indecision at a few points too. First, the electrician wasn’t allowed to start because of Pennsylvania shutdowns. Then, we had to figure out our Forbes & Lomax light switches (as I had to order them, not the electrician), which by the time we ordered, the London warehouse had shutdown and we were at the mercy of that re-opening two months later. Then, our kitchen plans changed completely and our very understanding electrician was patient as we changed 4 GCFI outlet and all the light switch locations (which were already a nightmare due to plumbing & radiator pipe locations). Then, we had to wait for some other light fixtures to arrive which were also delayed. AND THEN (cue all the eye rolls), we had our hood debacle where we took more than 6 months to get that installed because we were building it ourselves and kept doing it wrong out of pure stupidity. Why does that matter you may ask? Well, because a hood extractor is required by code in this area, and our final electrical inspection couldn’t take place until that was installed. So it was November 2020 before that inspection finally happened and we were kosher to move in. Phew! The remaining few months was really us dragging our feet on a few final touches (that doesn’t sound like us does it?! lol) and now we’re finally done 12 months later.
Hoorah!!


Plot twist!
Would we have done anything differently? Yes, we would have used different spotlights. Because we chose (and ordered) the WAC spotlights about a month before we ordered the Forbes & Lomax switches, we didn’t know that the F & L dimmer switches do not connect as well with those specific spotlights, without the use of an extra driver power-pack device (you can read the technical info here). There are specific requirements for each, and ideally you should be selecting those things AT THE SAME TIME with the help of your contractor to ensure it all works correctly together. Now, most people are using a general contractor for this extent of electrical work in conjunction with a bigger renovation…that GC then sub-hires out an electrician, so these details would be handled within their project management process. But as I manage most projects myself, it was an oversight based on lack of experience.
We used these WAC spotlights as we had used WAC previously in our last home and were very happy… but if we were to “fix” it (which we won’t be because it would cost another $5K in materials and labour), then we would have used these Nora recessed downlights instead. And it would have saved us about $2.5K too. #ugh What it means is we can’t dim our lights to lower than 25% or they flicker on and off. I don’t know how many people actually keep lights that low, but we never do… my dimming threshold is usually about 40%. So we just ploughed on through and took the loss. Ho Hum! But always lessons to be learned… !
As mentioned above, I’m finishing up a whole separate post about the spotlights we chose and why (a UK versus USA comparison), how you know the number of spots to put in, and a general how-to on choosing lighting. There is not a right and wrong way to do these things generally speaking (with the exception of adhering to local codes), I’m just very particular about the look I wanted in our historical home. So look out for that shortly!
Moving On…
Next up on the basic systems upgrades is full-house HVAC. This one’s a doozy… but that’s just begun and will be finished in a couple of weeks time (by early April). So let’s hope I can write this kind of post in a month’s time and not a year.
But they lived happily ever after… in a beautifully lit house!
The end.