

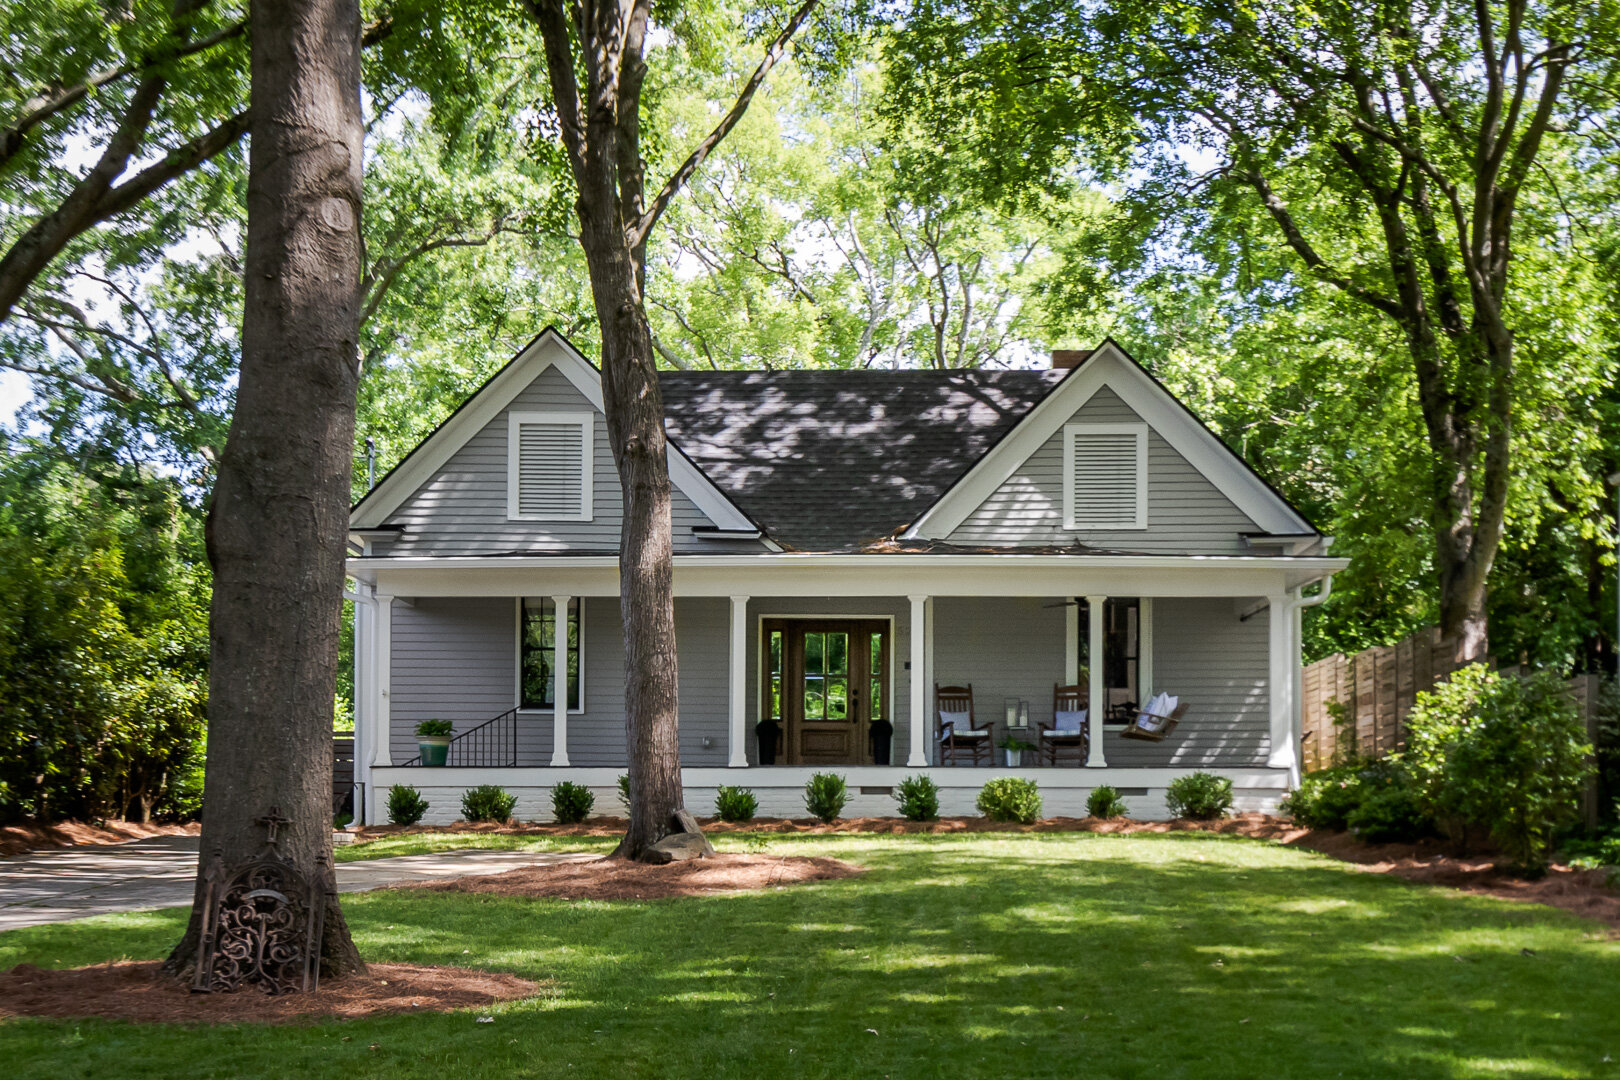
Meet the Urban Farmhouse in Midtown Atlanta
In July 2015, Stu and I were trawling a neighborhood we loved for homes that might be available soon. It was one of those sought after neighborhoods where very little actually ever hit the market, you had to be “in the know”. By good fortune, the same day, our friend texted us to say they knew about a house coming soon, but said it probably wasn’t our cup of tea. They were right - this house was single story, ranch style, it didn’t have a garage, and sat on 1/3 acre (we’re terrible at gardening). We weirdly sat outside the house for 10 minutes staring at it. And then the owner pulled in and invited us in to see it. We went inside and fell in love. I whispered to Stu ‘This is it’ - He nodded his head, and the next day we were under contract. We were only the 4th owner.
Built in 1900, and one of the original farmhouses in the quiet and often unnoticed neighborhood between two major roads, this house was in pretty good condition. It had excellent bones for renovation. The back roof was falling in, the ceilings had been lowered sometime in the 50s, and as usual, the original hardwood floors were covered in carpet. But it was a simple box, with clean lines and ample space. The porch was to die for, and for hilly Atlanta, the plot of land was incredibly flat.
In the first gallery, enjoy our listing photos (taken by professional photographer @venvisio) when we put the house on the market back in April 2019. Then scroll down for before and afters of the exterior and each interior room, with a detailed explanation of what we changed during the renovation in spring/summer 2016.


House Exterior - Front Porch
Before
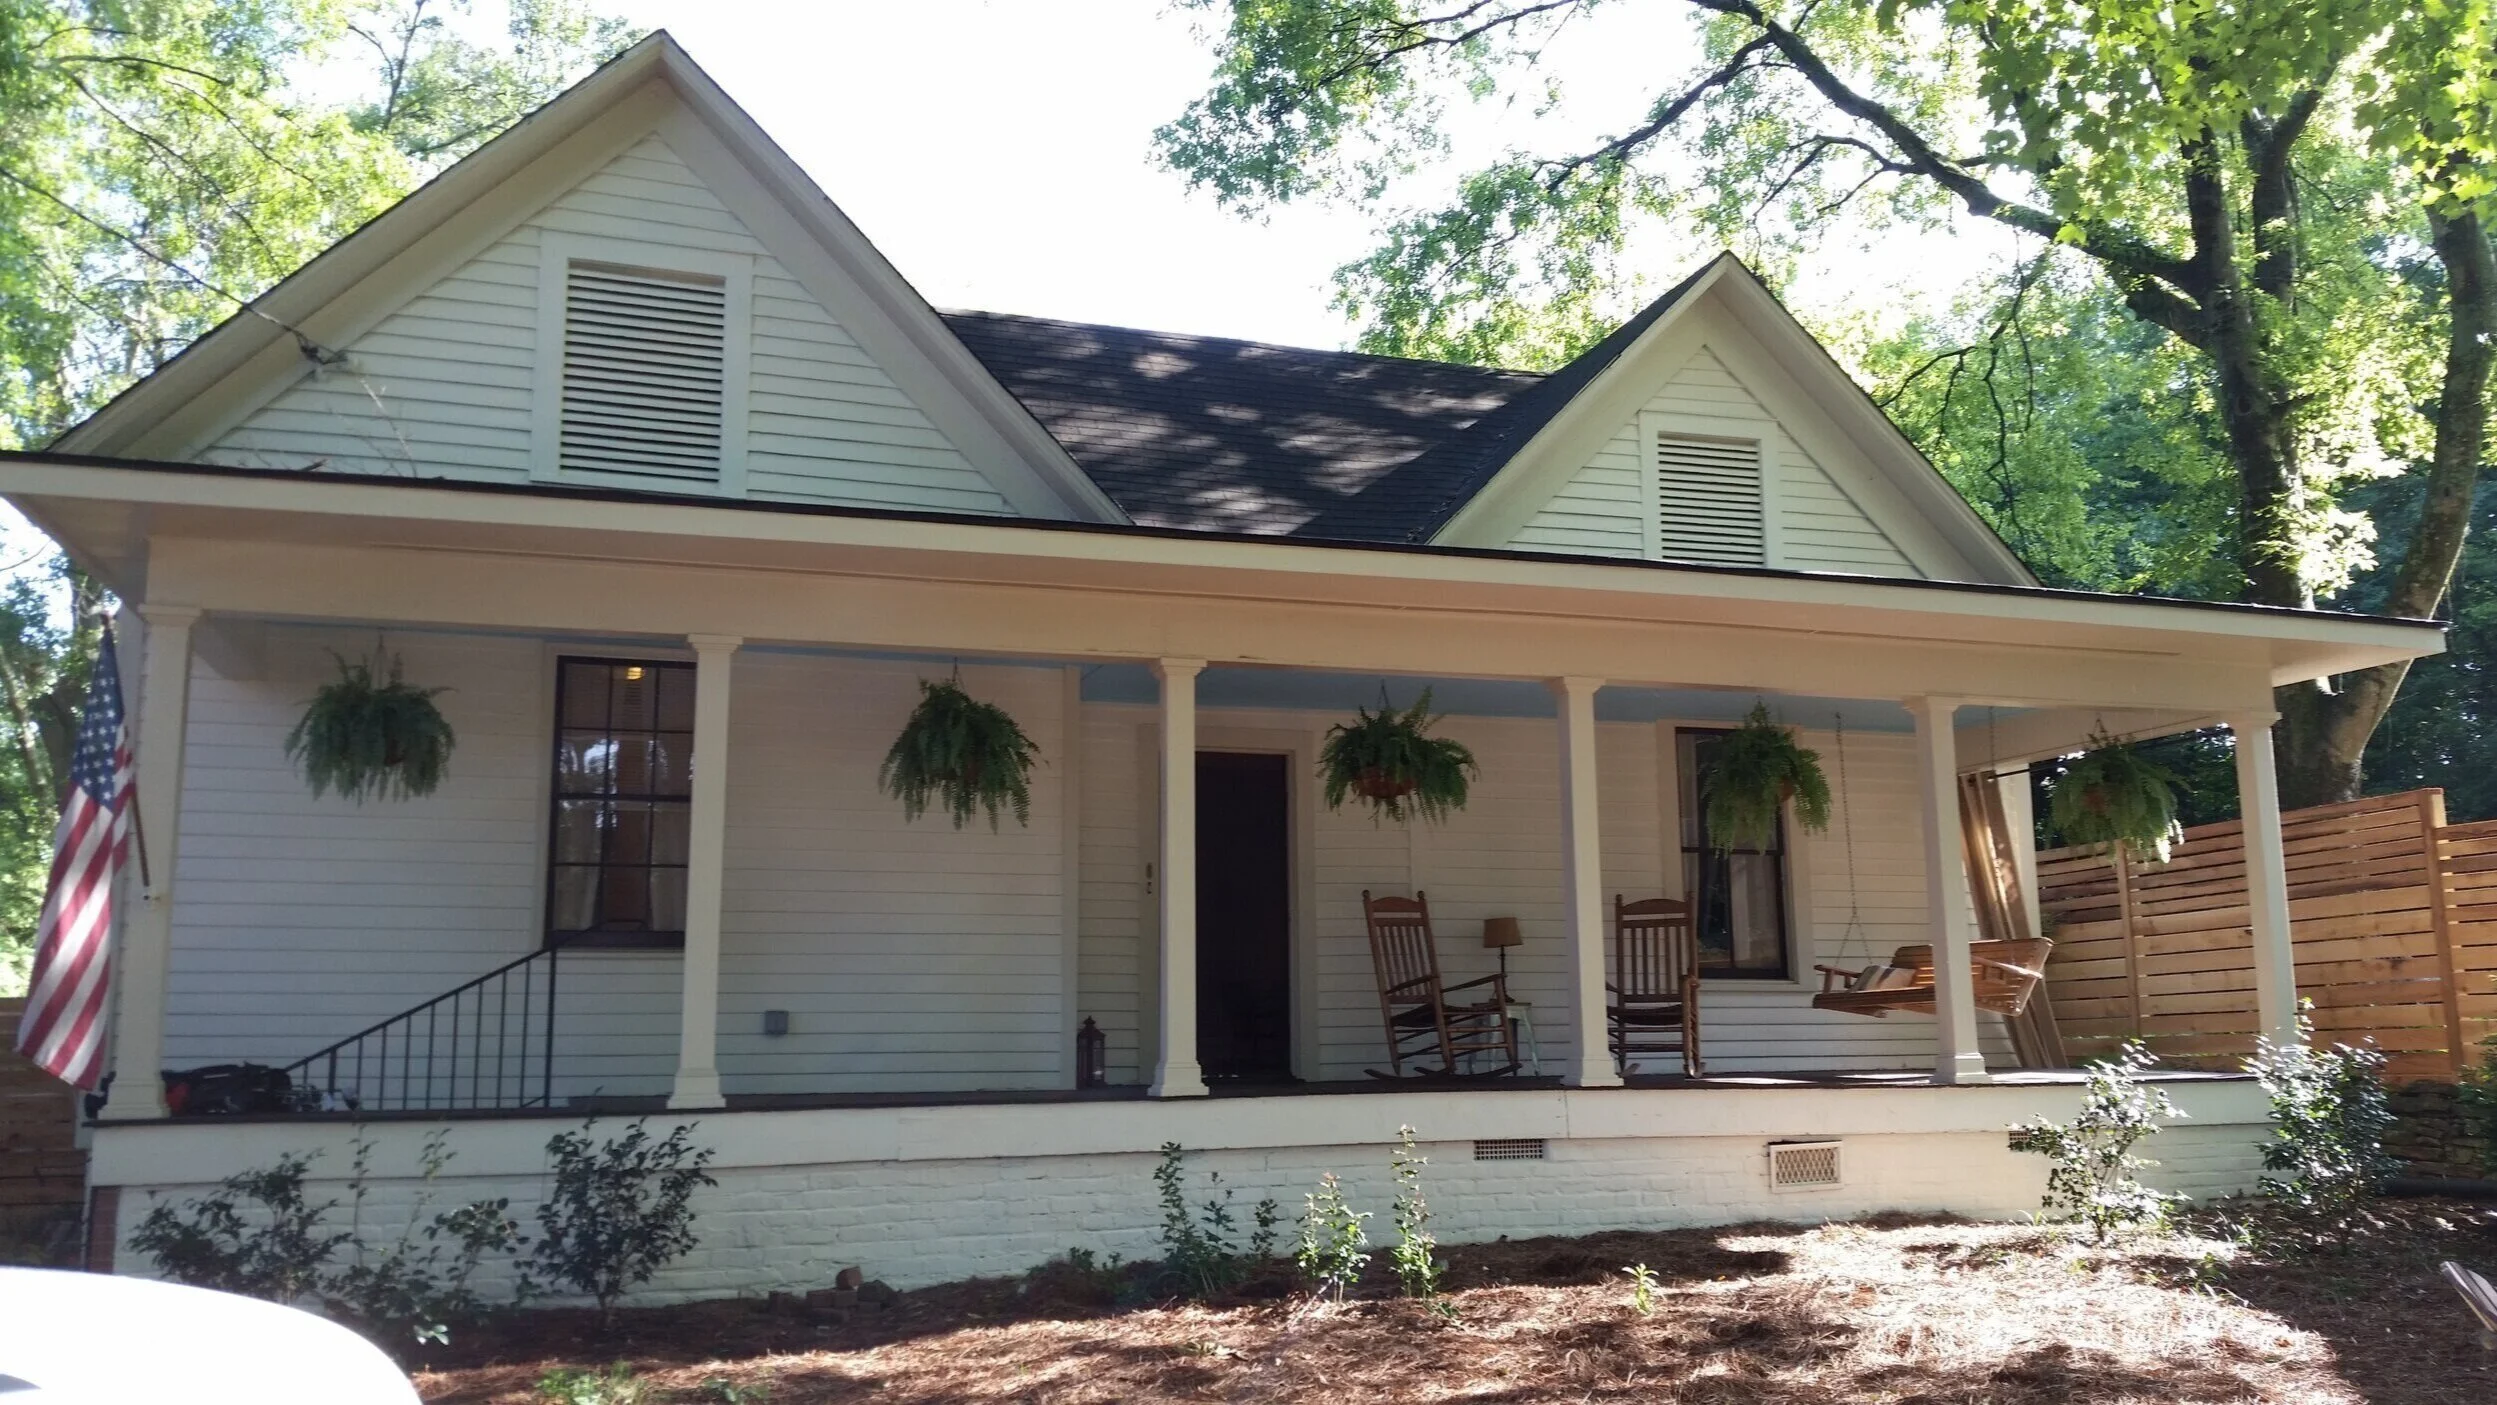
Our front porch was wide and welcoming, but showing many signs of wear and lack of upkeep. Yellowing, peeling and flaking paint. Single width front door. Dark brown paint on the porch floor, and bright glaring pool-esque blue on the porch ceiling. No overhead lighting except for a single exposed light bulb over the front door.

After
Installed wider front door and added two side-lights to increase light into front foyer. Commercially power-washed all the peeling paint - and re-painted in Benjamin Moore Stone Harbour (Siding), Simply White (Trim), Whispering Spring (Ceiling), and Black (Floor). Installed two flush mount ceiling lights, and a ceiling fan for more outdoor enjoyability. Installed new guttering throughout to improve house water flow. Shifted boxwoods to front of home to increase curb appeal.
House Exterior - Back of House & Patio
Before
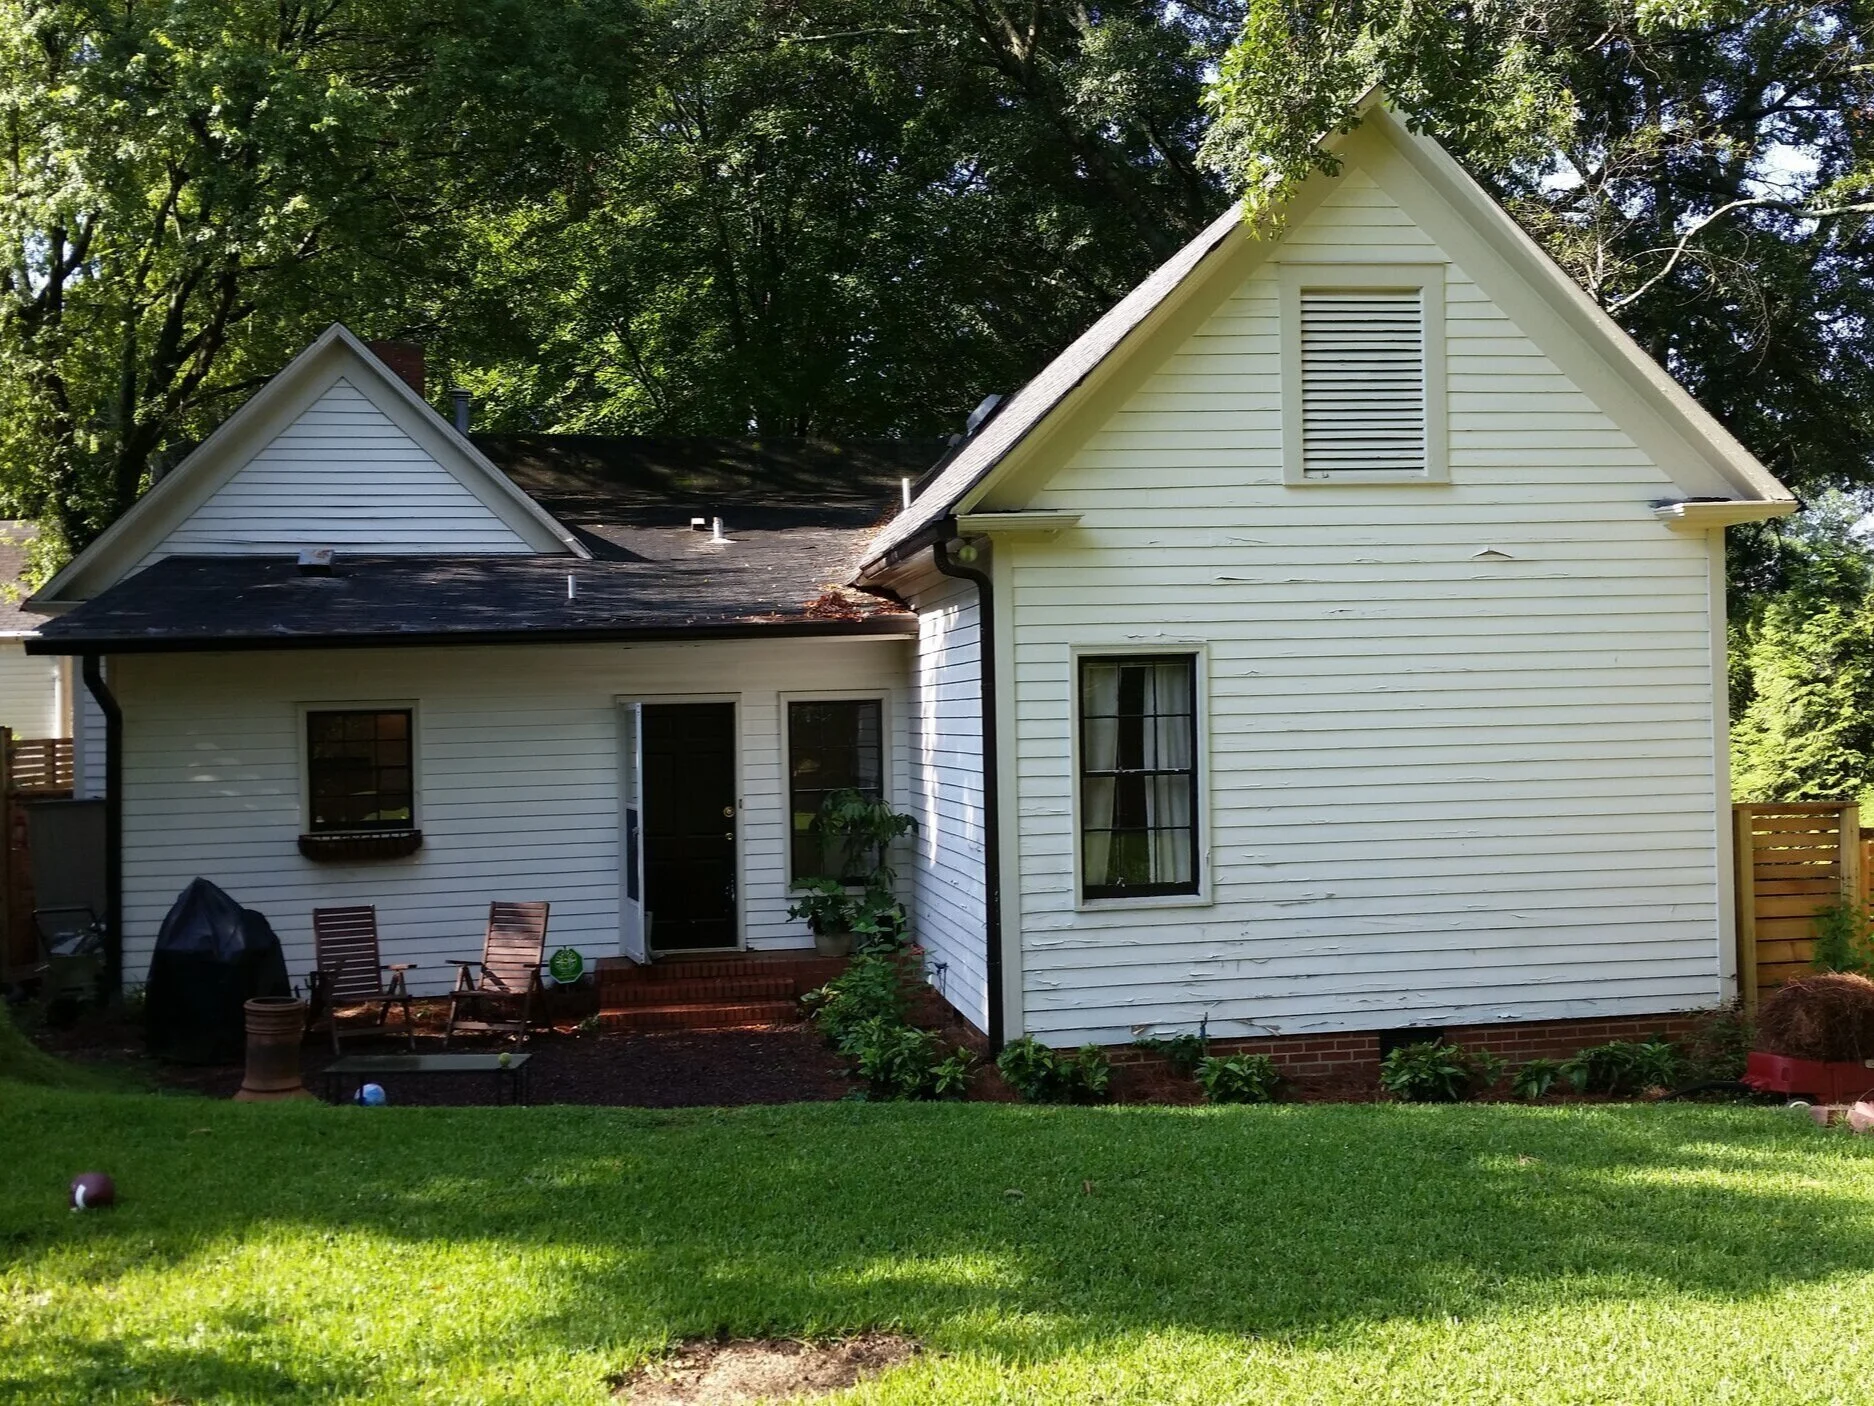
The back of the house lacked in light with small windows, a tiny galley kitchen with door straight out into a rubber pit from a few brick stairs and a guest bedroom with little light and no back access. The low pitched roof was caving in and the architecture was not sound to support it, so it all needed replacing immediately.

After
We extended the back of the house in the same “L” shape, adding 16’ across each area. We created a full open plan kitchen / living area with vaulted ceiling and gas fireplace, adding the large glass patio doors and triangular transom window for maximum light. On the right, the bedroom extension allowed for a full master suite, adding a hallway, bathroom, closet and large window looking out to a spectacular 100 year old oak tree in the back garden. We leveled the garden further, creating an 18’ square patio for cooking & entertaining, and a sitting area outside the bedroom.
Foyer / Entryway

Before
The foyer didn’t previously exist, you walked straight into the large living room with spaces that were difficult to use. The small 3’ opening lead into a small foyer with another 3 doorways - one to the main long hallway, one to the former dining room, and one straight into the bathroom. This bathroom view from the front door was a big detractor, and from a real estate perspective something we knew had to change. The living room also had a 3” jut about 6 inches in from the front door, and we realised a wall had been removed in the 1950s. Upon demo, when we got down to studs, we further found out this former wall was clearly a load-bearing structure and if we had not put the wall back, the roof would have eventually caved in!

After
We created a definitive formal entryway. We added back in the wall supports into the dining room. The front door change with additional side lights increased the light entering the space, as did expanding the hallway entrance to a full 6’ opening allowing light from the hallway bedrooms to filter in as well. The bathroom behind the telephone box picture was reconfigured so that the door could be shifted to the hallway, rather than staring at a toilet when you first walked in the front door! Sconces and new overhead lighting was also added to increase ambiance. All hardwood flooring in this part of the house was original, we just refinished it with Minwax Provincial Stain in a matte finish.
Kitchen

Before
The kitchen was in terrible shape, and not taken care of well by the prior owners. The almost flat roof above it was caving in and needed fully replacing, the cupboards were overrun by roaches according to mutual friends, and it was pretty minute by American standards. The galley style kitchen on one side had a range from the 1970s, a small pantry cupboard (pictured), houses a small 4-seater table, and also included a small laundry closet which sat next to a two-door refridgerator to the right of where I’m stood taking this picture.

After
Obviously one of the major spaces we renovated, completely removing most walls that were creating a claustrophobic and dank space, and opened it up to allow for a massive 10’ x 5’ island. The pantry cupboard on the back wall housed most of our large cooking equipment, while the pantry cupboard to the right acted as an office storage closet with printer pullout. This cupboard was later to become the stairs as part of a second floor renovation. We opted to use a local custom builder for all the cabinets, meaning every inch was fully planned with KitchenAid Mixer pullouts, cutlery trays, magnetic doors on the island, knife blocks in the drawer, oil pull-outs etc. All appliances are KitchenAid. Because we cook so much, we also went for a granite backsplash (matching the counter) behind the hob to reduce cleaning and a commercial grade hood. Bookcases for all of our cooking books and the children’s books, sit under the island beneath the stools. We also added built-in ceiling speakers which we used every single day!
Butler’s Pantry

Before
The dining room was the nicest room in the house before we renovated, but as the house had no garage and we like to build and cook, we opted to turn it into a plethora of storage areas. We did find some really cool handpainted wallpaper behind that little bookcase in the corner though!

After
Adjusted into a long narrow “butler’s pantry” which we had not finished building yet, and the two doorways on the right lead into a closed off kitchen pantry area as well as a closed off building tool / craft cupboard with attic access. Our grand plan for this space was to add a sliding barn door to the kitchen pantry, and then build cabinets with a prep sink on the left. We would then have put open wood shelving with a glamorous grasscloth wallpaper behind to act as bar shelves for alcohol and our inherited crystal collection.
Living Room

Before
The living room / family room did not exist before! We extended the footprint of the house in the same ‘L’ shape that it was before. So the new living room covered over this sunken rubber pit area, and then we added a concrete patio.

After
Besides the kitchen, this was our piece de resistance. We extended by 18’ x 16’ to create a large vaulted family room, adding in two oak beams in the vault and a large custom triangle window for maximum light. The double patio doors created a 6’ opening out onto the new concrete slab (to be covered in flagstones and a pergola in future). The gas fireplace with cast stone surround added a traditional touch, while the tech was well hidden for surround sound speakers in the walls.
Master Suite - Bedroom

Before
The master bedroom also did not technically exist. Pictured here is the guest room that used to sit at the back of the house, but changed this room into the bathroom/closet area of the master suite.

After
The master bedroom was a 14’ x 13’ addition, adding in an enormous 8’ x 5’ custom window that let us wake up to the view of the 100 year old oak tree that sat in the middle of the garden fence. We added a patio door as well for quick puppy release in the morning and evenings. Behind where I stood in this photo, there is a long hallway that housed multiple chest of drawers as well as the entrance to the master bath and closet.
Master Suite - Bathroom

Before
The master suite was previously on the other end of the house, which we turned into the guest suite instead (the closet was tiny!). So we used this bedroom to change into a larger bathroom and closet that were more fitting of a standard American master bedroom.

After
We absolutely adored this bathroom! Flooded with light, and now built with a marble 5’ x 3’ glass enclosed shower, plus the lovely claw-foot tub - we happily spent time in here. The drawer style vanity was built by the same local cabinet maker that did the kitchen. Herringbone porcelain tile floors completed the look, along with a lucky-find remnant piece of granite for the counter-top.
Mudroom / Laundry Room

Before
Perhaps our biggest gamble in this house, was changing this perfectly good bedroom that previously belonged to a 4 year old into a mudroom / laundry area, along with a side entrance. The closet pictured here, was absorbed into the laundry space to create a square room.

After
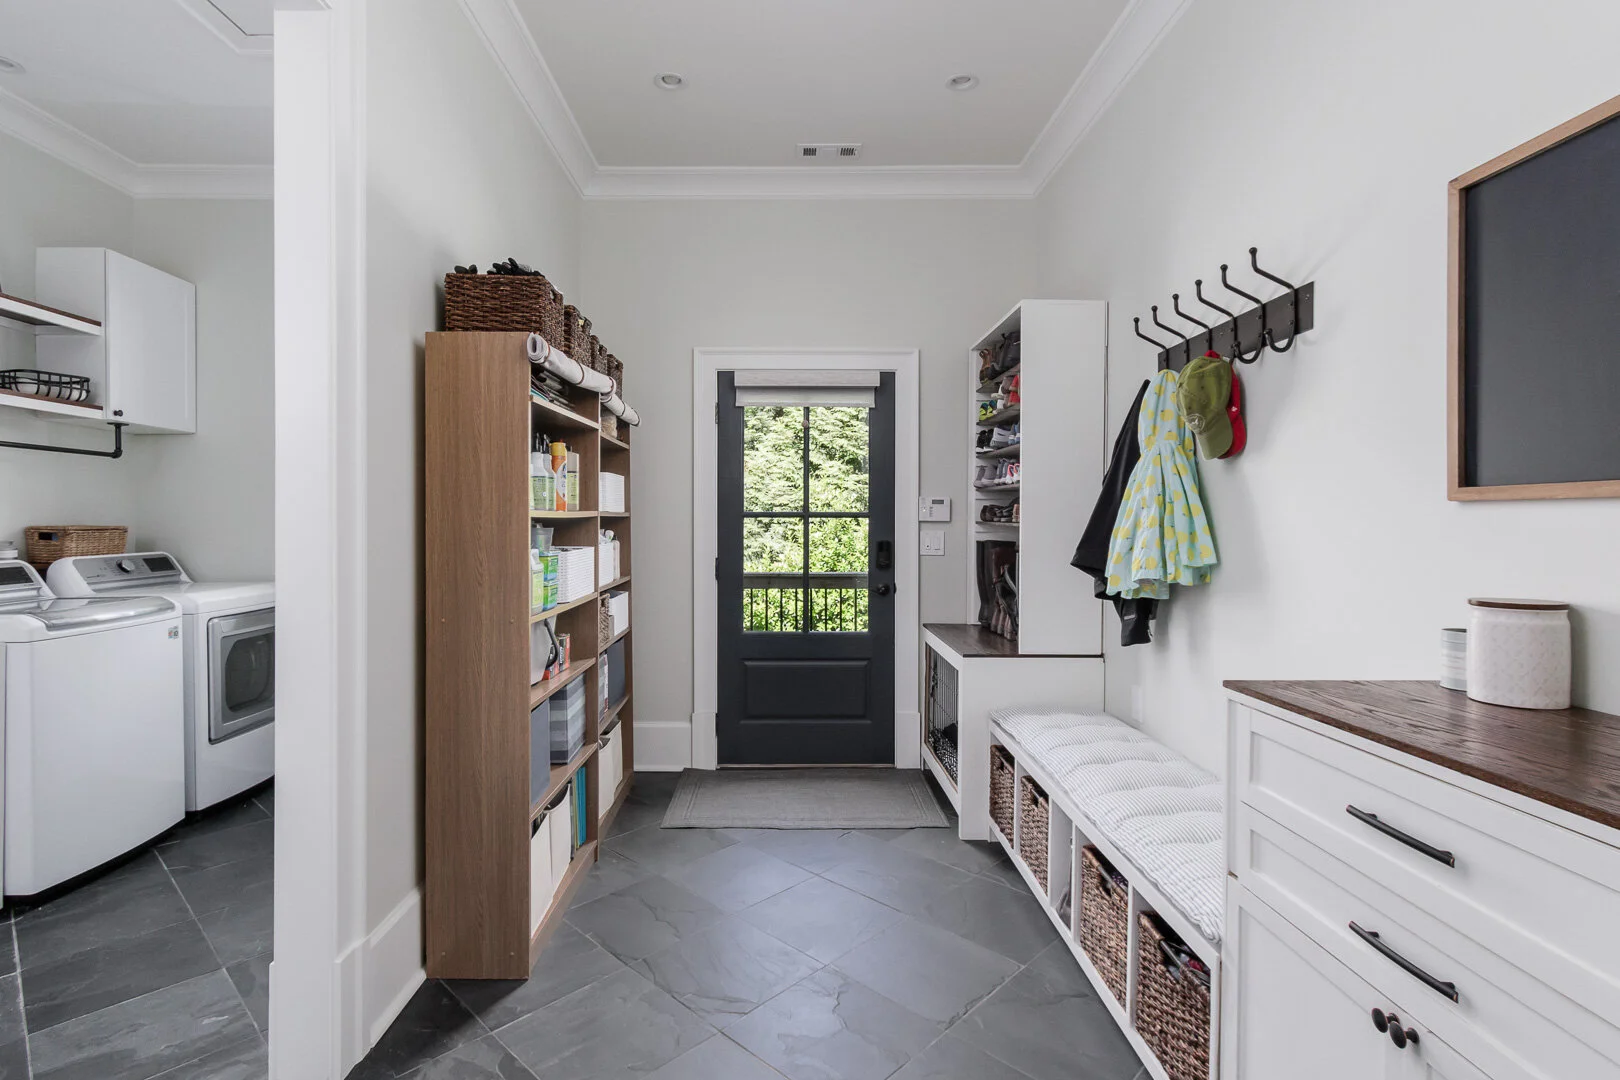
This mudroom and laundry room was probably the most used area of our home after the kitchen, and despite arguments from the realtor, contractor, and others who told us it would devalue the home, we did not see a negative impact in the end. The dog shower addition was the most luxurious thing we added, but again well used for muddy boots, painting projects, dirty children’s clothes, etc. We found it far more valuable than a sink! The cabinets and shelves were all added by us after the renovation was completed, and in the mudroom we also built a dog create, bench and desk to complete the space. We had many more projects to go in this little room though!
Nursery

Before
The nursery before was also a child’s room, but it was painted in a bright blue (not my style) and felt cramped.

After
Functionally, we actually changed very little. We absorbed the prior closet on the right hand side of the room into the laundry room, and took space from the guest room closet to give a closet back to this room. Minor space planning! The biggest change was actually adding a double door entry, which was done because this was going to be an office. But I got pregnant during renovation, and we had already carved out the space. That said, the double doors meant the bedroom was equally as great of a place to play in, and helped light flood into the narrow hallway behind. A fresh lick of neutral paint and the room felt like new.
Hallway Bathroom

Before
The hallway bathroom before had rust, mold and bug issues throughout. But changed it primarily because of the door positioning - as this door could be seen directly from the front door entryway. One step to the right and you were looking at a toilet! Certainly a major faux pas in a designer’s book these days.

After
We opted to flip the configuration of the bathroom, and put the door in the main narrow long hallway rather than the front entryway. The drywall shell of this bathroom was done by contractors, but the floor tile, wall coverings, and all plumbing of the bath, toilet and sink was completed by us. We opted to make it a bit more modern rather than replacing the previous cast iron tub (and because it would have cost us more to repair that, than buy the new one). We actually only just finished this bathroom two months before we sold!
Guest Bedroom
Before
Previously the master suite on the front of the house, this room had a tiny 5’ x 3’ closet and fairly small bathroom for a master.

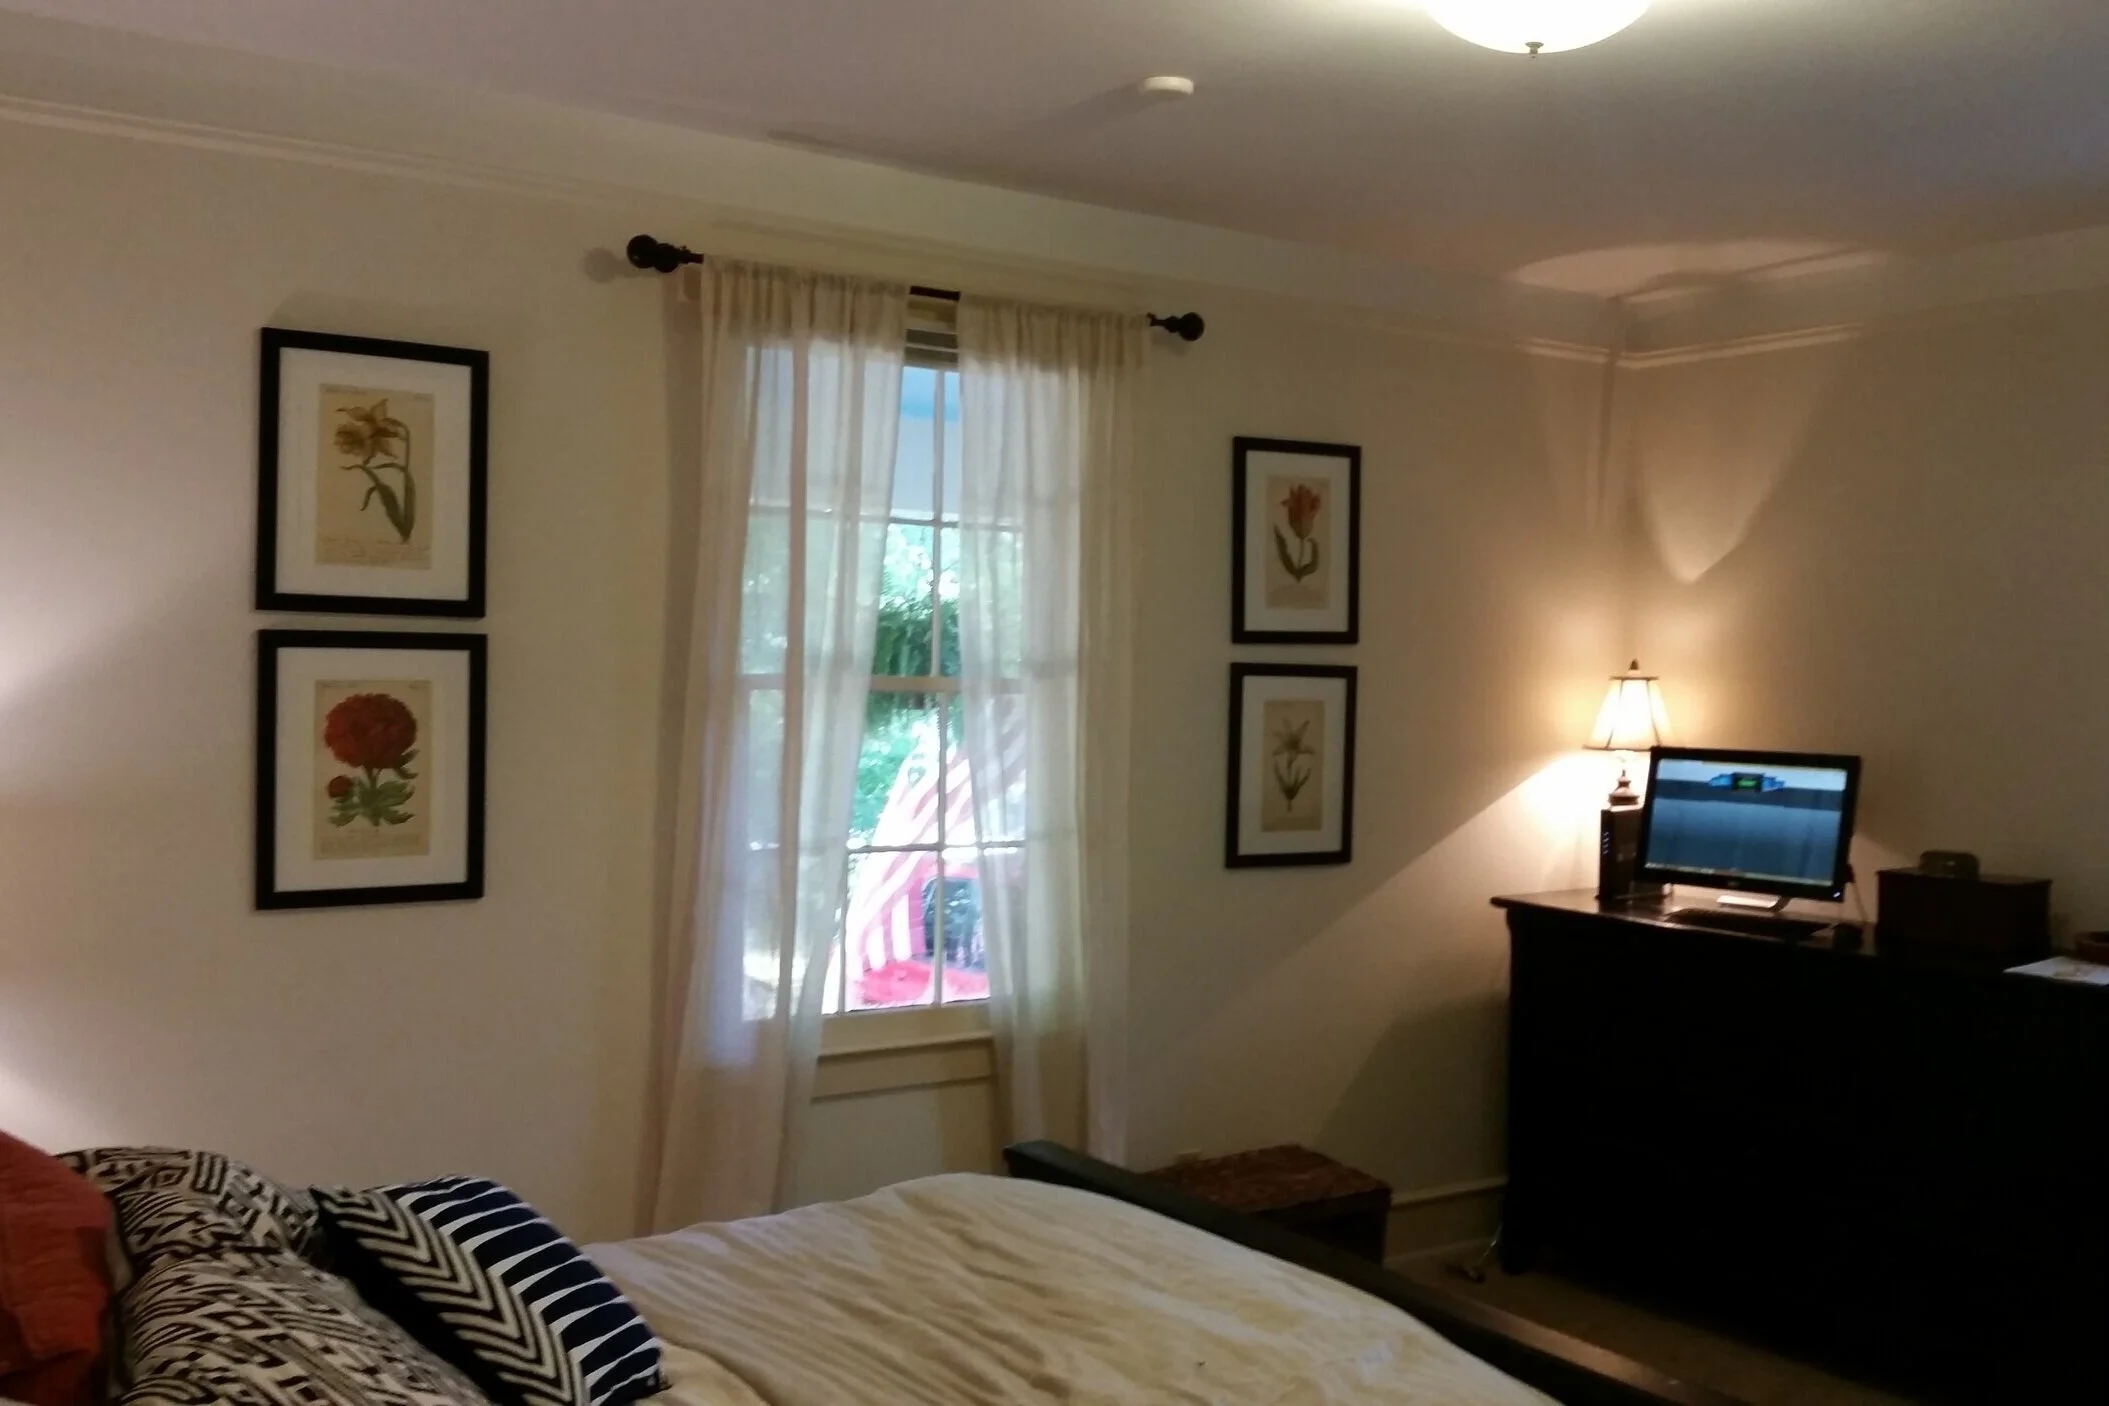
Before
We changed this room into the guest suite and did very little demo to it. No windows, walls, or trim was touch in this room which we later slightly regretted due to some bug issues coming in through old holes. We painted the window trims black, refinished the floors, and changed the closet vestibule into a cupboard instead. The other half of the closet was turned around to give space to the nursery. In the en-suite bathroom which was the only room renovated before we bought the house, we simply painted the window trim and walls to give it a fresher feel.
Floorplan Comparison

Before

After